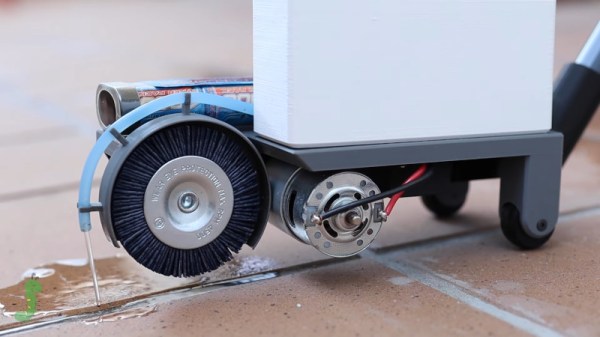
Cleaning tiled floors can be a drag. Getting the tiles themselves clean is bad enough, but often dealing with the grouted joints in between requires more elbow grease and attention to detail. It’s a tedious chore, and thus one ripe for improvement. [Elite Worm]’s cleaning machine is an excellent solution to the problem.
The machine is built entirely from scratch, using primarily 3D printed components. A fluid tank is fitted to the chassis, along with a custom 3D-printed pump run by a DC motor, to deliver cleaning product where its needed. A large DC motor is then used to spin a nylon brush which gets deep in the tile grooves to clean out the grime. The chassis is then fitted with rollers to allow it to glide along the floor. Finally, a handle is fitted which allows the user to push the tool along, with switches to turn on the spinning brush and dispense cleaning fluid.
It’s a great tool, and one which eliminates hours of scrubbing on hands and knees. We’re sure the time investment in the build will pay off before long. We’ve seen other tricky cleaning hacks before, too. Video after the break.
If you’re in the habit of using isopropyl alcohol to clean your PCBs after soldering, you probably have a nice big jug of the stuff stashed away. If you don’t, you’re probably out of luck, since the COVID-19 pandemic has pretty much cleared IPA out of the retail market. But don’t fret: depending on where you live, alternative PCB cleaning solutions may be as close as your nearest auto parts store.
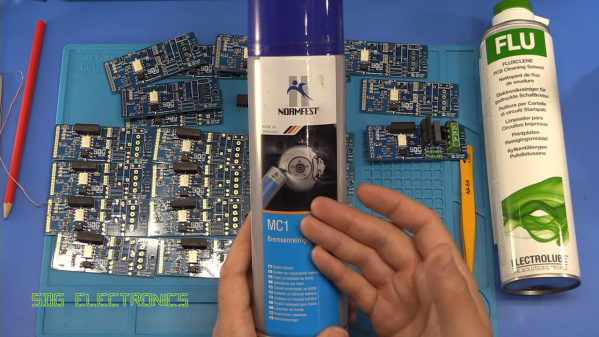
[Steven]’s search for a cheaper and perhaps more readily available substitute for his usual dedicated flux cleaner lead him to try automotive brake cleaner on a few test boards. He suspected that they might contain acetone, which is prone to yield unfortunate results with solder resist and silkscreen on PCBs, so some tests were in order. The brand he tried was Normfest Bremsenreiniger MC-1, a German brand that according to its Safety Data Sheet contains only hydrocarbons like alkanes, butane, and propane. It did a fine job cleaning all but the crustiest rosin flux without collateral damage.
In the video below, [Steven] goes through a few more brands with similar results, and we were encouraged enough by his results to check brake cleaners made for the US market. Alas, almost all of the cheap and readily available aerosols have acetone as the principle ingredient, mixed in with methanol, ethanol, and assorted ingredients that together will probably make for a bad day. About the only US-sold brand without acetone that we could find was Keller-Heartt, which lists only naptha and ethanol on its SDS. There may be others, but make sure you test whatever you find.
Aerosol solvents aren’t the only way to clean a PCB, of course. Ultrasonic cleaners do a great job, and as [Steven] discovered, they’re generally safe for most components.
How do you clean the residual flux off your boards? There are plenty of ways to go about the job, ranging from “why bother?” to the careful application of isopropyl alcohol to every joint with a cotton swab. It seems like more and more people are turning to ultrasonic cleaners to get the job done, though, and for good reason: just dunk your board and walk away while cavitation does the work for you.
But just how safe is it to sonically blast the flux off your boards? [SDG Electronics] wanted to know, so he ran some cleaning tests to get to the bottom of things. On the face of it, dunking a PCB in an aqueous cleaning solution seems ill-advised; after all, water and electricity famously don’t mix. But assuming all the nooks and crannies of a board can be dried out before power is applied, the cleaning solution itself should be of little concern. The main beef with ultrasonic cleaning seems to be with the acoustic energy coupling with mechanical systems on boards, such as crystal oscillators or micro-electrical-mechanical systems (MEMS) components, such as accelerometers or microphones. Such components could resonate with the ultrasonic waves and be blasted to bits internally.
To test this, [SDG Electronics] built a board with various potentially vulnerable components, including the popular 32.768-kHz crystal, cut for a frequency quite close to the cleaner’s fundamental. The video below goes into some detail on the before-and-after tests, but the short story is that nothing untoward happened to any of the test circuits. Granted, no components with openings as you might find on some MEMS microphones were tested, so be careful. After all, we know that ultrasound can deal damage, and if it can levitate tiny styrofoam balls, it might just do your circuit in.
Sometimes the best way to get a hacker to do something is to tell them that they shouldn’t, or even better can’t, do it. Nothing inspires the inquisitive mind quite like the idea that they are heading down the road less traveled, if for nothing else to say that they did it. A thrown gauntlet and caffeine is often all that stands between the possible and the impossible.
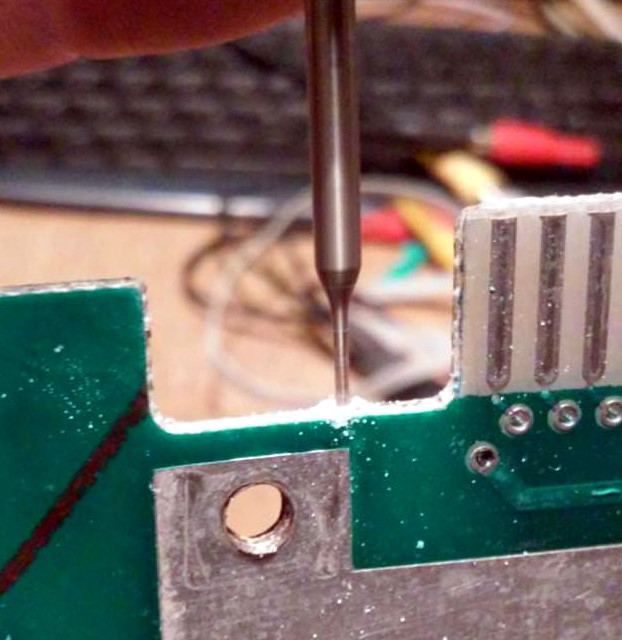
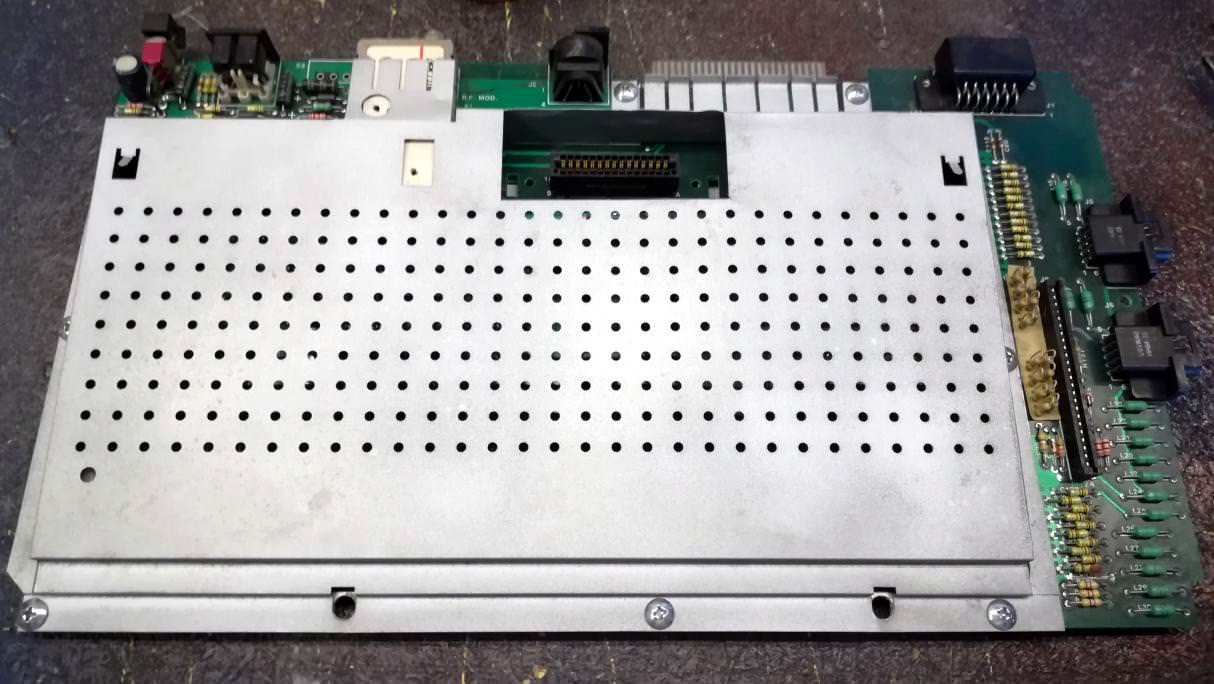
Preparing the PCB for epoxy injection
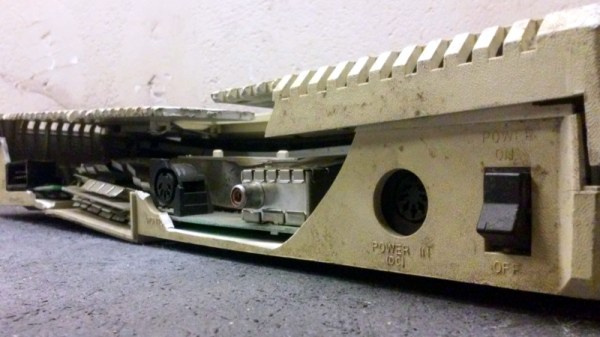
So when [Drygol] heard a friend comment he had an old Atari 800 XL that was such poor shape it couldn’t be repaired, he took on the challenge of restoring the machine sight unseen. Luckily for us, his pride kept him from backing down when he saw the twisted and dirty mess of a computer in person. He’s started documenting the process on his blog, and while this is only the first phase of the restoration, the work he’s done already is impressive enough that we think you’ll want to follow him along on his quest.
There’s no word on what happened to this miserable looking Atari, but we wouldn’t be surprised if it was run over by a truck. The board was cracked and twisted, with some components missing entirely. The first step in this impossible restoration was straightening the PCB, which [Drygol] did by clamping it to some aluminum bar stock and heating the whole board up to 40C (104F) for a few days. Once the got most of the bend out, he used a small drill bit to put holes in the PCB laminate and inject epoxy to add some strength. It’s an interesting technique, and the results seem to speak for themselves.
Once the board was straight, he went through replacing blown passive components and broken chip sockets. All the ICs were pulled and treated to an isopropyl alcohol and acetone bath in an ultrasonic cleaner to get them looking like new again. The CPU was cooked and needed to get swapped out, but otherwise it was smooth sailing, and before long he had the machine booted up. While most would have been satisfied to just get this far, [Drygol] considers this to be the easy part.
He next straightened out the metal shielding with a mallet, sanded it down, and sprayed it with a new zinc coating. The plastic around the keyboard and the metal trim pieces were also removed, cleaned, and refinished where necessary. Rather than going for perfection, [Drygol] intentionally left some issues so the machine didn’t look 100% pristine. It’s supposed to be a functional computer, not a museum piece behind glass.
We’ll have to wait until the next entry in this series to see how he repairs the absolutely devastated case. Any rational person would just use a case from a donor machine, but we’ve got a feeling [Drygol] might have something a little more impressive in mind.
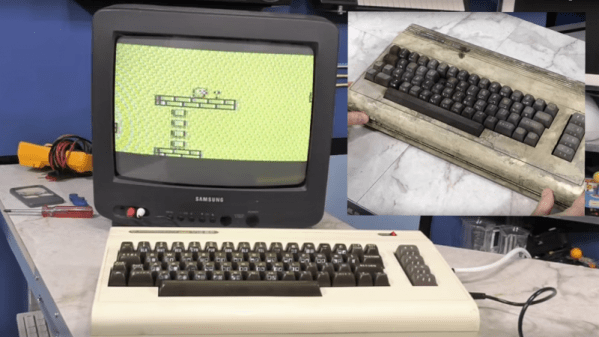
No matter which platform you’re into, retrocomputing is usually a labor of love. The obsolete, the unpopular, the downright weird – old computers of every stripe are found, restored to something like their former glory, and given a new lease on life. It’s heartwarming, in a way. But when a computer has obviously been abused, it takes a little extra effort, of a lot in the case of this oil-submerged VIC-20 restoration.
In the two-part video below, [The 8-Bit Guy] goes through the gory details of bringing this classic Commodore back from the grave. The first video shows the cosmetic rebuild, which given the filthy state of the machine was no mean feat. Cracked open, the guts were found to be filled with an oily residue; [The 8-Bit Guy] chalks that up to a past life in some kind of industrial setting, but we see it more as flood damage. Whatever the sad circumstances on the machine’s demise, the case required a workout to clean up, and it came out remarkably fresh looking. The guts needed quite a bit of cleaning too, mainly with brake cleaner to cut through the gunk.
Part two focuses on getting the machine running again, and here [The 8-Bit Guy] had his work cut out as well. With a logic probe, signal injector, and some good old-fashioned chip swapping, he was able to eliminate most of the potential problems before settling in on some RAM chips as culprits for the video problems he saw at power-up. It all worked out in the end, and the machine looks and acts like new. We’re impressed.
Maybe we shouldn’t question [The 8-Bit Guy]’s call on the VIC-20 being from an industrial setting, though. After all, the “little Amiga that could” ran a school’s HVAC system for over 30 years.
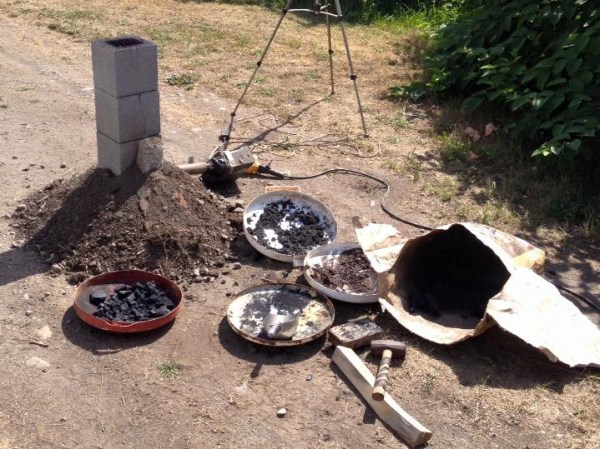
[Chandler Dickinson] did his monthly sweep of the floor in his blacksmith’s shop when it occurred to him that all that metal dust had to go somewhere, didn’t it? So he did the only reasonable thing and made a crude foundry out of cinder blocks, melted his dirt in it, and examined what came out the other end.
His first step was to “pan” for steel. He rinsed all the dirt in a bucket of water and then ran a magnet at the bottom of the bucket. The material that stuck to the magnet, was ripe for reclaimation.
Next he spent a few hours charging a cinderblock foundry with coal and his iron dust. The cinderblocks cracked from the heat, but at the end he had a few very ugly brittle rocks that stuck to a magnet.
Of course there’s a solution to this non-homogenous steel. As every culture with crappy steel eventually discovered, you can get really good steel if you just fold it over and over again. So he spend some time hammering one of his ugly rocks and folding it a bit. He didn’t get to two hundred folds, but it was enough to show that the resulting slag was indeed usable iron.
He did a deeper examination of the steel last week, going as far as to etch it, after discovering that the metal sparked completely differently when sanded on one side versus the other. It definitely needed work, but all seemed to have worked in the end.
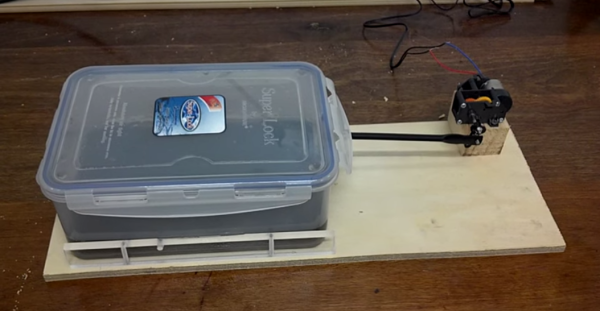
Spring is here and it’s time to pull the bikes out of the shed. One think that is often overlooked is bicycle maintenance. No one wants to be that guy walking his bike home after a part failure renders the bike unrideable. One portion of proper bike maintenance is cleaning the chain. A contaminated bike chain can wear quicker, not be as flexible, hinder shifting and increase wear to the drivetrain cogs. Tired of sitting there cleaning his chain with a tooth brush, [Ally] built a washing machine for bike chains.
This machine is quite simple, it’s a plastic box full of turpentine and dish detergent. The chain is submerged in the liquid and a lid is put on the box. At the local hobby store, [Ally] purchased a small gearbox and motor assembly. Powered by a 5vdc wall wart, the output shaft of the gearbox spins a crank that in-turn agitates the box, chain and cleaning liquid. After about 5 minutes the chain is free of grit and gunk. Not bad for a few dollars, spare parts and a little bit of time. Check out the video of it in action after the break.