Follow The Bouncing Needles Of This Analog Meter Clock

Our community never seems to tire of clock builds. There are seemingly infinite ways to mark the passage of time, and finding unique ways to display it is endlessly fascinating.

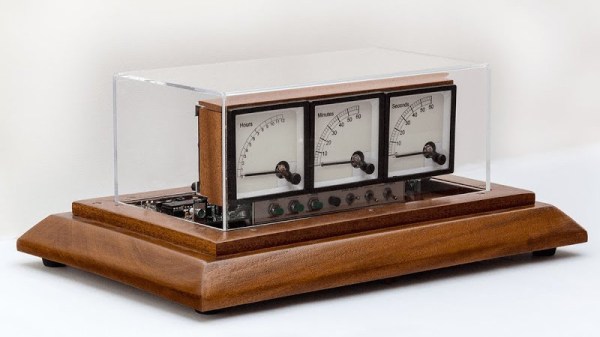
There’s something about this analog voltmeter clock that really seems to have caught on with the Redditors who commented on the r/DIY thread where we first spotted this. [ElegantAlchemist]’s design is very simple – just a trio of moving coil meters with nice industrial-looking bezels. The meters were wired for 300 volts AC, so the rectifier and smoothing cap were removed and the series resistance was substituted for one more appropriate for the 0-5VDC range needed for the project. New dial faces showing hours, minutes and seconds were whipped up in Corel Draw, and everything was put into a sturdy and colorful aluminum “stomp box” normally used for effects pedals. An Arduino Nano and an RTC drive the meters with a nice, bouncy action. Simple, cheap to build, and a real crowd pleaser.

The observant reader will note a similarity to a clock we covered a while back. That one chose 3D-printed cases for an airplane instrument cluster look. We like the spare case design in [ElegantAlchemist]’s build, but wonder how this clock would look in a fine wood case.

Arduino Tachometer Clock Fires On All Cylinders

We’re certainly no strangers to unique timepieces around these parts. For whatever reason, hackers are obsessed with finding new and interesting ways of displaying the time. Not that we’re complaining, of course. We’re just as excited to see the things as they are to build them. With the assumption that you’re just as enamored with these oddball chronometers as we are, we present to you this fantastic digital tachometer clock created by [mrbigbusiness].

The multi-function digital gauge itself is an aftermarket unit which [mrbigbusiness] says you can get online for as little as $20 from some sites. All he needed to do was figure out how to get his Arduino to talk to it, and come up with some interesting way to hold it at an appropriate viewing angle. The mass of wires coming out of the back of the gauge might look intimidating, but thanks to his well documented code it shouldn’t be too hard to follow in his footsteps if you were so inclined.

Hours are represented by the analog portion of the gauge, and the minutes shown digitally were the speed would normally be displayed. This allows for a very cool blending of the classic look of an analog clock with the accuracy of digital. He’s even got it set up so the fuel indicator will fill up as the current minute progresses. The code also explains how to use things like the gear and high beam indicators, so there’s a lot of room for customization and interesting data visualizations. For instance, it would be easy to scrap the whole clock idea and use this gauge as a system monitor with some modifications to the code [mrbigbusiness] has provided.

The gauge is mounted to a small project box with some 3D printed brackets and bits of metal rod, complete with a small section of flexible loom to cover up all the wires. Overall it looks very slick and futuristic without abandoning its obvious automotive roots. Inside the base [mrbigbusiness] has an Arduino Nano, a DS1307 RTC connected via I2C, a voltage regulator, and a push button to set the time. It’s a perfectly reasonable layout, though we wonder if it couldn’t be simplified by using an ESP8266 and pulling the time down with NTP.

We’ve seen gauges turned into a timepiece before, but we have to admit that this is probably the most practical realization we’ve seen of the idea yet. Of course if you want to outfit the garage with something a bit more authentic, you can always repurpose a Porsche brake rotor.

UV Glow Clock Tells The Time Glowingly

Reddit user [TuckerPi] wanted to make something to thank his father for helping him get through his engineering degrees. He hit it out of the park with this awesome glowing clock. The clock uses a strip of UV glow tape, which is rotated by a small stepper motor. On one side a UV LED is moved up and down by a second motor to make the tape glow underneath it. A Raspberry Pi drives the whole system, writing the time on the tape and rotating it to face outwards. Once a minute the clock rewrites the time on the rubber.

This is a lovely build that shows what [TuckerPI] learned in college, as he built most of the mechanism himself, cutting his own metal gears and parts and making a nice, simple case from African mahogany. He also shows his mistakes, such as his first attempt to build the glowing mechanism from silicon rubber mixed with UV powder. Although it worked initially, he found that the UV powder fell out of the rubber after a short while, so he replaced it with UV glow tape.

[TuckerPi] hasn’t published the full schematics of the device, but there is a lot of detail in the Imgur photos of the build and in the Reddit thread where he discussed the build. Kudos to him for finding an interesting and unique way to thank his father for his help.

Continue reading “UV Glow Clock Tells The Time Glowingly”

Wooden Clock To FPGA Conversion

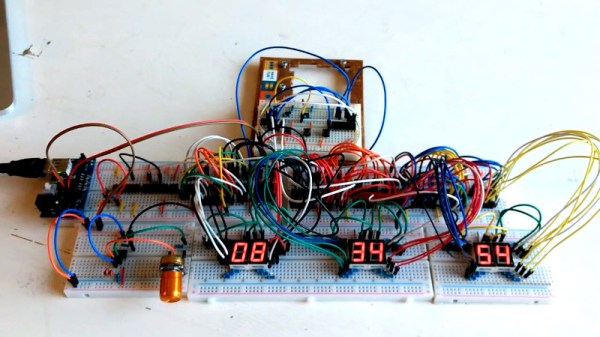
[John] wanted a project to help him learn more about FPGAs. So he started with his wooden clock — made with an Arduino — and ported it over to a Lattice FPGA using Icestorm. What’s nice is that he takes you through the steps he used to simulate the design using the Falsted simulator and then realizing it in the FPGA. Since he’s just starting out, it is a good bet he ran into the same rough edges you will (or did) and sometimes that can really help get you over the hump. You can see a video below, and the code for the project is on GitHub.

For example, after mocking up a circuit design in Falstad he realized he could make one large counter instead of several modules, and he contrasts that to a more modular approach. He also ran into a feature that was simple for the Arduino but difficult for the FPGA. He got it working, but it took some optimization effort to make everything fit in the relatively small FPGA he was using.

Continue reading “Wooden Clock To FPGA Conversion”

Word Clock Don’t Need No Stencil Font

Word clocks use natural language to display the time. They’ve been in vogue in the last 20 years or so, as low-cost digital technology makes them particularly cost effective and easy to build for the average maker. The hardware and software is a solved problem, so presentation is everything. Luckily, [watsaig]’s effort does not disappoint.

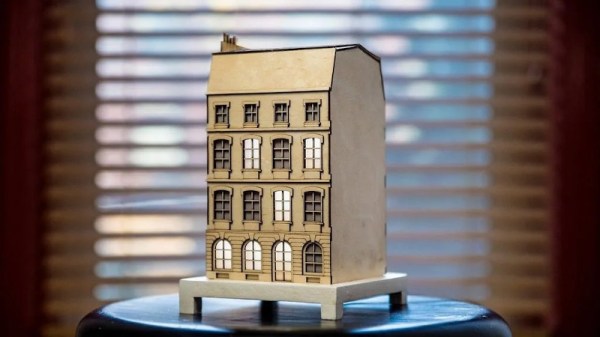
The build began with a timeframe of just seven days — a narrow window given [watsaig]’s lack of experience with lasercutting and woodworking. Not content to let that get in the way, it was time to get to work. Wood was sourced from Amazon and designs laid out, before lasercutting began in earnest.

[watsaig] decided to fill all of the letters with epoxy to achieve a flat finished surface that also served as diffuser for the LEDs. To avoid using an unsightly stencil font, the centers (the cut out portion) of letters like O, A, and R had to be placed by hand. Unfortunately his turned out quite badly. When using a squeegee method to work epoxy into the letters, the inserts tended to shift, ruining the face plate.

Undeterred, the clock face was recreated from scratch, and it was determined that a pipette was a far more suitable tool, allowing the letters to be filled with epoxy without unduly disturbing the letter inserts. The final result is visually attractive, finished with a wonderful stain and giving a pleasing glow thanks the careful attention to diffusion and masking. The hidden Happy Birthday message may have been lost in the rush, but it’s the thought that counts, after all.

For a Continental take, check out this word clock in Catalan.

Weather Forecasting Clock Makes An Almighty Racket

The old-fashioned alarm clock was a staple of cartoons in years past, with loud clanging bells and slap-to-shutoff functionality. Despite being an excellent dramatic device, these classic timepieces began to lose favor to the digital clock radio, and, in more recent times, the smartphone alarm. However, [LenkaDesign] has come up with this excellent build that combines the best of the old and the new.

The build starts with an old alarm clock. The clockwork internals are removed, but the bells remain, powered instead by a brushed DC motor. An Arduino Nano is the brains of the operation, interfacing with the now-ubiquitous temperature, humidity and barometric pressure sensors. Time is displayed on a Nokia 5110 LCD screen of the type popular a decade ago when options for small hobby project displays were significantly more limited then they are today.

As a nice touch, an old circuit board lends a new face to this clock, with a trio of big chunky buttons to act as controls. The LCD uses attractive icons to help convey information, making the most of the graphical capabilities available. There’s even a rudimentary weather forecasting algorithm that uses barometric pressure changes to predict the likelihood of rain.

Overall, it’s a tidy build that promises to serve as a great alarm clock, given the high volume of the original bells. Alarm clocks have always been a hacker staple, but if you’re still struggling to get out of bed this fire bell build should rattle your fillings loose on a daily basis. Video after the break.

[Thanks to Baldpower for the tip!]

Continue reading “Weather Forecasting Clock Makes An Almighty Racket”

NTP Morse Code Clock Powered By ESP8266

We’ve featured a great many unique clocks here on Hackaday, which have utilized nearly every imaginable way of conveying the current time. But of all these marvelous timepieces, the Morse code clock has the distinct honor of simultaneously being the easiest to construct and (arguably) the most difficult to read. As such, it’s little surprise we don’t see them very often. Which makes this latest entry into the field all the more interesting.

[WhisleyTangoHotel] has taken the basic concept of the Morse clock, which at its most simplistic could be done with a microcontroller and single LED, and expanded it into a (relatively) practical device. With both audio and visual signaling, and support for pulling the time from NTP, this is easily the most polished Morse code clock we’ve ever seen. Using it still requires you to have a decent grasp on Samuel Morse’s now nearly 200 year old encoding scheme of course, but on the bright side, this clock is sure to help keep your CW skills sharp.

For those following along at home, [WhisleyTangoHotel] provides a hand-drawn diagram to show how everything connects together in his Morse timepiece, but there’s nothing on the hardware side that’s likely to surprise the Hackaday reader. A single momentary push button represents the device’s sole user input, with the output being handled by a LED “tower” and speaker on their own respective pins on the microcontroller. Here a Adafruit Feather HUZZAH is used, but any ESP8266 would work in its place.

Of course, the advantage of using an ESP8266 board over your garden variety MCU is the Wi-Fi connectivity. This allows the clock to connect to an NTP server and get the current time before relaying it to the user. Some might think this overkill, but it’s really a critical feature; the lack of a proper RTC on the ESP means the clock would drift badly if not regularly synchronized. Assuming you’ve got a reliable Internet connection, this saves you the added cost and complexity of adding an external RTC.

[WhisleyTangoHotel] wraps up his blog post by providing his ESP8266 Arduino source code, which offers an interesting example in working not only with NTP and time zones on the ESP, but how to handle parsing strings and representing their principle characters in Morse code.

Interestingly enough, in the past we’ve seen a single LED clock that didn’t use Morse code to blink out the time, which might be a viable option as an alternate firmware for this device if you’re not in the Samuel Morse fan club.

Continue reading “NTP Morse Code Clock Powered By ESP8266”