How To Play Doom – And More – On An NES

Doom was a breakthrough game for its time, and became so popular that now it’s essentially the “Banana For Scale” of hardware hacking. Doom has been ported to countless devices, most of which have enough processing ability to run the game natively. Recently, this lineup of Doom-compatible devices expanded to include the NES even though the system definitely doesn’t have enough capability to run it without special help. And if you want your own Doom NES cartridge, this video will show you how to build it.

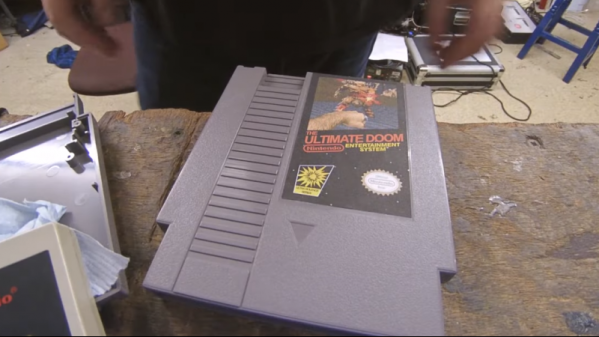
We featured the original build from [TheRasteri] a while back which goes into details about how it’s possible to run such a resource-intensive game on a comparatively weak system. You just have to enter the cheat code “RASPI”. After all the heavy lifting is done, it’s time to put it into a realistic-looking cartridge.

To get everything to fit in the donor cartridge, first the ICs in the cartridge were removed (except the lockout IC) and replaced with custom ROM chips. Some modifications to the original board have to be soldered together as well, since the new chips’ pinouts don’t match perfectly. Then, most of the pin headers on the Raspberry Pi and the supporting hardware have to be removed and soldered together. Then, [TheRasteri] checks to make sure that all this extra hardware doesn’t draw too much power from the NES and overheat it.

The original project was impressive on its own, but with the Doom cartridge completed this really makes it the perfect NES hack, and also opens up the door for a lot of other custom games, including things like Mario64.

Continue reading “How To Play Doom – And More – On An NES”

This Heads Up Display Is All Wet

Athletes have a long history of using whatever they can find to enhance their performance or improve their training. While fitness tracker watches are nothing new, swimmers have used them to track their split times, distance, and other parameters. The problem with fitness trackers though is that you have to look at a watch. FORM has swim goggles that promise to address this, their smart goggles present the swimmer with a heads-up display of metrics. You can see a slick video about them below.

The screen is only on one eye, although you can switch it from left to right. The device has an inertial navigation system and is — of course — waterproof. It supposedly can withstand depths up to 32 feet and lasts 16 hours on a charge. It can use Bluetooth to send your data to your phone in addition to the display.

Continue reading “This Heads Up Display Is All Wet”

See If Someone Has Been In Your Drawers With This Simple Alarm

There’s a spy movie – probably from the [James Bond] franchise – in which our hero is staying in a fancy hotel. It’s crawling with enemies, naturally, and eager to see if one has been snooping in his room while he’s out for martinis, he sticks a hair across the gap in the door. When he comes back and finds the hair missing, he knows the game is afoot.

This hotel safe intrusion detector is what [Q] might have thought up for such a job if he’d had access to PIC microcontrollers and SMD LEDs. [Andy]’s “LightSafer” is a silent alarm for hotel safes, drawers, closets, or even the refrigerator – anywhere where the transition from dark to light indicates an unwanted visit. It’s tiny – only 33 x 21 mm – and is powered by a CR2032 coin cell. A Broadcom APDS-9300 light sensor watches for openings while the PIC monitors a joystick control for the correct PIN entry. There’s no audible alarm; rather, an LED blinks to indicate an unauthorized intrusion and blinks once for every 15 minutes since the event.

LightSafer is simple but effective, with a clever UI that keeps the current draw low and the battery life long. [Andy] used a similar technique for this low-draw cat tracking collar that we featured a while back.

Measuring Particulate Pollution With The ESP32

Air pollution isn’t just about the unsightly haze in major cities. It can also pose a major health risk, particularly to those with vulnerable respiratory systems. A major part of hazardous pollution is particulate matter, tiny solid particles suspended in the air. Particulate pollution levels are of great interest to health authorities worldwide, and [niriho] decided to build a monitoring rig of their own.

Particulate matter is measured by an SDS011 particulate matter sensor. This device contains a laser, and detects light scattered by airborne particles in order to determine the level of particulate pollution in PM2.5 and PM10 ranges. The build makes use of an ESP32 as the brains of the operation, chosen for its onboard networking hardware. This makes remotely monitoring the system easy. Data is then uploaded to a Cacti instance, which handles logging and graphing of the data.

For those concerned about air quality, or those who are distrustful of official government numbers, this build is a great way to get a clear read on pollution in the local area. You might even consider becoming a part of a wider monitoring network!

A Handy Way To Cheaply Print A Robotic Arm

There’s something fascinating about humanoid robotic hands, if only because of how they are such close approximations of our own hands. One could almost picture them with tendons and skin covering them. Sadly, making your own is quite prohibitive because in addition to being complex bits of machinery, making one of these marvels of engineering is usually rather expensive.

[Gray Eldritch]’s Humanoid Robot Arm project seeks to fix both points, by providing a ready to print project. All it takes is about a kilogram of PLA filament, some TPU filament, five MG996r servos (or equivalent), an SG90 servo or similar, an Arduino Uno board and a few other bits and pieces. This should result in a robotic arm with hand as covered in the video of the Mark 3 version that is embedded after the break.

Continue reading “A Handy Way To Cheaply Print A Robotic Arm”

Hands-On: CCCamp2019 Badge Is A Sensor Playground Not To Be Mistaken For A Watch

Last weekend 5,000 people congregated in a field north of Berlin to camp in a meticulously-organized, hot and dusty wonderland. The optional, yet official, badge for the 2019 Chaos Communication Camp was a bit tardy to proliferate through the masses as the badge team continued assembly while the camp raged around them. But as each badge came to life, the blinkies that blossomed each dusk became even more joyful as thousands strapped on their card10s.

Yet you shouldn’t be fooled, that’s no watch… in fact the timekeeping is a tacked-on afterthought. Sure you wear it on your wrist, but two electrocardiogram (ECG) sensors for monitoring heart health are your first hint at the snoring dragon packed inside this mild-mannered form-factor. The chips in question are the MAX30001 and the MAX86150 (whose primary role is as a pulse sensor but also does ECG). We have high-res ADCs just waiting to be misused and the developers ran with that, reserving some of the extra pins on the USB-C connector for external devices.

There was a 10€ kit on offer that let you solder up some electrode pads (those white circles with gel and a snap for a solid interface with your body’s electrical signals) to a sacrificial USB-C cable. Remember, all an ECG is doing is measuring electrical impulses, and you can choose how to react to them. During the workshop, one of the badge devs placed the pads on his temples and used the card10 badge to sense left/right eye movement. Wicked! But there are a lot more sensors waiting for you on these two little PCBs.

Continue reading “Hands-On: CCCamp2019 Badge Is A Sensor Playground Not To Be Mistaken For A Watch”

Impractical Clock Uses Tuning Fork

Clock projects are so common that they are almost a cliche. After all, microcontrollers have some clock source and are good at counting, so it stands to reason that a clock is an obvious project. [WilkoL’s] clock though has a most unusual clock source: a 440 Hz tuning fork.

A cheap plastic dome really shows off the fork and contributes to this good-looking build. An ATTiny13 divides the input frequency down, handles the display, and obeys the adjustment buttons. It does require a little metalworking, as the tuning fork needed filing and threading, although we bet you could figure out other ways to mount it.

Continue reading “Impractical Clock Uses Tuning Fork”