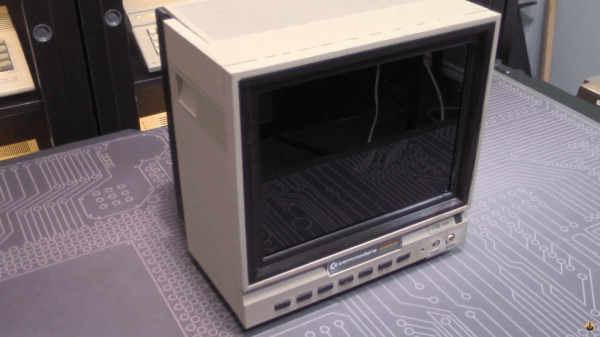
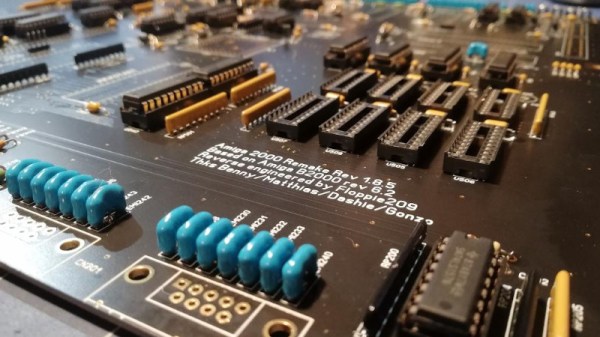
A CIA In 74HCT

If you owned a classic Commodore home computer you might not have known it at the time, but it would have contained a versatile integrated circuit called the MOS6526. This so-called CIA chip, for Complex Interface Adaptor, contained parallel and serial ports, timers, and a time-of-day counter. Like so many similar pieces of classic silicon it’s long out of production, so [Daniel Molina] decided to replicate a modern version of it on a PCB using 74HGT CMOS logic.

The result will be a stack of boards board that appear to be about the size of a 3.5″ floppy disk covered in surface-mount 74 chips, and connected to the CIA socket of the Commodore by a ribbon cable. The base board is the only one completed so far and contains the data direction registers and parallel ports, but the succeding boards will each carry one of the chip’s other functions.

It seems rather odd to use so much silicon to recreate a single chip, but the point is not of course to provide a practical CIA replacement. Instead it’s instructive, it shows us how these interfaces work as well as just how much circuitry is crammed into the chip. It’s no surprise that it’s inspired by the C74 Project, a TTL 6502 processor that we featured last year.

This Commodore 16 Is An NTSC One… No, Wait, It’s A PAL One!

We’re used to our computers being powerful enough in both peripheral and processing terms to be almost infinitely configurable under the control of software, but there was a time when that was not the case. The 8-bit generation of home computers were working towards the limits of their capability just to place an image on a TV screen, and every component would have been set up to do just the job it was intended for. Thus when different countries had different TV standards such as the mostly-European PAL and the mostly-American NTSC, there would have been different models of the same machine for each market. The Commodore 16 was just such a machine, and [Adrian Black] has modified his NTSC model with a custom ROM, an Arduino and an Si5351 clock generator to be switchable between the two.

The differences between a PAL and NTSC C16 are two-fold. The clock for the video chip is of a different frequency, and the ROM contents differ too. [Adrian]’s machine therefore has a larger ROM containing both versions which are switchable via one of the upper address lines. A couple of tracks cut in the crystal oscillator circuit allow him to inject a new clock from the Si5351 module, and and Arduino controls everything. The appropriate ROM and clock are selected via a very simple interface, the reset button is captured and while a short press still resets the computer a long one switches the mode.

Despite having its principal engineer, [Bil Herd] as a colleague here at Hackaday, it’s sad that we don’t see as many Commodore 16s as we should. A recent feature showed a 64k C16, but didn’t make it into a C64.

Continue reading “This Commodore 16 Is An NTSC One… No, Wait, It’s A PAL One!”

A Quite Obscure C128 Video Mode Hack

30 years ago, [Dave] found himself up a C128D creek without a paddle. His main monitor was on the fritz, and he needed to use his C128D in 40-column mode to run old C64 programs for development purposes. Normally this is only possible through the low quality composite out, but no composite monitor was available. Needs must, so he got to coding a workaround that would allow the C128D to output in 40 column mode through the higher-quality RGBI output. 

It’s a proper old-school hack in the spirit of the 8-bit era. The C64 ROM is copied into RAM, where it’s then modified to instead update a 40-column image that’s sent to the RGBI display hardware. The original C64 character ROM is also copied over to ensure everything displays correctly.

It’s not bulletproof, and a few pokes to the wrong memory locations have a high likelihood of crashing the system, seeing as the ROM is now in RAM. However, it does allow the user to enable FAST mode and use all the C128 extended keys. [Dave] recommends experimenting in an emulator first, lest you scare your vintage monitor with angry signals it can’t understand.

The C128 was Commdore’s last 8-bit computer on the market, and there’s a heck of a story behind its creation.

Custom Monitor For Pi-Powered Commodore 64

Classic games never seem to have gone out of style and with the emulation powers of the Raspberry Pi, there seems to be no end of projects folks have been coming up with. [Chris Mills] project is a great looking monitor to get his Commodore 64 fix by combining the retro looks of a home-made 64-style monitor with the Raspberry Pi.

[Chris] is only interested in Commodore 64 emulation, at least with this project, and wanted something that would fit on a desk without taking up too much room. An eight inch LCD security monitor fit the bill perfectly. [Chris] ended up building a wooden enclosure for the monitor to give it that Commodore look. The monitor, power supply and cable connections fit inside along with speakers; each of these having their inputs on the back. A fan vents in the back as well and the Pi sits outside running the Combian 64 emulation software.

[Chris] has put up some galleries of build pics. The logo from the old Commodore logo is a nice touch. Read over the Hackaday site and you could build your own Commodore 64, or use the Commodore 64 itself to house the Raspberry Pi if you wanted.


Twenty Five Years Since The End Of Commodore

This week marks the twenty-five year anniversary of the demise of Commodore International. This weekend, pour one out for our lost homies.

Commodore began life as a corporate entity in 1954 headed by Jack Tramiel. Tramiel, a Holocaust survivor, moved to New York after the war where he became a taxi driver. This job led him to create a typewriter repair shop in Bronx. Wanting a ‘military-style’ name for his business, and the names ‘Admiral’ and ‘General’ already taken, and ‘Lieutenant’ simply being a bad name, Tramiel chose the rank of Commodore.

Later, a deal was inked with a Czechoslovakian typewriter manufacture to assemble typewriters for the North American market, and Commodore Business Machines was born. Of course, no one cares about this pre-history of Commodore, for the same reason that very few people care about a company that makes filing cabinets. On the electronics side of the business, Commodore made digital calculators. In 1975, Commodore bought MOS, Inc., manufacturers of those calculator chips. This purchase of MOS brought Chuck Peddle to Commodore as the Head of Engineering. The calculators turned into computers, and the Commodore we know and love was born.

Continue reading “Twenty Five Years Since The End Of Commodore”

The Repair And Refurbishment Of Silicone Keyboards

There are a lot of retrocomputers out there sitting in garages and attics, and most of them need work. After thirty or forty years, you’re looking at a lot of corrosion, leaking caps, and general wear and tear. When it comes to extreme refurbishment, we haven’t seen anyone better than [Drygol], and this time he’s back with an exceptional example of how far repair and refurbishment can go. He’s repairing the silicone keyboard of a Commodore 116 using some very interesting techniques, and something that opens up the door to anyone building their own silicone keypad.

This project comes from from a member of a demoscene group that found an old C116 that needed a lot of work. The C116 shipped with a silicone membrane keyboard instead of the mechanical keyswitches of the C64 and other, higher-end computers. Unfortunately, this silicone keypad had a few keys ripped out of it. No one, as far as we can tell, has ever figured out how to make these silicone keypads from scratch, but [Drygol] did come up with a way to replace the ripped and missing keys. The process starts with making a silicone mold of the existing keyboard, then casting silicone into the negative of that mold. After a few attempts , [Drygol] had a custom silicone button that matched the shape and color of the original C116 keyboard. The only thing left to do was to attach tiny conductive carbon pads to the bottom of the newly cast buttons and fit them into the existing keyboard.

This is an interesting refurbishment, because there are a lot of vintage computers that used silicone keyboards in the place of mechanical keyswitches. The Speccy, The Commodore TED machines, and a lot of vintage calculators all used silicone keyboards. Until now, no one has figured out how to make DIY silicone keypads, and repairing silicone was out of the question. [Drygol]’s attempt isn’t perfect — it needs key labels, but screen or pad printing will take care of that — but it’s the best we’ve seen yet and opens the doors to a lot of interesting projects in the world of vintage computer repair.

Make Your Commodore 16 64k, But Not A Commodore 64

The Commodore 16 was a budget home computer from the mid 1980s, the entry-level model in a wider range of machines. As its name suggests it only has 16k of memory in keeping with its budget status, and while it has the rest of the hardware necessary to run software intended for its 64k stablemates, that 16k is impossible to expand without modifying the machine. Should you have a ’16 in your collection this is not a particularly arduous process, and Tynemouth Software have gone into great detail over how it can be achieved.

As was quite common in machines of the period, the address lines for the RAM area above the fitted 16k are not wired to disable it when those addresses are selected, so the same 16k appears mirrored three times in the space between it and the 64k limit. Thus simply plugging in a 64k cartridge would result in the top 48k being unusable, and some means of disabling or supplanting the internal chips was called for. Contemporary upgrades required pin or track snipping, but as they go on to show us there are some less ugly alternatives both permanent and reversible. Whichever you might favor they all at least don’t carry the huge cost hurdle in 2019 that they might have been when the machine was new. Sadly even though their cases may be similar the resulting machine will not be a Commodore 64, not even a new one.

Long-time Hackaday readers will know that the hardware designer for these machines was our Hackaday colleague [Bil Herd], and all followers of Commodore and his work should read his account of the CES trade show at the heady height of Commodore’s  fame.