Scratch-Built Industrial Camera’s Modular Design Really Stacks Up

The news here isn’t so much that [Guarav Singh] built this high-quality industrial digital camera from scratch, but it’s in the way it was accomplished. That plus the amount of information that’s packed into the write-up, of course. And the excellent photography.

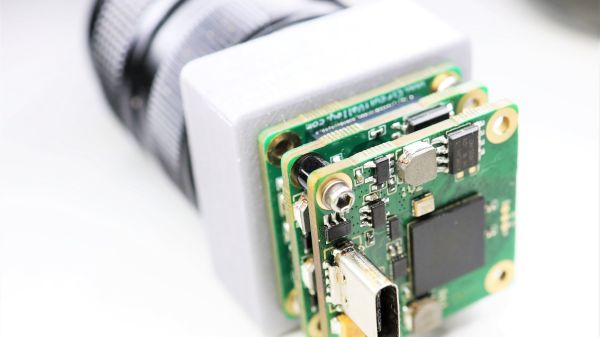
Modularity was one of [Guarav]’s design goals, with the intention of being able to swap out the sensor as the technology changes. To that end, [Guarav] came up with a stack of three PCBs. The middle board of the stack contains a Lattice FPGA chip along with two 16-MB RAMs and the FPGA config flash. The sensor board lies on one side of the FBGA board, while the USB 3.0 board is on the other. Each six-layer board is a masterpiece of high-density design, and the engineering that went into interfacing them and getting everything squeezed into a 3D-printed case with an integrated aluminum C-mount ring is pretty impressive.

[Guarav]’s write-up goes into a great deal of detail on processing the sensor data on the FPGA. Also, there’s quite a bit of practical information on implementing MIPI (Mobile Industry Processor Interface) and the CSI (Camera Serial Interface) specification. We’ve delved into this world before, but this project is a great hands-on explanation that might really help move your MIPI project along.

Thanks for the tip, [STR-alorman].

True Networked KVM Without Breaking The Bank

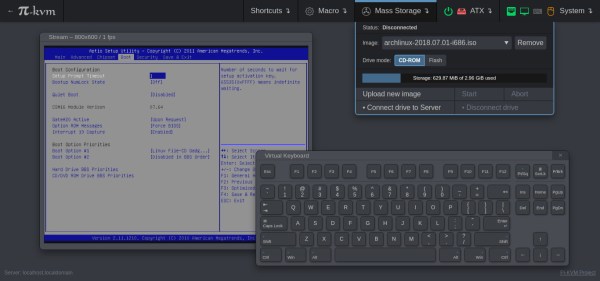
For administering many computers at once, an IP KVM is an invaluable piece of equipment that makes it possible to get the job done over the network without having to haul a keyboard, monitor, and mouse around to each computer. The only downside is that they can get pricey, unless of course you can roll one out based on the Raspberry Pi and the PiKVM image for little more than the cost of the Pi itself.

The video linked below shows how to set all of this up, which involves flashing the image and then setting up the necessary hardware. The build shows an option for using HDMI over USB, but another option using the CSI bus would allow for control over options like video resolution and color that a USB HDMI dongle doesn’t allow for. It also makes it possible to restart the computer and do things like configure BIOS or boot from removable media, which is something that would be impossible with a remote desktop solution like VNC.

The creator of PiKVM was mentioned in a previous post about the creation of the CSI bus capture card, and a Pi hat based on this build will be available soon which would include options for ATX controls as well. Right now, though, it’s possible to build all of this on your own without the hat, and is part of what makes the Pi-KVM impressive, as well as its very low cost.

Continue reading “True Networked KVM Without Breaking The Bank”

Multiplexing Pi Cameras

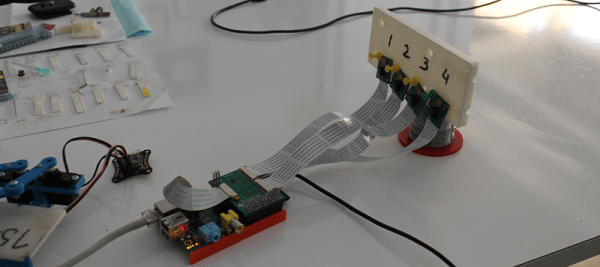
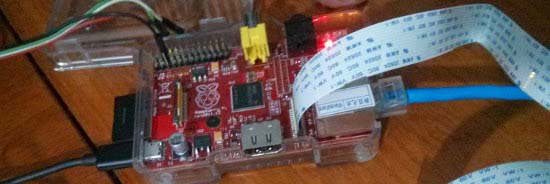
The Raspberry Pi and its cool camera add-on is a great way to send images and video up to the Intertubes, but what if you want to monitor more than one scene? The IVPort can multiplex up to sixteen of these Raspi camera modules, giving the Pi sixteen different views on the world and a ridiculously high stack of boards connected to the GPIO header.

The Raspberry Pi’s CSI interface uses high-speed data lines from the camera to the CPU to get a lot of image data quickly. Controlling the camera, on the other hand, uses regular old GPIOs, the same kind that are broken out on the header. We’ve seen builds that reuse these GPIOs to blink a LED, but with a breakout board with additional camera connectors, it’s possible to use normal GPIO lines in place of the camera port GPIOs.

The result is a stackable extension board that splits the camera port in twain, allowing four Raspi cameras to be connected. Stack another board on top and you can add four more cameras. A total of four of these boards can be stacked together, multiplexing sixteen Raspberry Pi cameras.

As far as the obvious, ‘why’ question goes, there are a few interesting things you can do with a dozen or so computer controlled cameras. The obvious choice would be a bullet time camera rig, something this board should be capable of, given its time to switch between channels is only 50ns. Videos below.

Continue reading “Multiplexing Pi Cameras”

Stereo Vision And Depth Mapping With Two Raspi Camera Modules

The Raspberry Pi has a port for a camera connector, allowing it to capture 1080p video and stream it to a network without having to deal with the craziness of webcams and the improbability of capturing 1080p video over USB. The Raspberry Pi compute module is a little more advanced; it breaks out two camera connectors, theoretically giving the Raspberry Pi stereo vision and depth mapping. [David Barker] put a compute module and two cameras together making this build a reality.

The use of stereo vision for computer vision and robotics research has been around much longer than other methods of depth mapping like a repurposed Kinect, but so far the hardware to do this has been a little hard to come by. You need two cameras, obviously, but the software techniques are well understood in the relevant literature.

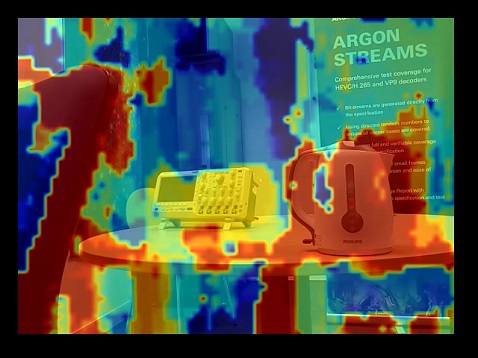
[David] connected two cameras to a Pi compute module and implemented three different versions of the software techniques: one in Python and NumPy, running on an 3GHz x86 box, a version in C, running on x86 and the Pi’s ARM core, and another in assembler for the VideoCore on the Pi. Assembly is the way to go here – on the x86 platform, Python could do the parallax computations in 63 seconds, and C could manage it in 56 milliseconds. On the Pi, C took 1 second, and the VideoCore took 90 milliseconds. This translates to a frame rate of about 12FPS on the Pi, more than enough for some very, very interesting robotics work.

There are some better pictures of what this setup can do over on the Raspi blog. We couldn’t find a link to the software that made this possible, so if anyone has a link, drop it in the comments.

Adding GPIOs To The Raspberry Pi With The Camera Interface

GPIOs

The Raspberry Pi Model B+ was just released, and now everyone who picks one of those up has a few more GPIO pins to play around with. For the millions of people with the two-year-old version of the Pi, we’re still stuck with the same old, same old: 17 GPIOs on the big header, and that’s about it as far as toggling pins goes.

The Broadcom SoC on the Pi has far more GPIO pins than are broken out on the large header, and a few of those go to the CSI camera interface. These GPIOs can be broken out with a few flat cables (Portuguese, Google Translatrix), giving you four more GPIOs, and this technique can also be used with the new, expanded Model B+.

The CSI camera connector has two I²C lines that go directly to the camera, controllable in Linux as GPIO0 and GPIO1. There are two more GPIO connectors on the CSI connector controllable as GPIO5 and GPIO21. By carefully slicing and soldering wires to a flat cable, these GPIO lines can be broken out onto a breadboard.

There’s a video below demonstrating these GPIO lines being used to control a few LEDs. Of course, anything that is possible with a normal Raspi GPIO is possible with the CSI connector GPIO lines.

Continue reading “Adding GPIOs To The Raspberry Pi With The Camera Interface”

Making Luminol From Household Chemicals

What to make your own chemiluminescent material? Check out this process that uses common household goods to synthesize luminol. You’ll need some lab equipment, and [NurdRage] mentions some precautions to take as luminol is not itself toxic, but some of the fumes and intermediary chemicals found during the process are.

Start by cutting up some vinyl gloves and boiling them with some rubbing alcohol to extract diethyl hexyl phthalate. After filtering, that gets boiled with water and some drain cleaner. The goal here is to continue the process until you have pure phthalic anhydride. Almost done? Not even getting started. This is a very complicated process, but fascinating to watch. After the break you’ll find the full video, or a five-minute abridged version for those that just want a taste of this experiment.

When we looked at the quantum dot manufacturing process a couple of days ago we asked for more chemistry hacks. This is exactly what we were talking about and are thankful that [Rob] sent in the tip. Keep them coming!

Continue reading “Making Luminol From Household Chemicals”