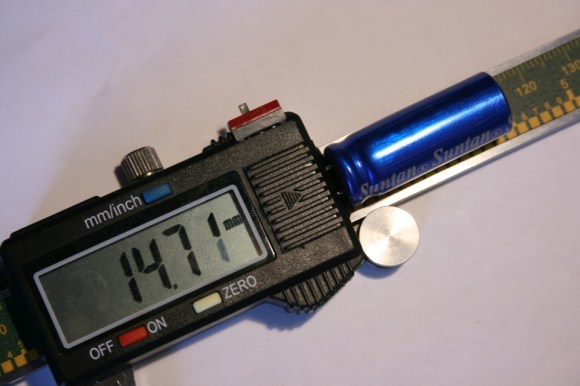
Sorting Thousands Of Drill Bits

[Austin Adee] came into some drill bits. A lot of them actually. But when thousands of assorted sizes are delivered in one disorganized box, are they actually useful? Not unless you’re drilling holes where diameter doesn’t matter.

So two projects were at hand: finding a place to store a few hundred different sizes of bits, and tackling the actual sorting itself. In the end, he used input from a digital caliper alongside a Python script that showed him where to put them.

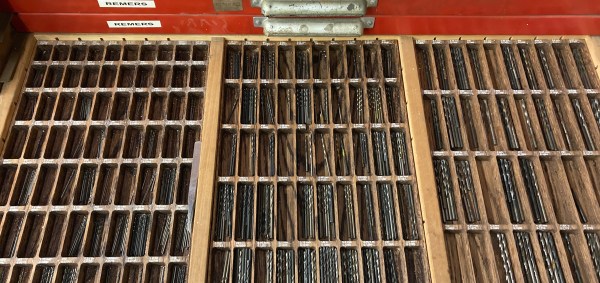
The start of the tray design process was a bit of a research project, establishing the common sizes and how many would fit into a given space. This data was used to spin up the layout for trays with 244 different pockets to hold the bits. The pockets were CNC milled, but getting labels for each to work with the laser engraver was a bit of a hack. In the end, filling in the letters with white crayon really makes them pop, despite [Austin’s] dissatisfaction with the level of contrast.
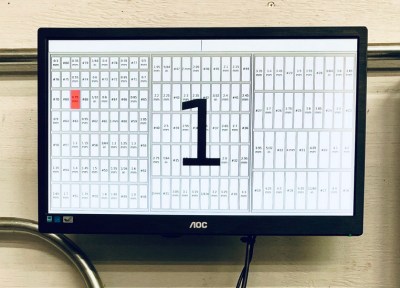
But wait, we promised you an epic sorting hack! Unfortunately there’s no hopper, vibration feed, and sorting gantry that did this for him (now if it were perler beads he’d have been all set). Still, the solution was still quite a clever one.

A set of digital calipers with a Bluetooth connection sends the dimension back to a python script every time you press the capture button. That script find the pocket for the nearest size and then highlights it on a map of the drill bit drawer displayed on the computer monitor. In the end the trays fit into a wide tool chest drawer, and are likely to keep things organized through exactly one project before everything is once again in disarray.

[Austin] mentions a lag of up to one second for the Bluetooth calipers to do their thing. For assembly-line style work, that adds up. We remember seeing a really snappy reaction time on these digital calipers hacked for wireless entry.

How To Reverse Engineer Mechanical Designs For 3D Modeling

If you’re interested in 3D printing or CNC milling — or really any kind of fabrication — then duplicating or interfacing with an existing part is probably on your to-do list. The ability to print replacement parts when something breaks is often one of the top selling points of 3D printing. Want some proof? Just take a look at what people made for our Repairs You Can Print contest.

Of course, to do that you need to be able to make an accurate 3D model of the replacement part. That’s fairly straightforward if the part has simple geometry made up of a primitive solid or two. But, what about the more complicated parts you’re likely to come across?

In this article, I’m going to teach you how to reverse engineer and model those parts. Years ago, I worked for a medical device company where the business model was to duplicate out-of-patent medical products. That meant that my entire job was reverse engineering complex precision-made devices as accurately as possible. The goal was to reproduce products that were indistinguishable from the original, and because they were used for things like trauma reconstruction, it was critical that I got it right.

Continue reading “How To Reverse Engineer Mechanical Designs For 3D Modeling”

The Most Sensational Calipers On The Planet!

Everyone here probably has a pair of cheap Chinese calipers kicking around the workbench. This means everyone here also knows how quickly the batteries in these handy little tools die. [Thosnbn] also noticed this, but instead of simply complaining and wishing the problem would go away, he decided to do something about it. He built a battery pack for his calipers, giving this tool a two year battery life.

The idea for this build came after [thosnbn]  completely destroyed a pair of these cheap calipers. At the time, the fix was to tape a AA battery to the tool, and solder wires directly to the contact pads for the tiny button cell battery. This fix worked, and after dealing with the ugliest tool known to man for a few years, [thosnbn] decided to clean it up a little.

The new battery enclosure was designed in Fusion360, includes handy features like a switch, and is completely 3D printed. It took a few weeks for [thosnbn] to get all the parts to fit together correctly, but the end result is great. This battery pack fits neatly on the back of the calipers, holds a single AA battery, and the lid is tightly secured with a pair of machine screws.

Unfortunately, [thosnbn] chose to share this project on imgur, a site that does not support sharing .stl or other 3D printer files. It does, however, serve as inspiration for you to make your own battery pack for a pair of cheap calipers.

Improved Digital Caliper Interfacing, Including 3D Printed Connector

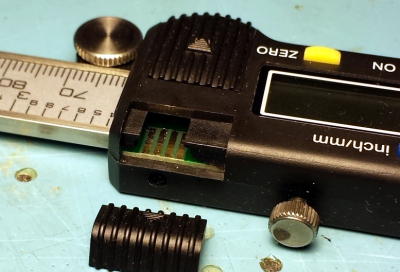
[MakinStuff] wrote in to let us know about a project he did for new and improved interfacing to the ubiquitous cheap Chinese digital calipers. Interfacing to this common caliper model is well-trod ground, but his project puts everything about interfacing and reading the data in one place along with some improvements: a 3D printed connector that makes mating to the pads much more stable and reliable, 3d-printed-plug-for-digital-calipersa simple interface circuit for translating the logic levels, and an interrupt-driven sample Arduino sketch to read the data. Making the sketch interrupt-driven means the Arduino never sits and waits for input from the calipers, making it easier have the Arduino do other meaningful work at the same time, ultimately making it easier to incorporate into other projects.
The connector has spaces to insert bare wires to use as contacts for the exposed pads inside the calipers. Add a little hot glue and heat shrink, and you’ll never have to fiddle with a hacked-together connection again.

This common caliper model has been hacked and re-purposed in interesting ways. We’ve seen them used as a Digital Read Out (DRO) on a lathe as well as being given the ability to wirelessly log their data over Bluetooth.

Continue reading “Improved Digital Caliper Interfacing, Including 3D Printed Connector”

SPATA: Shaving Seconds And Saving Brainpower Whilst 3D-modeling

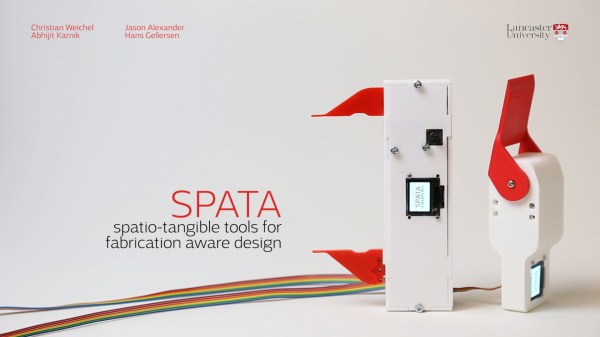
If you’ve spent some late nights CADing your next model for the 3D printer, you might find yourself asking for a third hand: one for the part to-be-modeled, one for the tool to take measurements, and one to punch the numbers into the computer. Alas, medical technology just isn’t there yet. Luckily, [Christian] took a skeptical look at that third hand and managed to design it out of the workflow entirely. He’s developed a proof-of-concept tweak on conventional calipers that saves him time switching between tools while 3D modeling.

His build [PDF] is fairly straightforward: a high-resolution digital servo rests inside the bevel protractor while a motorized potentiometer, accelerometer, and µOLED display form the calipers. With these two augmented devices, [Christian] can do much more than take measurements. First, both tools are bidirectional; not only can they feed measurement data into the computer with the push of at button, both tools can also resize themselves to a dimension in the CAD program, giving the user a physical sense of how large or small their dimensions are. The calipers’ integrated accelerometer also permits the user to perform CAD model orientation adjustments for faster CAD work.

How much more efficient will these two tools make you? [Christian] performs the same modeling task twice: once with conventional calipers and once with his tools. When modeling with his augmented device, he performs a mere 6 context switches, whereas conventional calipers ratchet that number up to 23.

In a later clip, [Christian] demonstrates a design workflow that combines small rotations to the model while the model is sculpted on a tablet. This scenario may operate best for the “if-it-looks-right-it-is-right” sculpting mindset that we’d adopt while modeling with a program like Blender.

Of course, [Christian’s] calipers are just a demonstration model for a proof-of-concept, and the accuracy of these homemade calipers has a few more digits of precision before they can rival their cousin on your workbench. (But why let that stop you from modifying the real thing?) Nevertheless, his augmented workflow brings an elegance to 3D modeling that has a “clockwork-like” resonance of the seasoned musician performing their piece.

[via the Tangible, Embedded, and Embodied Interaction Conference]

Continue reading “SPATA: Shaving Seconds And Saving Brainpower Whilst 3D-modeling”

Trinket EDC Contest: USB Calipers

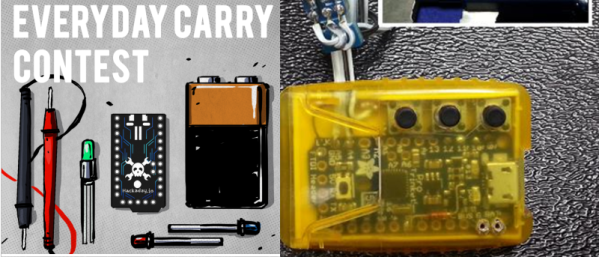
[Lou]’s entry for the Trinket EDC Contest is a great addition to the ubiquitous digital calipers found on workbenches and eBay resellers the world over. It translates the value displayed on the calipers to a USB HID interface for logging all those tricky measurements at the push of a button.

Most of the digital calipers you’ll find at Harbor Freight or on eBay are pretty much the same. There are two pads on the caliper’s PCB that give any microcontroller the ability to read what is being measured. It’s done with a 24-bit encoding scheme, where each bit is a nearly-BCD measurement in units of 1/1000 of an inch or 1/100 of a millimeter. After decoding the value, [Lou]’s trinket sends a few numbers to a computer over a USB HID interface.

Simply sending a measurement to a computer over USB wasn’t enough for [Lou]. He added three buttons to the project for typing multiple characters. The first button just sends Enter to the computer, the second sends a comma, and the third sends “/2 (Enter)”, exactly what you need to input the radius of something when measuring the diameter.

This was a project for the Trinket EDC Contest that ended a few hours ago. Nobody knows who the winner is, but there are some pretty cool prizes up for grabs including the new Rigol scope, a Fluke 179, and a soldering station.

Supercharging Your Digital Calipers

supercapCalipers01

A dead battery in your digital calipers usually means a trip to the store for a new button cell. Not for [Trevor]. His hack substitutes a super capacitor, guaranteeing you’ll never need to rummage around for one of those pesky watch batteries again.

These calipers require only 20 seconds to reach a full charge that can last for a few days. Better still, [Trevor] designed a simple circuit with a voltage regulator at the end of the cord to allow charging via USB: just remember to flip the switch from “discharging” to “charging” mode. Although this is a fairly straightforward hack, its design is impressively tidy. The super capacitor fits perfectly at the end of the display and slides along with it, keeping it away from any important printed numbers. If these are the same calipers everyone seems to have these days, it looks like it may still fit in the provided case, too.

If you’re looking for more ways to beef up your calipers, try upgrading them with a Bluetooth module.