Repairing A Samsung 24″ LCD Monitor With Funky Color Issues

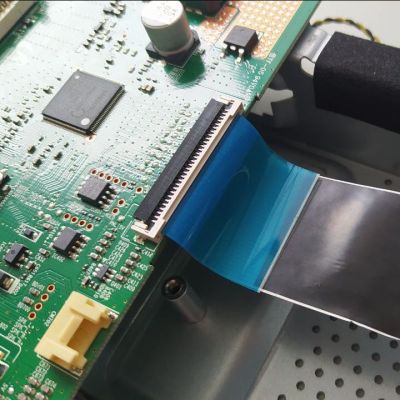
The old cable in place on the Samsung monitor. (Credit: MisterHW)

Dumpster diving is one of those experiences that can net you some pretty cool gear for a reasonable price. Case in point the 24″ Samsung S24E650XW LCD monitor that [MisterHW] saved from being trashed. Apparently in very good condition with no visible external damage, the unit even powered up without issues. It seemed like a golden find until he got onto the Windows desktop and began to notice quaint red shimmering in darker areas and other issues that made it clear why the monitor had been tossed. Of course, the second best part about dumpster diving is seeing whether you can repair such issues.

Prior to disassembly it had been noted that percussive maintenance and bending of the frame changed the symptoms, suggesting that something was a bit loose inside. After taking the back cover and shielded enclosure off, a quick visual inspection of the boards and cables quickly revealed the likely suspect: broken traces on one of the cables.

Apparently somewhere during the assembly step in the factory the cable had been pushed against the PCB’s edge, causing the initial damage. Based on the listed assembly date the monitor had only been in use for a few years before it was tossed, so likely the symptoms would have begun and worsened as one after another of the traces gradually cracked and broke due to vibrations, thermal expansion, etc.

This issue made fixing the monitor very simple, however, assuming a suitable replacement cable could be found. The broken cable is a 30P 1.0 pitch PFC, with EBay throwing up a cable with similar specs for a Thomson brand TV. One purchase and anxious wait later, the replacement cable was installed as in the featured image alongside the old cable. Perhaps unsurprisingly it restored the monitor to full working order, demonstrating once again that dumpster diving is totally worth it.

Saving A Scope From The Dumpster

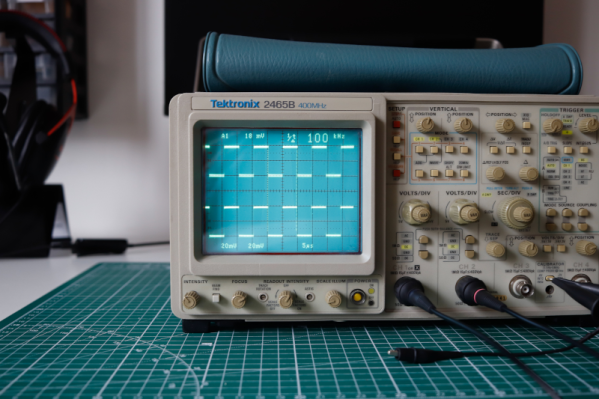
If you read Hackaday, you probably get the title of [SunEstra’s] post: A Casual Date with the Dumpster. Many great hacking projects start with finding one man’s trash. This June, [SunEstra] rescued an old Tektronix 2465B oscilloscope, which appeared to be in good shape. Why we never find four-channel 400 MHz scopes in the dumpster is hard to explain, but we are still happy for him, if not a little jealous.

As you might expect, powering up the scope was a disappointment. Relays clicked. Lights flashed. But no display. Adjusting the grid bias on the CRT brought up the display, but it also brought up something else: an error message.

The scope was complaining of “test failure 05-40.” A look through the manual reveals that is “positive level too positive.” Huh. Too much of a good thing, we guess. The test checks the A5 board, so a visual inspection there was the first step.

Unsurprisingly, there were electrolytic capacitors leaking electrolyte. This is, apparently, a well-known problem with this scope. Replacing the electrolytics with some similar tantalum capacitors. In a few cases, the corrosion had eaten pads off the PCB, and some were damaged during the removal. It took a little ingenuity to connect the new parts on the board.

The result? A working scope. Maybe the scope will help repair the next thing that comes out of the dumpster. Sometimes, the best dumpster dives involve intercepting the gear before it hits the dumpster. We keep hoping to run into one of these on the curb (the linked post seems dead, but the video is still there).

Sonos Speakers Free To Sing Again

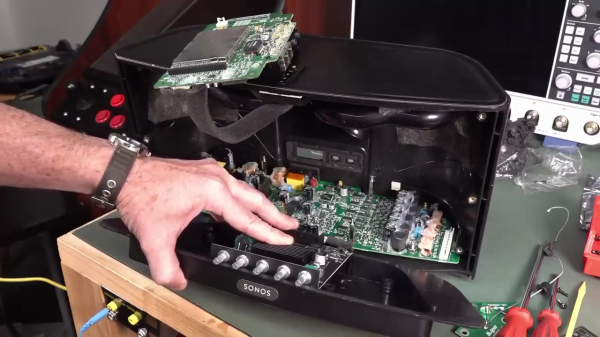
Over at the EEVBlog, [Dave Jones] takes a second look at the Sonos Play 5 Gen 1 that he rescued from the dumpster recently. Despite being solidly built, [Dave] discovered that even the stereo line-in jack can’t be used without registering an account with Sonos. Not to be defeated, he hacks these speakers to make them work standalone.

Bluetooth Audio Amplifier Module (Fosi Audio)

The hack here involves fitting the speaker cabinet with new “guts” in the form of a wireless stereo 2×50 watt digital amplifier [Dave] found online for under $30. This particular model, the Fosi TB21, is almost a perfect fit for the Sonos cabinet — with only minimal Dremel tool encouragement required. It turned out the power supply section of the Sonos main board was easy to isolate. [Dave] couldn’t use the existing amplifiers, so he removed them from their power supply and re-routed the power supply to the Fosi module. He also removed the Sonos wireless interface board from the cabinet, and used an online design tool to make a simple first order Butterworth crossover network set to 2800 Hz to connect the speakers.

The new amplifier board is mounted in the shallow base of the speaker cabinet. It could have easily been oriented either way, but [Dave] chose to install it knobs-forward. This also gave him a reason to toss out the Sonos badge. The resulting modified unit looks very professional, and works well as a Bluetooth speaker for the lab.

We wrote about the opposite conversion last year, where old speakers from the 1960s were hacked to add Sonos capability. You can read about the controversy surrounding Sonos here, and we discussed the issue on the Hackaday Podcast in episode 058.

Continue reading “Sonos Speakers Free To Sing Again”

Condemned Precision Capacitors Find New Home, Refuse To Become Refuse

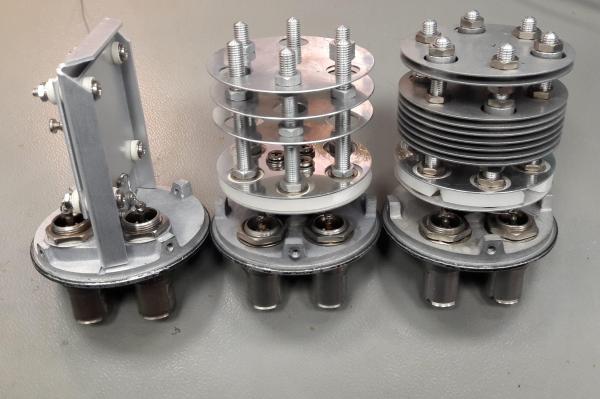
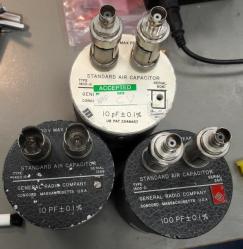
Ah, the age old tradition of Dumpster diving! Sometimes we happen to spot something that’s not quite trash, but not quite perfect, either. And when [dzseki], an EEVblog.com forum user, spotted some high-precision capacitors being 86’d at their employer’s e-waste pile, [dzseki] did what any good hacker would do: took them home, tested them, and tore them down to understand and either repair or reuse them. They explain their escapades and teardown in this EEVblog.com forum post.

High-precision capacitors with RF connectors.

If you’re not familiar with capacitors, they are really just two or more plates of metal that are separated by an insulator, and in the case of these very large capacitors, that insulator is mostly air. Aluminum plates are attached with standard bolts, and plastic insulators are used as needed. There’s also discussion of an special alloy called Invar that lends to the thermal stability of the capacitors.

[dzseki] notes that these capacitors were on their way to the round file because they were out of spec, but only by a very, very small amount. They may not be usable for the precision devices they were originally in, but it’s clear that they are still quite useful otherwise. [dzseki]

Of course, Dumpster diving for cool parts is nothing new, and we’ve covered nifty projects such as this frankenmonitor bashed together from two bin finds.

Thank you [David] for the great tip, and don’t forget to leave your own in the Tip Line.

Help, I’m Buried Alive By Tablets!

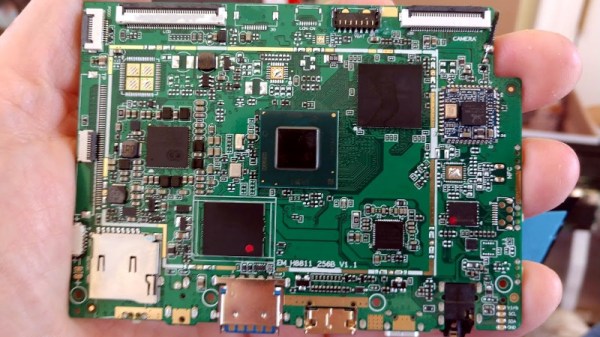
It’s fair to say that many Hackaday readers will have a propensity for hoarding electronic or tech junk. Who hasn’t hung on to something because “It might be useful someday”? Spare a thought for [Mike Drew], who in his own words is “buried alive by tablets”. In this case the tablets are Intel-based ones that look as though they ran one of those cut-down Windows versions, and they appear to be rejects from a repair shop processing customer returns that he saved from the dumpster. They are missing their backs, and not all of their screens work, but they amount to a tidy pile of Stuff That’s Too Good To Throw Away.

The exact spec is a 1.4 GHz quad-core Atom with 4 GB of RAM and 32 GB of Flash, and appear from the photos to have HDMI and USB 3 interfaces. Happily they run Linux Mint 20 so they have plenty of potential, but there is only so much that one person can do with them before running out of ideas. He tells us he’s made a Folding@Home cluster, but beyond that he’s open to suggestions. Depending on the age of the commenter no doubt he’ll be exhorted to run Beowulf or mine Bitcoin, but we’d suggest more sensible ideas.

So, what would you do with them? They lack the handy GPIO port of a Raspberry Pi, but with suitable USB peripherals could you use them in any lowish-power distributed node project where the popular SBC would be the usual choice? Perhaps something like WeeWX, or OpenEnergyMonitor. Or how about distributed mesh network nodes, after all there’s an x86 port of LibreMesh. It’s obvious that there’s plenty of potential to be found, so help [Mike] with his problematic bounty in the comments.

Pi 4 Emulator In A Durable, Dumpstered Cabinet

We must be looking in the wrong Dumpsters, because we never find anything as cool as [Queen_Combat] did. It’s one of those Kidzspace kid-proof waiting room game systems, complete with the original TV and an XBOX 360 that hasn’t been updated since 2009. When life hands you a sturdy game console box, it’s almost your duty to turn it into an all-in-one Raspberry Pi 4 emulation station.

[Queen_Combat] relocated the speakers from the top to the inside, just behind the vent holes on the sides, and printed a couple of mountable custom enclosures to hold them there. These are driven with a little 5W amplifier board, and everything is run from the XBOX’s power supply.

We particularly like the use of extenders in cigarette-lighter form factor, because we hadn’t seen those before. [Queen_Combat] printed a couple of adapters to make them fit nicely into the large holes on the front where the XBOX controllers were once attached — one has a volume knob, and the other has a USB3 port and a 3.5mm audio jack. [Queen_Combat] wanted to have HDMI audio out as well, so there’s an HDMI audio extractor in the mix, too, and another extender around back. Only thing missing is a paint job and some sweet vinyl graphics.

Yes, vinyl graphics would be sweet, but how? Not on the laser cutter, if that’s what you’re thinking. Don’t dismiss vinyl cutters out of hand, because they can do a whole lot more than that.

Via r/raspberry_pi

Convert printer to WiFi scanner

Converting A 3-in-1 Printer Into A WiFi Scanner, Just Because

[Zaprodk] had trash-picked a defunct HP Envy 450 AIO, a 3-in-1 printer, scanner, and copier. Normally there usually isn’t much use for these unless you’re willing to hunt down the cartridges which it used, so your next step is to dismantle it for parts. That’s what he was going to do but then decided to see if he could remove as much as possible while leaving just the scanner.

Converted WiFi scanner boards

He ran into trouble after he’d “fixed” the lid-open sensor and unplugged pretty much everything. He was getting too many error messages on the LCD panel to reconfigure the WiFi. Luckily he could connect it to his computer using USB and do the configuration from there. One dubious mod involved turning an “unflipped” flexible flat cable into a “flipped” one by doing a little cutting, scraping and gluing. Check out his write-up for the full hack.

Interested in more dumpster hardware recovery? Check out how [Adil Malik] rescued a scope with some reverse engineering and an FPGA. And then there’s how [Matt] turned a dumpster-found WiFi router into a 3D printing server.