Robotic Hand Uses Old CD-ROM Parts

Robotic arms and actuators are compelling things to watch, and as popular among the maker set as they are crucial to modern industry. [kthod2000] built a design of their own, which relies on parts salvaged from old CD-ROM drives. 

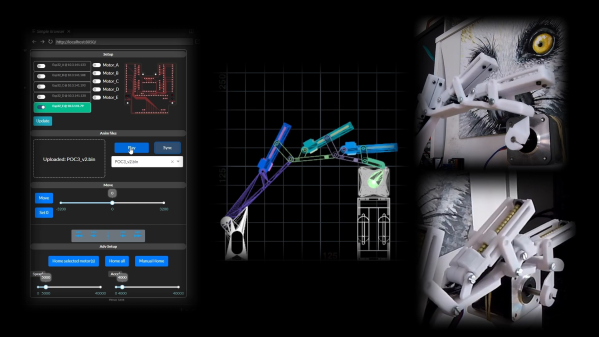
The arm itself is constructed of many components which appear to be 3D printed, with three main motors visible along its length. These look to be the eject motors harvested from several optical drives, which usefully come with a threaded screw on the output shaft that makes them perfect for a linear-drive application. Run by a TMC2208 driver via a microcontroller, the eject motors control the motion of several stages of the robot arm as it moves up and down.

The intention seems to be that one of these three-tiered assemblies could act as a single finger. Ganged up multiple times, this could allow the creation of something akin to a full five-digit robot hand. [kthod2000] has also done plenty of work on the software side of things that handles controlling the arm. The kinematics can all be simulated on screen in concert with the real motion of the arm.

We’ve seen similar builds before, too, like this plotter built out of scrap DVD drives. They’re a great source of quality electromechanical components for small projects, so it’s no surprise to see them put to work here. Video after the break.

Continue reading “Robotic Hand Uses Old CD-ROM Parts”

Mini Linear Actuators From DVD Drive Parts

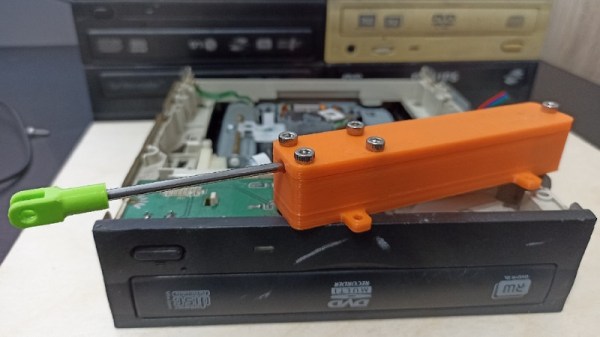
For many years now a source for some of the smallest and cheapest home made CNC mechanisms has been the seemingly never-ending supply of surplus CD and DVD-ROM drives. The linear actuator that moves the laser may not be the longest or the strongest, but it’s free, and we’ve seen plenty of little X-Y tables using CD drives. It’s these mechanisms that [Nemo404] has taken a little further, freeing the lead screw and motor from the drive chassis and placing them in a 3D-printed enclosure for a complete linear actuator that can be used in other projects. (Video, embedded below.)

There seems to be no positional feedback, not even the limit switch that would grace a typical CD drive, but aside from that it makes for a compact unit. There are two versions, one for a linear bearing and the other for the brass bushes found in CD drives. It’s unclear how strong the result is, but it appears to be strong enough to demonstrate lifting a small container of screws.

Should you need to make your own actuator then aside from the easy-to-obtain old CD drive the files can be found on Thingiverse. And introduce yourself to the world of CD drives for CNC machines by taking a look at this mill.

Thanks [BaldPower] for the tip!

Continue reading “Mini Linear Actuators From DVD Drive Parts”

Build A Plotter Using Scrap DVD Drives

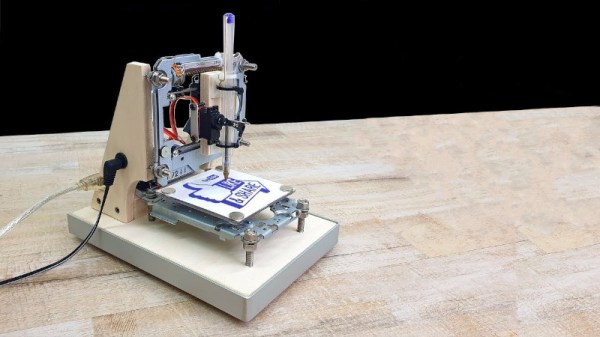
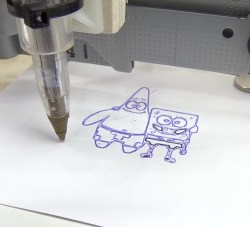
Building your own CNC machine can present a series of varied challenges. There are the software considerations, but also the mechanical side of things – motors, shafts, screws and slides all need to be addressed in a working design. Of course, you can always outsource some of the work – and that’s precisely what [Daniele Tartaglia] did with this pen plotter build (Youtube link, embedded below).

It’s a capable plotter, able to nicely reproduce both graphics and text.

The build gains X and Y axes by virtue of two salvaged DVD drives. The tray mechanisms come ready to go with stepper motors and lead screws already assembled, and make a great basis for a compact plotter. A wooden frame is constructed to hold everything together. The pen is held against the paper with a rubber band which helps the ballpoint to draw a nice dark line, with a servo used as a pen retract mechanism. An Arduino Uno with a stepper driver shield is then employed to run the show.

It’s a tidy build, with neat cable management and smart design choices giving it a pleasing aesthetic. The CNC fundamentals are good, too – with minimal backlash and slop, the plotter is able to draw quite effectively. Old optical drives are a popular choice for plotter builds, as it turns out. Video after the break.

Continue reading “Build A Plotter Using Scrap DVD Drives”

A Low-Cost Mini PCB Printer

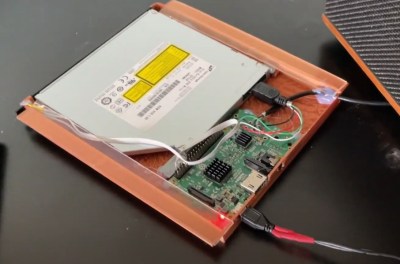
The next great advancement in homebrew electronics is an easy way to turn copper clad board into functional circuit boards. This has been done since the 60s with etch resist pens, sheets of etch resist rub-on transfers, the ever-popular photocopy and clothes iron, and now with small CNC mills. It’s still a messy, slow, and expensive process. [johnowhitaker] and [esot.eric] are trying to solve the latter of these problems with a mini PCB printer made out of DVD drives.

Playing around with the guts of a DVD drive is something [john] and [eric] have been doing for a while now, and for good reason. There’s a lot of interesting tech in DVD drives, with motors, steppers, and gears able to make very, very accurate and precise movements. Most PCBs aren’t very big, either, so a laser cutter that can only traverse an area a few inches square isn’t that much of a downside in this case.

With a small diode laser mounted to a CNC gantry constructed out of DVD drives, the process of making a PCB is actually pretty simple. First, a slurry of laser printer toner and alcohol is applied to the board. Next, the laser on this PCB printer lases over the traces and copper fills, melting the toner. The board is removed, the excess toner wiped off, and the unwanted copper is melted away. Simple, even if it is a little messy.

Of course this method cannot do plated traces like your favorite Internet-based board house, but this does have a few advantages over any other traditional homebrew method. It’s cheap, since CD and DVD drive mechanisms are pretty much standardized between manufacturers. It’s also easy to add soldermask printing to this build, given that soldermasks can be cured with light. It’s a very cool build, and one that would find a home in thousands of garages and hackerspaces around the world.

The HackadayPrize2016 is Sponsored by:

ChaiBot: A Tea Robot Steeped In Utility

On the surface, a cup of tea is a simple thing to make. Heat up some water, insert tea leaves, and wait for it to steep. The wait time is a matter of taste, and it is absolutely crucial to remove the bag or infuser before it’s too late. Otherwise, you end up with a liquid that’s almost, but not quite, entirely unlike tea.

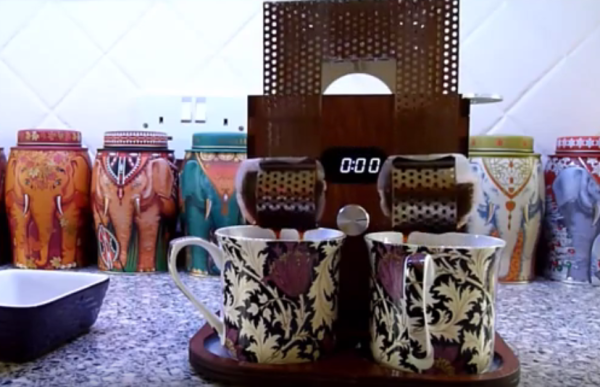
[Adrian] and his son would often find themselves lost in conversation during the steeping process and let it go too long. But that was before they built ChaiBot, an automatic tea minder. This fine-looking machine uses an old CD drive to raise and lower the tea bags, which are held by a thin piece of stainless steel mesh. Once the bags are lowered, [Adrian] pours hot water into the cups. The weight of the water is detected by a capacitive sensor under the cup cutouts, and this triggers the timer to start counting down to the perfect cuppa.

One of the coolest features of ChaiBot is the built-in circulation. Every minute, the bags are lifted out briefly and reinserted, disturbing the water so the steeping is more uniform. Since the final step to making great tea is drinking it before it goes cold, ChaiBot sends a push notification to [Adrian]’s phone. Be sure to check out the demo after the break.

Here’s another CD drive-based tea bot we covered a while back. It’s not quite as pretty, but it gets the job done. If you’re not one to wander off while your tea steeps but prefer not to watch a clock, here’s a compact timer that’ll fit in your pocket.

Continue reading “ChaiBot: A Tea Robot Steeped In Utility”

3D Printing Pen And CNC Machine Yields Cheap 3D Printer

3D printers are ubiquitous now, but they’re still prohibitively expensive for some people. Some printers cost thousands, but even more inexpensive options aren’t exactly cheap. [Daniel] decided that this was unacceptable, and set out to make a basic 3D printer for under $100 by including only the bare essentials needed for creating anything out of melted plastic.

3D printers are essentially four parts: a bed, filament, and a hot end and extruder. In a previous project, [Daniel] used parts from old CD drives to create a three-axis CNC machine which he uses for the bed. To take care of the hot end and extruder, he is using a 3D printing pen which he mounts to the CNC machine and voila: a 3D printer!

It’s not quite as simple as just strapping a 3D printing pen to a CNC machine, though. The pen and the CNC machine have to communicate with each other so that the pen knows when to place filament and the CNC machine knows when to move. For that, [Daniel] went with a trusty Arduino in order to switch the pen on and off. Once it’s working, it’s time to start printing!

[Daniel] does note that this is a design that’s relatively limited in terms of print size and resolution, but for the price it can’t be beat. If you’re interested in getting started with 3D printing, a setup like this would be perfect. 3D pens are a pretty new idea too, and it’s interesting to see them used in different ways like this.