Prototyping PCBs With Electrical Discharge Machining

Here at Hackaday, we thought we’d seen every method of making PCBs: CNC machining, masking and etching with a variety of chemicals, laser engraving, or even the crude but effective method of scratching away the copper with a utility knife. Whatever works is fine with us, really, but there still does seem to be room for improvement in the DIY PCB field. To whit, we present rapid PCB prototyping with electrical discharge machining.

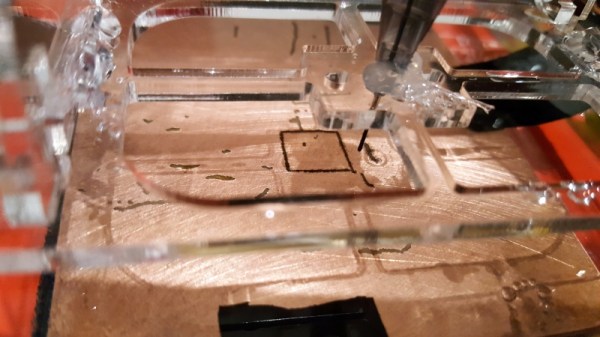
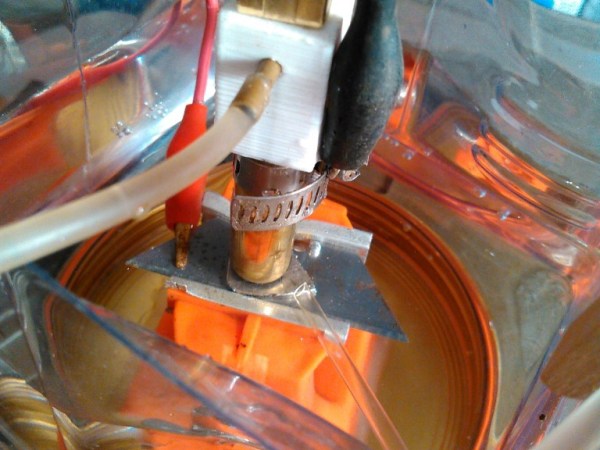
Using an electric arc to selectively ablate the copper cladding on a PCB seems like a great idea. At least that’s how it seemed to [Jake Wachlin] when he realized that the old trick of cutting a sheet of aluminum foil using a nine-volt battery and a pencil lead is really just a form of EDM, and that the layer of copper on a PCB is not a million miles different from foil. A few experiments with a bench power supply and a mechanical pencil lead showed that it’s relatively easy to blast the copper from a blank board, so [Jake] took the next logical step and rigged up an old 3D-printer to move the tool. The video below shows the setup and some early tests; it’s not perfect by a long shot, but it has a lot of promise. If he can control the arc better, this homebrew EDM looks like it could very rapidly produce prototype boards.

[Jake] posted this project in its current state in the hopes of stimulating a discussion and further experimentation. That’s commendable, and we’d really love to see this one move along rapidly. You might start your brainstorming by looking at this somewhat sketchy mains-powered EDM, or look into the whole field in a little more detail.

Continue reading “Prototyping PCBs With Electrical Discharge Machining”

[Ben Krasnow] Drills Really Small Holes With Electricity

Drilling holes is easy; humans have been doing it in one form or another for almost 40,000 years. Drilling really tiny holes in hard materials is more challenging, but still doable. Drilling deep, straight holes in hard materials is another thing altogether.

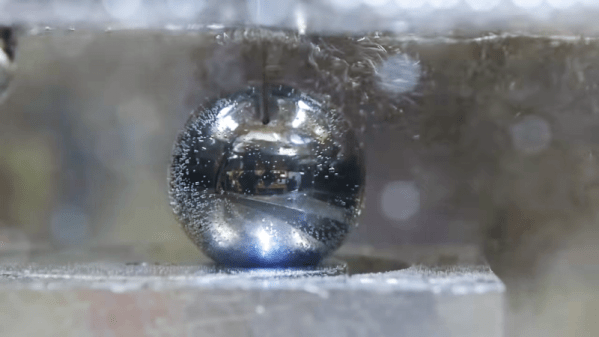
Luckily, these days we have electric discharge machining (EDM), a technique that opens up all kinds of possibilities. And just as luckily, [Ben Krasnow] got his hands on some EDM gear to try out, with fascinating results. As [Ben] explains, at its heart EDM is just the use of a small arc to ablate metal from a surface. The arc is precisely controlled, both its frequency via an arc controller, and its location using CNC motion control. The arc controller has always been the sticking point for home EDM, but the one [Ben] tried out, a BaxEDM BX17, is squarely aimed at the small shop market. The whole test platform that [Ben] built has a decidedly home-brew look to it, with a CNC gantry rigged up to a water tank, an EDM drill head spinning the drill rods slowly, and an airless paint gun providing high-pressure process fluid. The video below shows that it works remarkably well nonetheless.

While we’re certainly keen to see [Ben]’s promised videos on EDM milling and cutting, we doubt we’ll line up to shell out €2,950 for the arc controller he used. If you have more courage than money, this mains-powered EDM might be a better fit.

Continue reading “[Ben Krasnow] Drills Really Small Holes With Electricity”

EDM For The Cheap And Adventurous

Laser cutters, waterjets, plasma cutters, CNC routers – most hackerspaces and even many dedicated home-gamers seem to have some kind of fancy tool for cutting sheet goods into intricate shapes. But with no access to a CNC machine and a need to cut a complex shape from sheet metal, [AlchemistDagger] cooked up this bare-bones and somewhat dangerous EDM rig to get the job done.

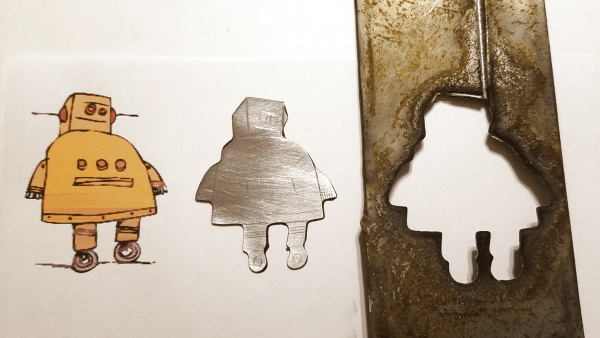
Electric discharge machining has been around for decades and is used a lot for harder metals like titanium and tool steel. The process makes sense to anyone who has seen contacts pitted and corroded by repeated arcing – an electric arc is used to remove metal from the workpiece, with a dielectric fluid used to cool the workpiece and flush away debris. For [AlchemistDagger]’s purposes, a lot of the complicated refinements, like high-frequency power supplies and precise tool positioning, were ignored. He built a simple linear slide to manually control the tool position, and the power supply was just a bridge rectifier connected to the 120-volt mains with some filter capacitors and a big light bulb as a ballast resistor. While the video below shows electrical conduit being notched, [AlchemistDagger] also made a brass cookie-cutter style tool to cut the Instructables logo from steel.

Obviously, mixing water and electricity is a recipe for disaster is you’re not careful, but this low-end EDM technique is a good one to file away for a rainy day. And if you’re looking for a little more sophistication in your homebrew EDM rig, we’ve got you covered there too. Continue reading “EDM For The Cheap And Adventurous”

DIY Barrel Rifling With 3D Printed Help

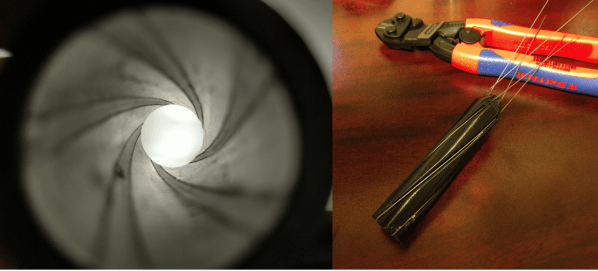
[Jeff Rodriguez] has been busy testing a feasible DIY method for rifling a barrel and has found some success using salt water, a power supply, wire, and 3D printed parts to create the grooves of rifling without the need for any moving parts or cutting tools. Salt water flows between the barrel’s inside surface and a 3D-printed piece that holds wires in a precise pattern. A current flows between the barrel and the wires (which do not actually touch the inside of the barrel) and material is eroded away as a result. 10-15 minutes later there are some promising looking grooves in the test piece thanks to his DIY process.

Rifled barrels have been common since at least the 19th century (although it was certainly an intensive process) and it still remains a job best left to industrial settings; anyone who needs a barrel today normally just purchases a rifled barrel blank from a manufacturer. No one makes their own unless they want to for some reason, but that’s exactly where [Jeff] is coming from. The process looks messy, but [Jeff] has had a lot of space to experiment with a variety of different methods to get different results.

Continue reading “DIY Barrel Rifling With 3D Printed Help”

Homemade EDM Can Cut Through Difficult Materials Like Magnets With Ease

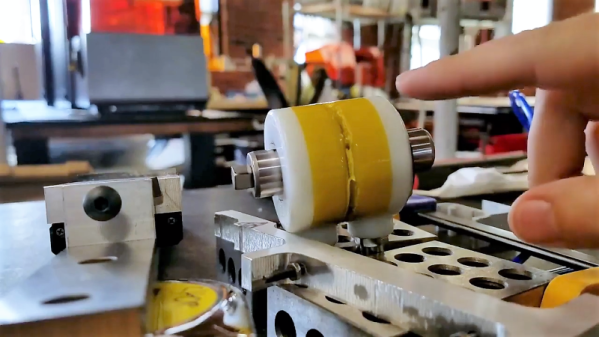
Many years ago [ScorchWorks] built an electrical-discharge machining tool (EDM) and recently decided to write about it. And there’s a video embedded after the break.

The build is based on the designs described in the book “Build an EDM” by Robert Langolois. An EDM works by creating lots of little electrical discharges between an electrode in the desired shape and a material underneath a dielectric solvent bath. This dissolves the material exactly where the operator would like it dissolved. It is one of the most precise and gentle machining operations possible.

His EDM is built mostly out of found parts. The power supply is a microwave oven transformer rewired with 18 gauge wire to drop the voltage to sixty volts instead of the oven’s original boost to 1.5kV.  The power resistor comes from a dryer element robbed from a unit sitting beside the road. The control board was etched using a hand traced schematic on the copper with a Sharpie.

The linear motion element are two square brass tubes, one sliding inside the other. A stepper motor slowly drives the electrode into the part. Coolant is pumped through the electrode which is held by a little 3D printed part.

The EDM works well, and he has a few example parts showing its ability to perform difficult cuts. Things such as a hole through a razor blade., a small hole through a very small piece of thick steel, and even a hole through a magnet.

Continue reading “Homemade EDM Can Cut Through Difficult Materials Like Magnets With Ease”

Removing A Broken Tap From Something Really Really Expensive

What happens when you break a tap or a bolt in a component whose price tag sits in the tens of thousands. Just drilling it out and throwing in a nut insert stops being acceptable. Is there a way to remove the tap without damaging the master part at all?

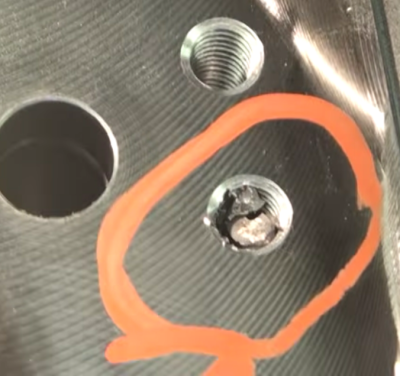
Broken tap stuck in the hole it was threading

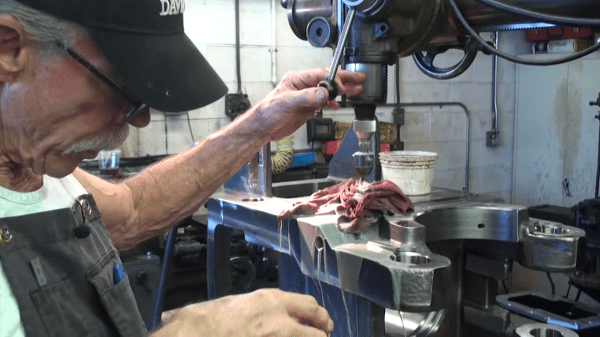
Well, that’s where [Tom Grafton] of Jerry’s Broken Drill and Tap comes in. He’s here to remove taps and chew bubblegum, and he’s definitely chewing bubble gum loudly the whole time. His primary work horse is a Metal Disintegration Machine.

A MDM is basically half of a typical wire EDM set-up. In EDM you used an electrode to punch a hole through the material. Then you thread a wire through the hole, thread it through a sometimes startling array of pulleys, and get going.

[Tom] used the MDM with an appropriately sized electrode to precisely disintegrate the middle of the tap out. After that it’s some careful work with a specially machined magnetic chisel. A quick chase of the threads with a tap and it’s back to the customer.

As you can see in the video after the break, the end result is a threaded hole that’s so indistinguishable from the rest he has to mark which one it was; presumably so the customer doesn’t forget why they’re paying him.

Continue reading “Removing A Broken Tap From Something Really Really Expensive”

Machine Metal With Electricity: An EDM Attachment For 3D Printers

[SuperUnknown] has revealed a secret project he’s been working on. He’s cooked up an EDM attachment for 3D printers, or any CNC machine for that matter. Electrical Discharge Machining (EDM) is a method of using sparks to machine metal. EDM isn’t a new technology, in fact commercial machines have been around since the 1960’s. If you’ve ever had an arc scar up your multimeter probes, you’ve unwittingly done a bit of EDM.

The theory behind EDM is simple: High voltage between the tool and workpiece causes sparks to jump between them. Each spark erodes the workpiece (and the tool). Big EDM machines perform their magic in a liquid which acts as both a dielectric and a flushing medium. This liquid can be anything from deionzed tap water to specially formulated oil. [SuperUnknown] is using good old-fashioned tap water.

edm-roughAs you can imagine, a single spark won’t erode much metal. EDM machines fire tens of thousands of times per second. The exact frequencies, voltages, and currents are secrets the machine manufacturers keep close to their chests. [SuperUnknown] is zeroing in on 65 volts at 2 amps, running at 35 kHz. He’s made some great progress, gouging into hardened files, removing broken taps from brass, and even eroding the impression of a coin in steel.

While we’d love to say this is a free open source project, [superUnknown] needs to pay the bills. He’s going with crowdsourced funding. No, not another Kickstarter. This project is taking a different route. The videos of the machine will be uploaded to YouTube and visible to [superUnknown’s] Patreon supporters. They will also be available for rent using YouTube’s new rental system. [SuperUnknown] has pledged to figure out a way to make the content available for starving college students and others with limited incomes.

Based upon his previous adventures with lil’ screwy, his homemade 100 ton press, and various other projects on the Arduino verses Evil YouTube channel, we think [superUnkown] has a pretty good chance of making home EDM work. Click past the break to see two videos of the 3D printer EDM toolhead in action. We should mention that [SuperUnknown] is rather colorful with his dialogue, so make sure you’re using headphones if you’re at work.

Continue reading “Machine Metal With Electricity: An EDM Attachment For 3D Printers”