The desktop manufacturing revolution has been incredible, unleashing powerful technologies that once were strictly confined to industrial and institutional users. If you doubt that, just look at 3D printing; with a sub-$200 investment, you can start making parts that have never existed before.
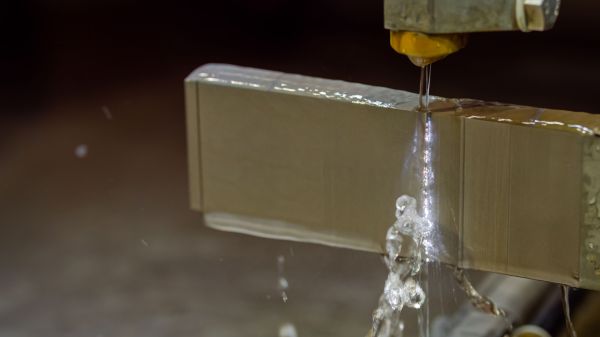
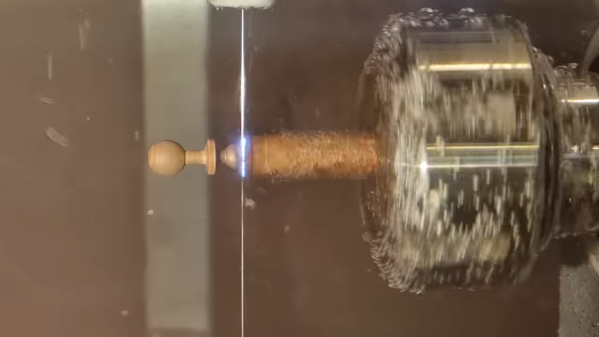
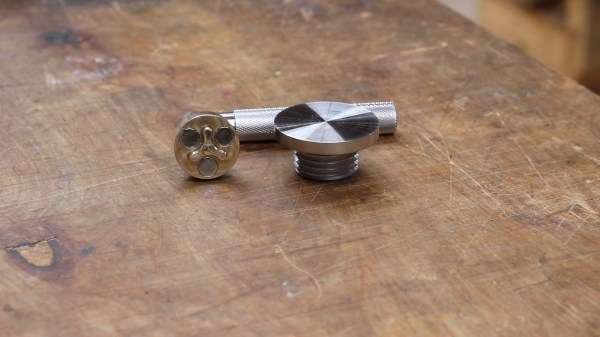
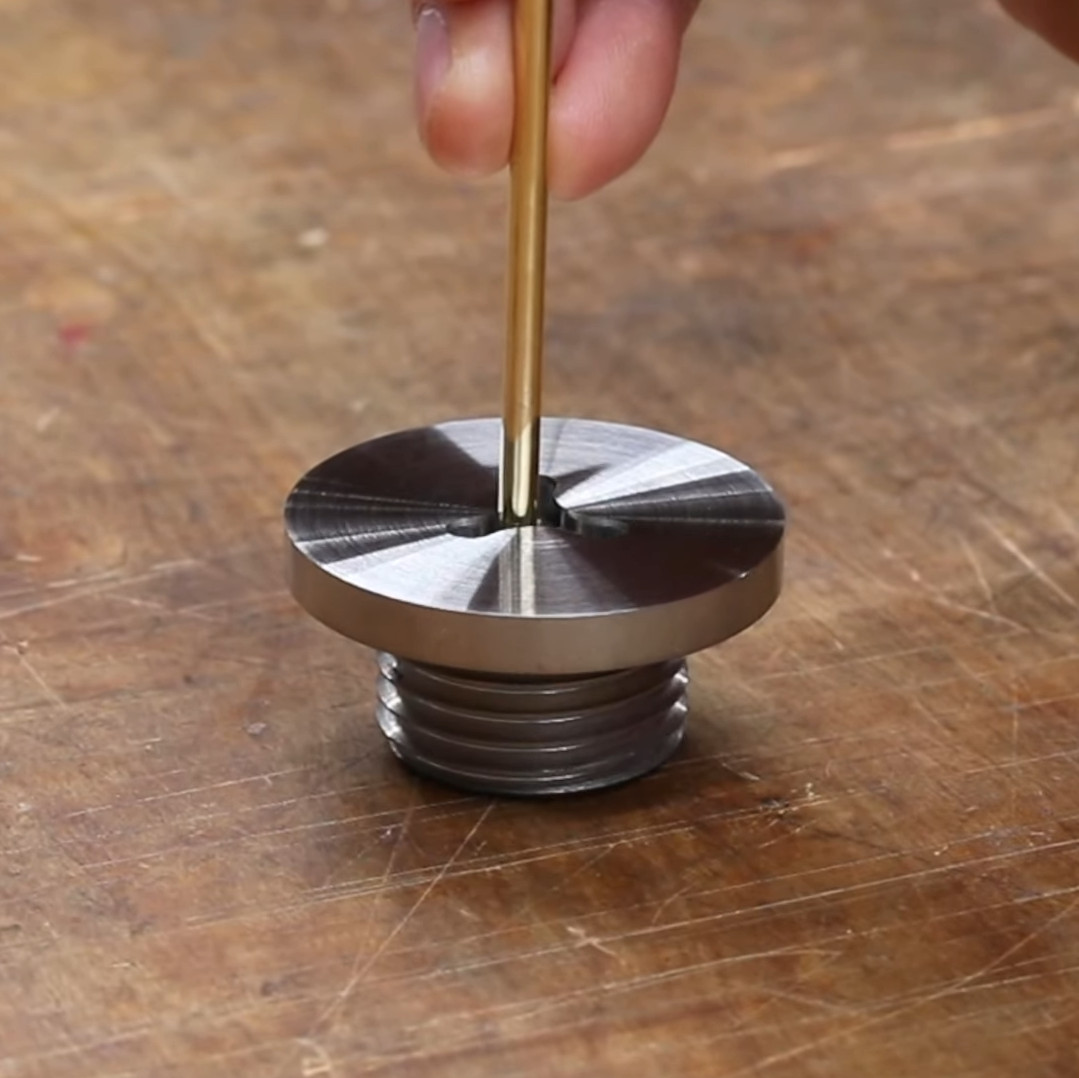
Sadly, though, most of this revolution has been geared toward making stuff from one or another type of plastic. Wouldn’t it be great if you could quickly whip up an aluminum part as easily and as cheaply as you can print something in PLA? That day might be at hand thanks to Powercore, a Kickstarter project that aims to bring the power of electric discharge machining (EDM) to the home gamer. The principle of EDM is simple — electric arcs can easily erode metal from a workpiece. EDM machines put that fact to work by putting a tool under CNC control and moving a precisely controlled electric arc around a workpiece to machine complex shapes quickly and cleanly.
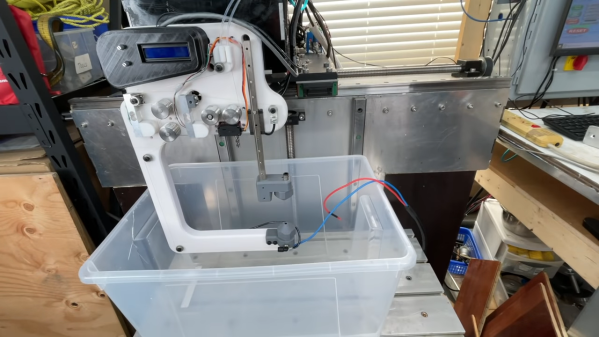
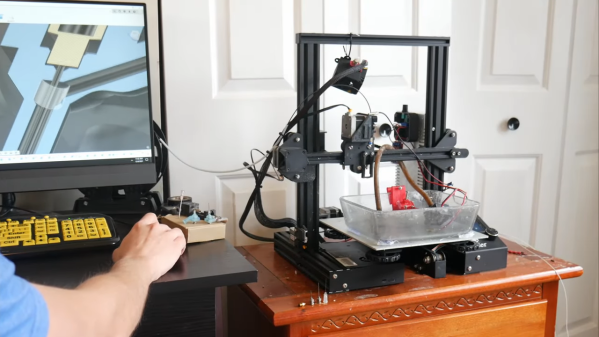
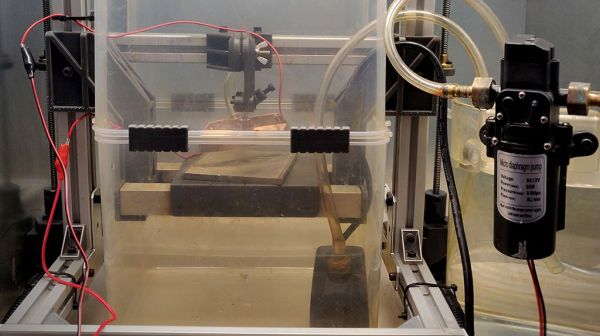
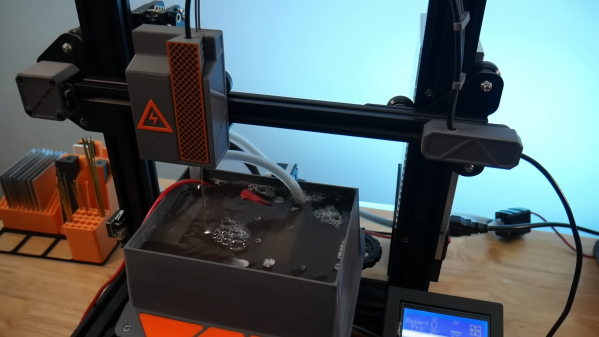
Compared to traditional subtractive manufacturing, EDM is a very gentle affair. That’s what makes EDM attractive to the home lab; where the typical metal-capable CNC mill requires huge castings to provide the stiffness needed to contain cutting forces, EDM can use light-duty structures and still turn out precision parts. In fact, Powercore is designed to replace the extruder of a bog-standard 3D printer, and consists almost entirely of parts printed on the very same machine. The video below shows a lot of detail on Powercore, including the very interesting approach to keeping costs down by creating power resistors from PCBs.
While we tend to shy away from flogging crowdfunded projects, this one really seems like it might make a difference to desktop manufacturing and be a real boon to the home lab. It’s also worth noting that this project has roots in the Hackaday community, being based as it is on [Dominik Meffert]’s sinker EDM machine.
Continue reading “Powercore Aims To Bring The Power Of EDM To Any 3D Printer”