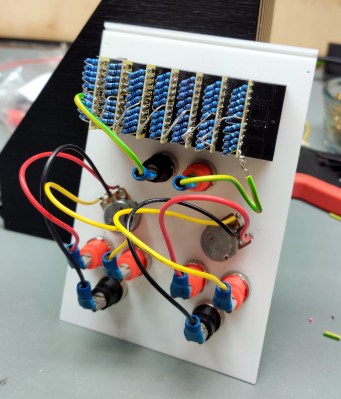
Hackaday editors Mike Szczys and Elliot Williams march to the beat of the hardware hacking drum as they recount the greatest hacks to hit the ‘net this week. First up: Casio stepped in it with a spurious DMCA takedown notice. There’s a finite matrix of resistors that form a glorious clock now on display at CERN. Will a patio paver solve your 3D printer noise problems? And if you ever build with copper clad, you can’t miss this speedrun of priceless prototyping protips.
Take a look at the links below if you want to follow along, and as always, tell us what you think about this episode in the comments!
It’s hardly a secret that getting into a serious electronics habit can be detrimental to your bank account. A professional grade lab is simply unobtainable for many a tinkerer, and even mid-range hardware can set you back considerably. Which is why many folks just starting out will attempt to salvage or build as much of their equipment as possible. It might not always be pretty, but it’ll get the job done.
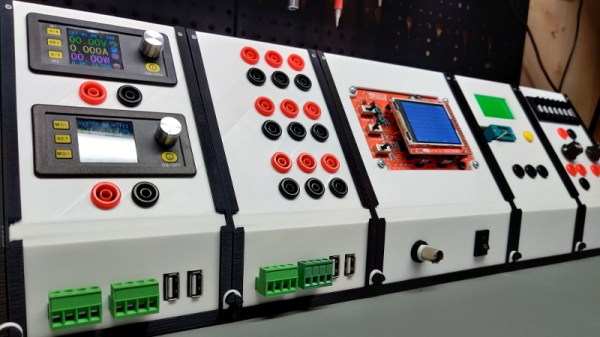
But this project by [Chrismettal] could end up completely reinventing the home electronic workspace. Using 3D printed frames, low-cost components, and a sprinkling of custom PCBs, this modular electronics workbench has all the bells and whistles an aspiring hardware hacker could need. As an added bonus, it looks like something that came off the International Space Station.
This is one of those projects that simply can’t be done justice in a few paragraphs. If you’ve ever wanted to put together a dedicated electronics workbench but were put off by the cost of individual components, read though the fantastic documentation [Chrismettal] has prepared for the EleLab_v2. Is it all top-of-the-line hardware? No, of course not. But it’s more than suitable for the kind of work people in this community usually find themselves involved in on a weekend.
So what’s included? Naturally [Chrismettal] has created a power supply module, in both variable and fixed flavors. But there’s also a module for a resistor substitution, a component tester, and even a digital storage oscilloscope. You can mix and match the modules suit your needs, and if you want to create entirely new ones, the FreeCAD sources are available to get you started.
We’ve seen low-cost power supply modules before, and naturally we’re no strangers to cheap DSO kits. But this project wraps those devices and gadgets up into a form factor that anyone would be happy to have on their bench. We’re exceptionally interested in seeing new modules developed for the EleLab_v2, and doubt this is the last time you’ll see this impressive project grace these pages.
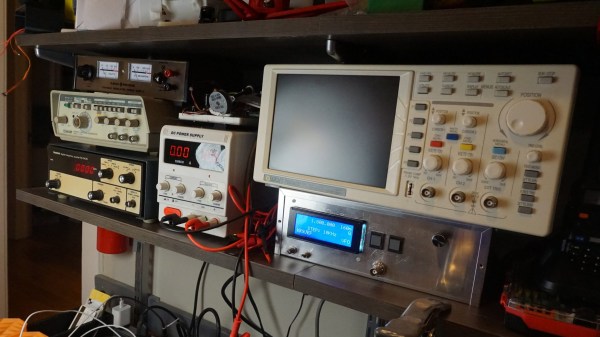
Ever been in a situation where you’re not sure where to begin building your own electronics workbench or improve your existing one? [Jeff Glass] writes in with a blog post as detailed as it is beautifully long, chronicling each and every part of his own home lab in order to give us some ideas on how to get one started.
Despite [Jeff] using his own workbench tools accrued over 10 years of working in the field as prime example, his guide takes into account that you don’t need the latest and most expensive in order to get working. Affordable examples of the tools presented are suggested, along with plenty of links to follow and what to look for in each one of them. He even goes on and aside to note the lack of affordable versions of bench-top multimeters, seeing how the portable counterparts are so cheap and plentiful in contrast.
However, contrary to [Jeff]’s claims, we would argue that there are things you could do without, such as the oscilloscope. And you could use a regular soldering iron instead of a soldering station if you are in a pinch. It just depends on the type of work you’re looking to do, and simpler tools can work just fine, that’s what they’re there for after all. That’s not to say his advice is all bad though, just that every job has different requirements, and he notes just that in the final notes as something to keep in mind when building your own lab.
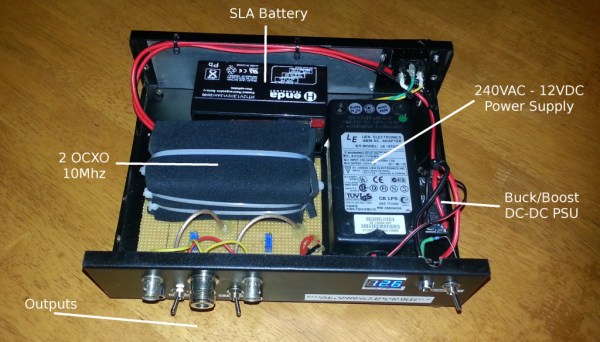
[Mark] wanted an accurate frequency reference for his electronics lab. He specified some requirements for the project, including portability, ability to work inside a building, and low cost. That ruled out GPS, cesium standard clocks, rubidium standard clocks, and left him looking for a low cost Oven Controlled Crystal Oscillator (OCXO).
The Low Cost 10 MHz Frequency Reference is based around a Morion OCXO. These Russian oscillators are available from eBay second hand at about $40 a pop. With a stability well within the requirements, [Mark] order a few.
The next step was to stick all the components in a box. The two OCXOs in the box need about 3 amps to heat up, which is provided by a 12 V PSU. For portability, a sealed lead acid battery was added. The front panel shows the supply voltages, switches between mains and battery supplies, and provides connectivity to the OCXOs.
Since OCXOs work by heating a crystal to a specific temperature, they can use quite a bit of power in the heating element. To increase battery life, a neoprene foam insulator was wrapped around the OCXOs.
For less than $100, this portable tool will aid in calibrating equipment or creating very accurate clocks.
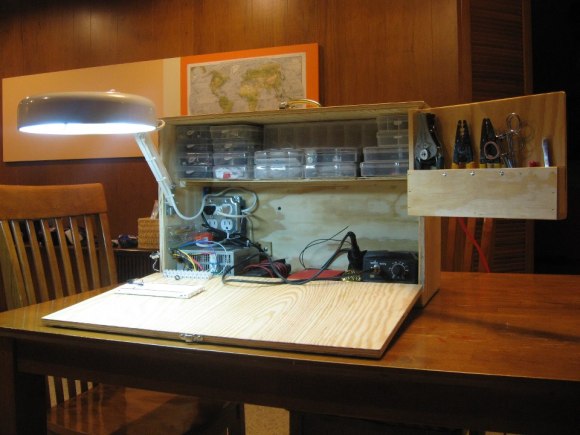
Anyway, back to the hack. [Brian’s] version of the Make Your Electronics Lab in a Box, is similar, but also unique. What we like about his version is the electrical outlets inside the box for plugging in tools, the super-handy-stash-away-magnifying-lamp, and the size of his box; lots of room for storing components up on the top shelf! The only thing he’s missing is his oscilloscope, which was a bit too deep for the box, so it had to stay separate.
Unless your lucky enough to have a big personal workshop where you can have dedicated stations for all kinds of different tools, you’re probably like most of us here at Hack a Day — lots of projects, but never enough space.
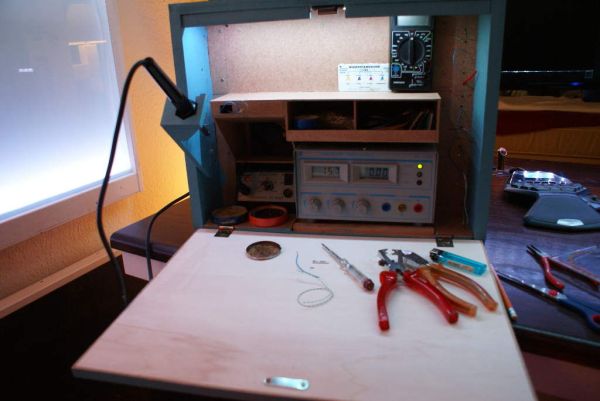
[McLovinGyver] lives in a small flat, and finds setup and cleanup time often take longer than the project itself — so he’s come up with this handy dandy Electronics-Lab-in-a-Box (trademark pending).
The guide is really more of a series of pictures of his process of building the portable lab, but he shows off some great ideas of things you might want to include in your own personal version of it. The first step is deciding what tools you need in the lab. In general, your power supply unit, soldering iron, hot air re-flow and fume exhaustion are going to dictate the general size and shape of your lab — from there, it’s just a matter of filling in the gaps with the rest of your small tools.