Attack On The Clones: A Review Of Two Common ESP8266 Mini D1 Boards

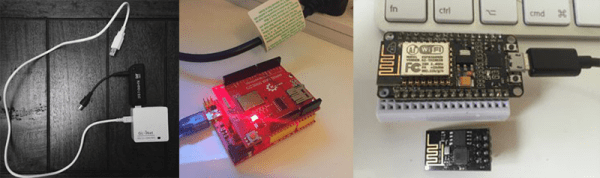
ESP8266-based development boards have proliferated rapidly. One favorite, the WEMOS Mini-D1 is frequently imitated and sold without any branding. As these boards continue to ship to hobbyists and retailers around the world, we thought it might be interesting to conduct a little experiment.

There are a few ESP8266 development boards available, and the most popular seem to be the NodeMCU ‘Amica’ board. Of course, there are dozens of other alternatives including the WiFiMCU, Sparkfun’s ESP8266 Thing, and Adafruit’s HUZZAH ESP8266. Given that, why is this review limited to the Mini D1 boards? Because the Mini D1 is the cheapest. Or was, until it was cloned.

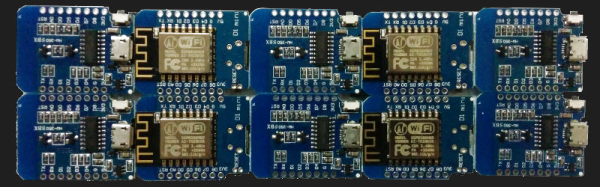
We took a look at some of these ‘clone’ boards to figure out the differences, find out if they work as intended, and perhaps most importantly, are these clone boards shipped out reliably. What are the results? Check that out below.

Continue reading “Attack On The Clones: A Review Of Two Common ESP8266 Mini D1 Boards”

Your Internet Of Things Speaks Volumes About You

If only Marv and Harry were burglars today; they might have found it much easier to case houses and — perhaps — would know which houses were occupied by technically inclined kids by capitalizing on the potential  vulnerability that [Luc Volders] has noticed on ThingSpeak.

As an IoT service, ThingSpeak takes data from an ESP-8266, graphs it, and publicly displays the data. Some of you may already see where this is going. While [Volders] was using the service for testing, he realized anyone could check the temperature of his man-cave — thereby inferring when the house was vacant since the location data also happened to be public. A little sleuthing uncovered several other channels with temperature data or otherwise tied to a location that those with nefarious intent could abuse.

Continue reading “Your Internet Of Things Speaks Volumes About You”

Open Sound Control Of Kitchen Lights

Controlling the Internet of Things is all about passing information around. Realistically, it doesn’t matter what is used, be it MQTT, HTTP, serial data, whatever, and it doesn’t really matter what data is sent as long as the sender and receiver agree on what the data means. MIDI could be used to pass information back and forth, for example and while MIDI is good for some things, Open Sound Control is a more modern alternative and one area where OSC excels over MIDI is Internet connectivity. [Matt] used OSC to control the lighting he installed in his kitchen.

kitchen_controller
ESP8622-1 and Buck Converter

[Matt] had moved in to a new house and wanted some under-cupboard lighting for his kitchen. He got a few cheap warm white LED lights from the Internet and went about wiring them together. For the controller, an ESP8266-1 was used as well as a 12 volt constant-current buck converter. The software runs on the Sming framework, rather than the Arduino framework, and listens for incoming OSC messages. When it receives a command on a specific channel, a callback function turns the lights on and off.  [Matt] also added a switch on the outside of the control box to manually turn the lights on and off.

OSC might not be the right choice for this project, and even [Matt] doesn’t know why he used it, but [Matt] got it working and uses an app on his phone to control it. If he wanted to, he could have used Ableton or another controller to control the lights. (He hasn’t wanted to yet.) OSC is an interesting alternative to MIDI and can also be used with an Arduino without an ethernet shield, or with RFID tags.

Dumbing Down A Smart Switch

Internet of Everything is the way to go for home automation these days. ITEAD makes an ESP-8266 switch that IoT-ifies your appliances. If you still have an ancient, 433 MHz style radio switch system, they even make one that does WiFi and 433 MHz. But if you’re too cheap to shell out for the dual-mode version, you can always add a $1 433 MHz radio yourself. Or at least, that’s what [Tinkerman] did.

IMG_20160522_163814x_thumbnail
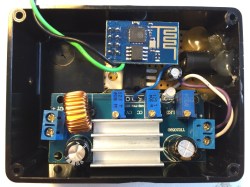
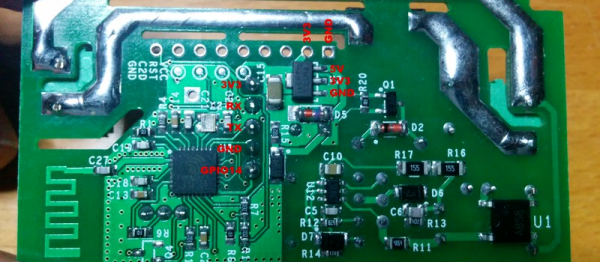
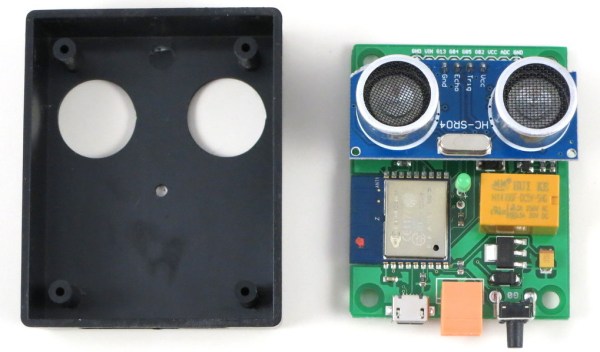
Aside from the teardown and reverse-engineering of the WiFi-enabled switch, [Tinkerman] also flashed custom firmware into the switch’s ESP-8266, and worked it all into his existing home Node-RED framework. Now he’s got more possible ways to turn on his living-room lights than any person could possibly hope for!

If you want to get into this whole WiFi-based home automation game, you could do worse than to have a look at the series we ran on MQTT just a little while ago. Seeing [Tinkerman]’s Node-RED demo makes us think that we’ll have to give that a look for our home system as well.

The Terrible Devices Of The Internet Of Wrongs

Last week was Bsides London, and [Steve Lord] was able to give a talk about the devices that could pass for either a terrible, poorly planned, ill-conceived Internet of Things Kickstarter, or something straight out of the NSA toolkit. [Steve] built the Internet of Wrongs, devices that shouldn’t exist, but thanks to all this electronic stuff, does.

Continue reading “The Terrible Devices Of The Internet Of Wrongs”

Minimal MQTT: Networked Nodes

Last time on Minimal MQTT, we used a Raspberry Pi to set up an MQTT broker — the central hub of a home data network. Now it’s time to add some sensor and display nodes and get this thing running. So pull out your ESP-8266 module of choice, and let’s get going.

DSCF8443For hardware, we’re using a WeMos D1 Mini because they’re really cute, and absolutely dirt cheap, but basically any ESP module will do. For instance, you can do the same on the simplest ESP-01 module if you’ve got your own USB-serial adapter and are willing to jumper some pins to get it into bootloader mode. If you insist on a deluxe development board that bears the Jolly Wrencher, we know some people.

NodeMCU: Getting the Firmware

We’re using the NodeMCU firmware because it’s quick and easy to get running. But you’re not stuck with NodeMCU if you want to go it alone: MQTT has broad support. [TuanPM] ported over an MQTT library to the native ESP8266 SDK and of course there’s espduino, a port for an Arduino-plus-ESP combo. He also ported the MQTT module to NodeMCU that we’ll be using today. Thanks, [TuanPM]!

Continue reading “Minimal MQTT: Networked Nodes”

YAGDO – Yet Another Garage Door Opener

It seems like every few months we cover another garage door opener, and the concept is quickly becoming the “Hello World” of DIY home automation. In this installment, reader [ray] made his own garage door opener and chose the ESP8266 as the wireless interface of choice, but spiced the application up with an ultrasonic sensor that detects whether the car is in the garage and a web app that shows history, plus integration with Blynk for remote access. For posterity, he made the project open source as well.

The video is well produced with lots of details and instructions, and the circuit board and assembly are refined and clean. It may be a “Hello World”, but it’s done right.

Some of the other garage door hacks we’ve covered in the last year include the fingerprint scanner opener, the IM-ME opener, the motion-based security opener, the cat-enabled opener, the OpenCV Pi opener, and a Bluetooth Low Energy opener.

Continue reading “YAGDO – Yet Another Garage Door Opener”