Nixie Tube Energy Meter Dresses Up Front Hall

When you move into a new house, there’s always something that needs fixing up. A bit of paint and some new drapes may help freshen up the place and put your mark on it, but things like exposed wiring and a very utilitarian looking electrical panel in your front hall are altogether different. Unwilling to live with the mess, [John Whittington] decided to enclose his utility panel and add a Nixie tube IoT watt meter to dress things up while monitoring energy usage.
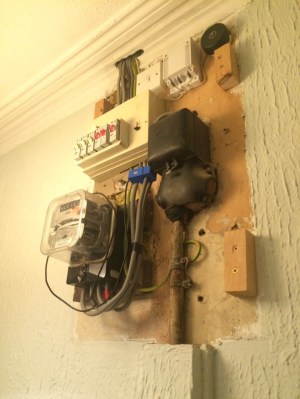
IMG_8991-e1451227735242Looking at the “before” pictures on [John]’s blog, we can see why he’d want to invest the effort – not exactly an attractive way to greet guests at the front door. A simple wooden box to replace the previous cover would have sufficed, but why pass up the opportunity to add value? [John] opted for a Nixie tube display to complement the glass of the electric meter. The Nixie modules were a bit on the pricey side, though, so with only a pair of tubes to work with, [John] came up with a clever system to indicate the scale of the display. We doubt he’ll ever see megawatt-level instantaneous power draw, but the meter is also capable of totalling energy use, and as a bonus an ESP-8266 gives lets him stream data to the web.

We’ve featured tons of Nixie projects before – everything from clocks to cufflinks. We have to agree that [John]’s Nixie project turned out great, and it’s sure to be a conversation starter with arriving guests.

Continue reading “Nixie Tube Energy Meter Dresses Up Front Hall”

Squash Your ESP-8266 Bugs With ESP-gdbstub

We hope we’re not insulting you by suggesting this, but it’s possible that even the best among us may be faced with bugs in our embedded code from time to time. And while we’re great fans of printf debugging over the serial port, and its high-speed equivalent — flipping a GPIO pin — there’s a time when your bug is so deep that having a real debugger is the best way to dig it out.

[slaff] has been doing some great work documenting C/C++ programming on the ESP-8266, mostly using Eclipse and some of the Arduino libraries. In the fourth part of his series of posts, he walks through using a couple debugger options for the ESP. What makes this all work is the ESP-gdbstub code from Espressif themselves. gdbstub looks great — it works both with the standard SDK as well as with FreeRTOS, so you can debug your ESP-8266 code whether it’s in an OS or on the bare metal. And all this just using the standard serial connection that’s used for programming.

Now, this still may not help with timing-related bugs. ESP-gdbstub uses the serial port, after all. But having the ability to set breakpoints and interactively inspect what’s going on in the chip’s memory is priceless, and doing so with no extra hardware connections is brilliant.

Continue reading “Squash Your ESP-8266 Bugs With ESP-gdbstub”

Fight Frost With An Internet Of Things Fridge Alarm

It has been incredibly humid around these parts over the last week, and there seems to be something about these dog days that makes you leave the fridge or freezer door open by mistake. [pnjensen] found this happening all too often to the family chill chest, with the predictable accretion of frost on the coils as the water vapor condensed out of the entrained humid air and froze. The WiFi-enabled fridge alarm he built to fight this is a pretty neat hack with lots of potential for expansion.

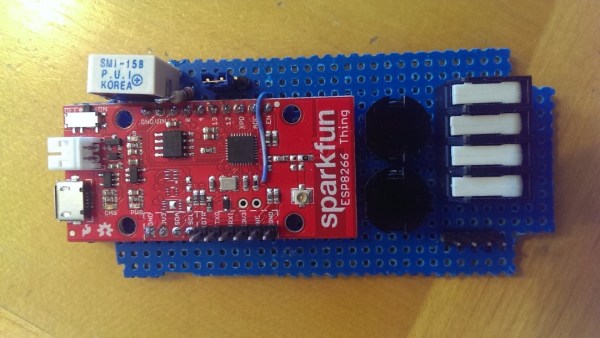
Based on a Sparkfun ESP8266 Thing and home-brew door sensors built from copper tape, the alarm is rigged to sound after 120 seconds of the door being open. From the description it seems like the on-board buzzer provides a periodic reminder pip while the door is open before going into constant alarm and sending an SMS message or email; that’s a nice touch, and having the local alarm in addition to the text or email is good practice. As a bonus, [pjensen] also gets a log of each opening and closing of the fridge and freezer. As for expansion, the I2C header is just waiting for more sensors to be added, and the built-in LiPo charger would provide redundancy in a power failure.

If frost buildup is less a problem for you than midnight snack runs causing another kind of buildup, you might want to check out this willpower-enhancing IoT fridge alarm.

Hello RAMPS, Meet ESP8266

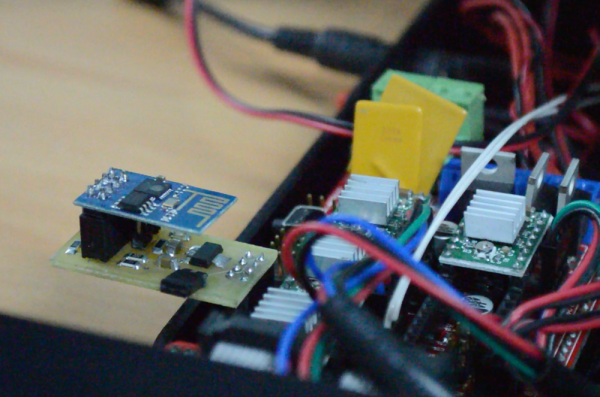
The proliferation of  DIY 3D printers has been helped in large measure by the awesome open-source RepRap project. A major part of this project is the RAMPS board – a single control board / shield to which all of the other parts of the printer can be easily hooked up. A USB connection to a computer is the usual link of choice, unless the RAMPS board has the SD-Card option to allow the 3D printer to operate untethered. [Chetan Patil] from CreatorBot built a breakout board to help attach either the ESP8266 WiFi or the HC-05 Bluetooth module to the Aux-1 header on the RAMPS board. This lets him stream G-code to the printer and allow remote control and monitoring.

While the cheap ESP8266 modules are the current flavor of the season with Hackers, getting them to work can be quite a hair tearing exercise. So [Chetan] did some hacking to figure out the tool chain for developing on the ESP module and found that LUA API from NodeMcu would be a good start. The breakout board is nothing more than a few headers for the ESP8266, the HC-05 and the Aux-1 connections, with a few resistors, a switch to set boot loader mode and a 3.3V regulator. If you’re new to the ESP8266, use this quick, handy, guide by [Peter Jennings] to get started with the NodeMCU and Lualoader. [Chetan]’s code for flashing on the ESP8266, along with the Eagle board design files are available via his Github repo. Just flash the code to the ESP8266 and you’re ready to go.

One gotcha to be aware of is to plug in the ESP module after the printer has booted up. Otherwise the initial communication from the ESP module causes the printer to lock up. We are sure this is something that can be taken care of with an improved breakout board design. Maybe use a digital signal from the Arduino Mega on the RAMPS board to keep the ESP module disabled for a while during start up, perhaps? The video after the break gives a short overview of the hack.

Continue reading “Hello RAMPS, Meet ESP8266”

Hackaday Prize Worldwide : New Delhi Kicad + Show And Tell

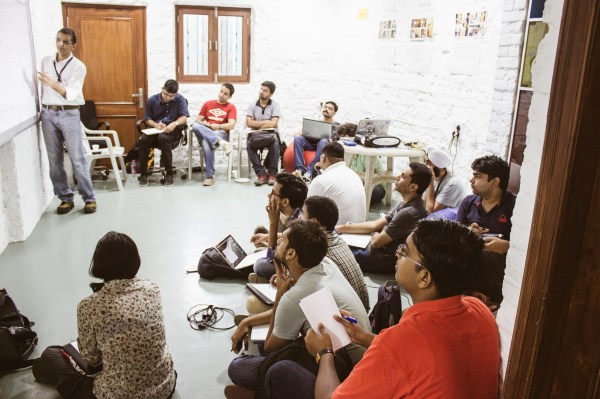
While Mumbai and Bengaluru have an active and large hacker community, New Delhi, India’s capital, seems to have leapfrogged ahead when it comes to hackerspaces – four at last count. So when the latest one in town, Maker’s Asylum, opened it’s doors last month, we decided to put together a hacker congregation to bring the community together and introduce them to the Hackaday Prize. Having already done Hackaday Prize bring-a-hack events in Mumbai and Bengaluru, we thought of doing something more substantial – a day long KiCad EDA workshop followed in the evening by a Show-n-Tell brag show.

Hackaday’s [Matt Berggren a.k.a. @technolomaniac] has done a couple of “Design a PCB from zero to WiFi with Hackaday!” Eagle EDA workshops recently. He designed a simple breakout board that allowed connecting an ESP-01 module to the USB port via an USB-UART cable with level conversion, pull up resistors and push button switches to make it easy to program. We had a slightly delayed start, so I quickly rushed through the awesome presentation that [Matt] has prepared, running through the “What is a PCB?” section and skipping the rest. We also discussed a couple of candidate designs for the day’s workshop – a pair of ATtiny line following robots, a simple Attiny SmartLED controller, but eventually, everyone got excited when I mentioned “ESP-8266” !

Continue reading “Hackaday Prize Worldwide : New Delhi Kicad + Show And Tell”

DIY ESP8266 Development Board

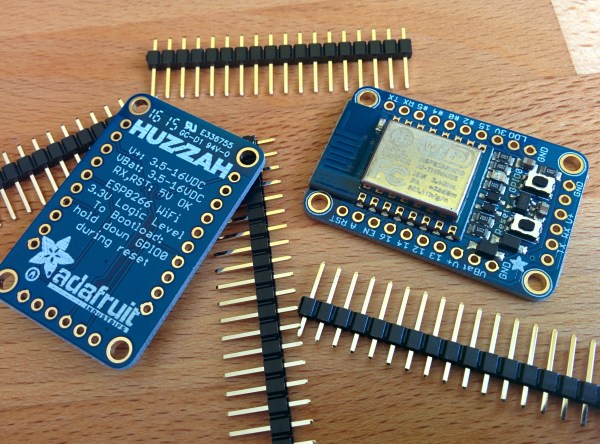
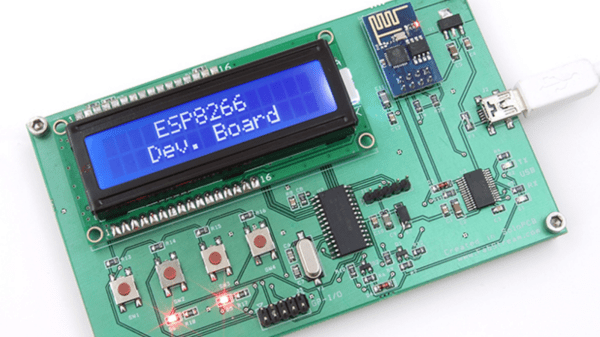
Those small, super-cheap, ESP8266 modules are being installed everywhere, creating all sorts of frivolous internet connected thingamajigs. But consider this period as a training ground of sorts, as hackers smarten their chops on figuring out how to get the best out of this IoT gravy train. Right now, getting the ESP8266 to work requires a fair amount of work and to make things easier, [Abdulgafur] built a ESP8266 development board.

The dev board lets the user connect the ESP8266 to a PIC micro controller as well as to a host PC. In addition, it hosts several peripherals such as a 2×16 LCD display, 4 push buttons, couple of indicator LEDs and some GPIO’s broken out to a header. PC communication is via a FT232RL USB-UART converter over a Mini-USB connector. There’s also a few bi-directional level converters to translate between 5V and 3.3V and pull-up resistors for the ESP8266.

As of now, the dev board only supports the ESP8266-01 module. A nice upgrade would be to add support for other ESP8266 modules too. Maybe a separate, 3d printed, pogo pinned, test fixture for the other modules. If you plan to build you own version, [Abdulgafur] has the schematic, PCB and BoM available for download, although we couldn’t spot the PIC code, so you might have to ask for that. And it would be a good idea to remove the GND copper pour from under the ESP8266 footprint.

ESP8266 WiFi Throwies

A few years ago, someone figured out you can take an LED, a coin cell battery, and a magnet, tape them together, and throw them on every conceivable metallic surface. This was the creation of LED throwies, and the world was much worse off for its invention.

With the ESP-8266 WiFi module, we have a tiny, tiny device with a WiFi radio, and just enough processing power to do something interesting. What does that mean? WiFi throwies.

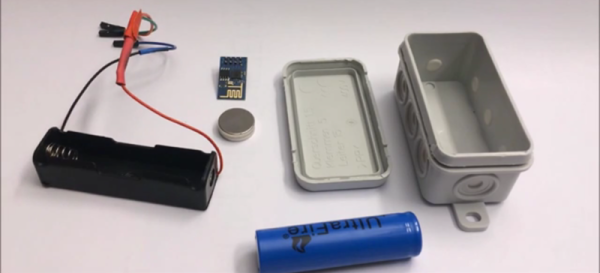
[Andreas Reischle] stuffed an ESP-8266 WiFi module and a lithium cell inside a weatherproof controller loaded up with magnets. On its own, these wouldn’t do much, but with the right combination of software, this little magnetic box can serve as an access point, serving up small JavaScript games to anyone who connects.

The software is based on the NodeMCU firmware and features a web server and a DNS server. The utility of a web server is obvious, and the DNS server redirects all traffic to the device’s index.html file, where a menu of small JavaScript games are presented.

It’s much better than polluting the world with LEDs and lithium; this one has Hunt the Wumpus on it.

Thanks [Oliver] for the tip.

Continue reading “ESP8266 WiFi Throwies”