This Home-Etched ARM Dev Board Is A Work Of Art

One of the step changes in electronic construction at our level over the last ten or fifteen years has been the availability of cheap high-quality printed circuit boards. What used to cost hundreds of dollars is now essentially an impulse buy, allowing the most intricate of devices to be easily worked with. Many of us have put away our etching baths for good, often with a sigh of relief.

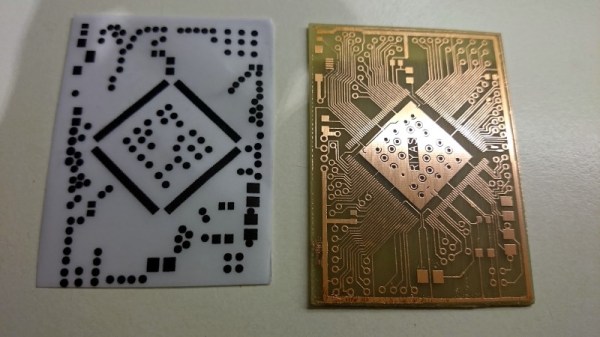
We’re pleased that [Riyas] hasn’t though, because they’ve etched an STM32 dev board that if we didn’t know otherwise we’d swear had been produced professionally. It sports a 176-pin variant of an STM32F4 on a single-sided board, seemingly without the annoying extra copper or lack-of-copper that we remember from home etching. We applaud the etching skill that went into it, and we’ll ignore the one or two boards that didn’t go entirely to plan. A coat of green solder mask and some tinning, and it looks for all the world as though it might have emerged from a commercial plant. All the board files are available to download along with firmware samples should you wish to try making one yourself, though we won’t blame you for ordering it from a board house instead.

It’s always nice to see that single board computers are not the sole preserve of manufacturers. If the RC2014 Micro doesn’t isn’t quite your style, there’s always the Blueberry Pi which features a considerably higher penguin quotient.

Homemade Integrated Circuits Hack Chat

Join us on Wednesday, August 14th at noon Pacific for the Homemade Integrated Circuits Hack Chat with Sam Zeloof!

While most of us are content to buy the chips we need to build our projects, there’s a small group of hackers more interested in making the chips themselves. What it takes the big guys a billion-dollar fab to accomplish, these hobbyists are doing with second-hand equipment, chemicals found in roach killers and rust removers, and a lot of determination to do what no DIYer has done before.

Sam Zeloof is one of this dedicated band, and we’ve been following his progress for years. While he was still in high school, he turned the family garage into a physics lab and turned out his first simple diodes. Later came a MOSFET, and eventually the Z1, a dual-differential amp chip that is the first IC produced by a hobbyist using photolithography.

Sam just completed his first year at Carnegie-Mellon, and he’s agreed to take some precious summer vacation time to host the Hack Chat. Join us as we learn all about the Z1, find out what improvements he’s made to his process, and see what’s next for him both at college and in his own lab.

join-hack-chatOur Hack Chats are live community events in the Hackaday.io Hack Chat group messaging. This week we’ll be sitting down on Wednesday, August 14 at 12:00 PM Pacific time. If time zones have got you down, we have a handy time zone converter.

Click that speech bubble to the right, and you’ll be taken directly to the Hack Chat group on Hackaday.io. You don’t have to wait until Wednesday; join whenever you want and you can see what the community is talking about.

Etching Aluminium Coins, Just For Fun

[MakeFailRepeat] was heading to MakerCentral in Birmingham, an event to which many makers were bringing coins to swap and trade. Wanting to get in on the action, he decided to etch some coins of his very own.

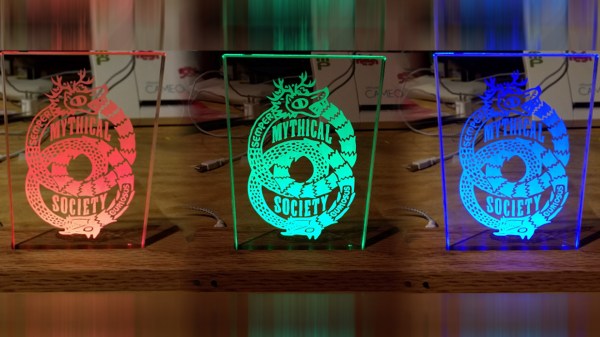
Etching aluminium is a simple process, readily accessible to the average maker. [MakeFailRepeat] started with an aluminium bar, and applied sticky-backed vinyl to the surface. This was then lasercut with the coin artwork, and the pieces removed to leave a negative space design for etching. With the resist layer in place, the aluminium was placed in a bath of salt water, and attached to the positive electrode of a DC supply or battery. With the negative electrode attached to a bolt, the aluminium is left to etch, with care taken to avoid over-etching. As a final finishing step, the coins were then placed in a cobbled-together rock tumbler, using scrap 3D printer filament as media.

The coins are a little rough around the edges, but we think they’re great for a first attempt. There’s plenty of different ways to etch; toner transfer is a particularly popular method. Video after the break.

Continue reading “Etching Aluminium Coins, Just For Fun”

How Do You Etch Something You Can’t Move?

We probably don’t need to tell this to the average Hackaday reader, but we’re living in a largely disposable society. Far too many things are built as cheaply as possible, either because manufacturers know you won’t keep it for long, or because they don’t want you to. Of course, the choice if yours if you wish to you accept this lifestyle or not.

Like many of us, [Erik] does not. When the painted markings on his stove become so worn that he couldn’t see them clearly, he wasn’t about to hop off to the appliance store to buy a new one. He decided to take things into his own hands and fix the poor job the original manufacturers did in the first place. Rather than paint on new markings, he put science to work and electroetched them into the metal.

Whether or not you’ve got a stove that needs some sprucing up, this technique is absolutely something worth adding to your box of tricks. Using the same methods that [Erik] did in his kitchen, you could etch an awesome control panel for your next device.

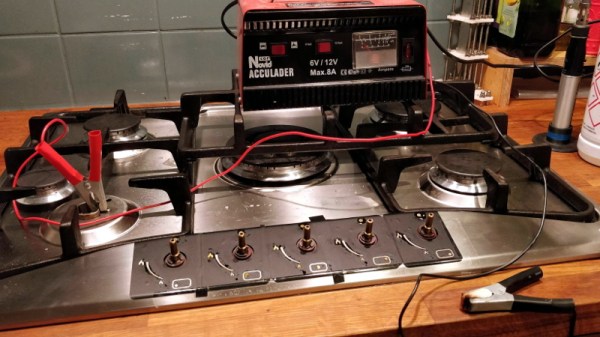
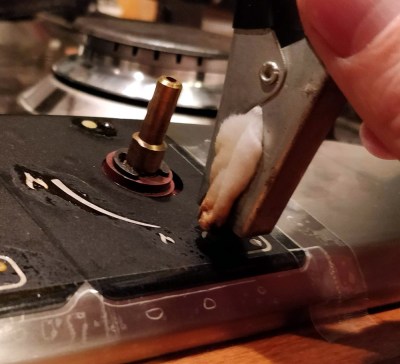
So how did he do it? Despite the scary multisyllabic name, it’s actually quite easy. Normally the piece to be etched would go into a bath of salt water for this process, but obviously that wasn’t going to work here. So [Erik] clipped the positive clamp of a 12 V battery charger to the stove itself, and in the negative clamp put a piece of gauze soaked in salt water. Touching the gauze to the stove would then eat away the metal at the point of contact. All he needed to complete the project were some stencils he made on a vinyl cutter.

We’ve previously covered using electricity to etch metal in the workshop, as well as the gorgeous results that are possible with acid etched brass. Next time you’re looking to make some permanent marks in a piece of metal, perhaps you should give etching a try.

[via /r/DIY]

DIY Vacuum Table Enhances PCB Milling

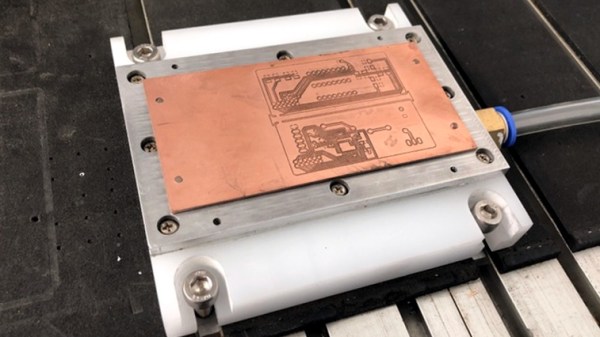
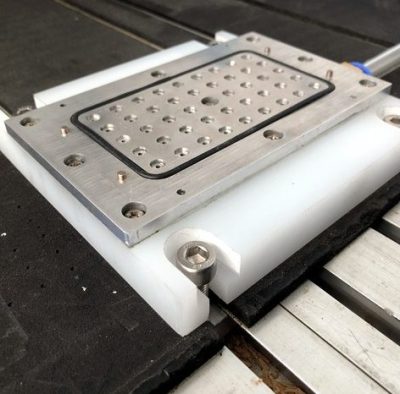
CNC milling a copper-clad board is an effective way to create a PCB by cutting away copper to form traces instead of etching it away chemically, and [loska] has improved that process further with his DIY PCB vacuum table. The small unit will accommodate a 100 x 80 mm board size, which was not chosen by accident. That’s the maximum board size that the free version of Eagle CAD will process.

When it comes to milling PCBs, double-sided tape or toe clamps are easy solutions to holding down a board, but [loska]’s unit has purpose behind its added features. The rigid aluminum base and vacuum help ensure the board is pulled completely flat and held secure without any need for external fasteners or adhesives. It’s even liquid-proof, should cutting fluid be used during the process. Also, the four raised pegs provide a way to reliably make double-sided PCBs. By using a blank with holes to match the pegs, the board’s position can be precisely controlled, ensuring that the back side of the board is cut to match the front. Holes if required are drilled in a separate process by using a thin wasteboard.

Milling copper-clad boards is becoming more accessible every year; if you’re intrigued by the idea our own [Adil Malik] provided an excellent walkthrough of the workflow and requirements for milling instead of etching.

Of Roach Killer And Rust Remover: Sam Zeloof’s Garage-Made Chips

A normal life in hacking, if there is such a thing, seems to follow a predictable trajectory, at least in terms of the physical space it occupies. We generally start small, working on a few simple projects on the kitchen table, or if we start young enough, perhaps on a desk in our childhood bedroom. Time passes, our skills increase, and with them the need for space. Soon we’re claiming an unused room or a corner of the basement. Skills build on skills, gear accumulates, and before you know it, the garage is no longer a place for cars but a place for pushing back the darkness of our own ignorance and expanding our horizons into parts unknown.

It appears that Sam Zeloof’s annexation of the family garage occurred fairly early in life, and to a level that’s hard to comprehend. Sam seems to have caught the hacking bug early, and by the time high school rolled around, he was building out a remarkably well-equipped semiconductor fabrication lab at home. Sam has been posting his progress regularly on his own blog and on Twitter, and he dropped by the 2018 Superconference to give everyone a lesson on semiconductor physics and how he became the first hobbyist to produce an integrated circuit using lithographic processes.

Continue reading “Of Roach Killer And Rust Remover: Sam Zeloof’s Garage-Made Chips”

Etch Your Own Circuit Boards In Your Kitchen

Right now, you can design a PCB, send it off to a PCB fab, and get professional finished boards in a few days for less than a dollar per square inch. This is fantastic, and it’s the driving force behind ever-dropping costs of hardware development. That’s great and all, but you can make circuit boards at home, easily, and without involving too many toxic chemicals. That’s exactly what [videoschmideo] did, and the results are pretty good.

The process starts with a single-sided copper clad board that would be readily obtainable at Radio Shack if there were any of those around anymore. Once the circuit is designed, the traces and pads are printed (mirrored) out onto sticker backing paper. The toner from your laser printer is transferred to the copper with a clothes iron.

The tricky part about creating a PCB is taking away all the copper you don’t want, and for this tutorial [videoschmideo] is using a vinegar and hydrogen peroxide process. If you’re using stuff you can buy at the grocery store, you’re only getting 3% acetic acid and 3% peroxide, but given enough time and enough peroxide, it’ll do the job. After the board is etched, [videoschmideo] neutralizes the copper acetate produced with aluminum foil. The end product isn’t the safest thing in the world, but aluminum salts are much more environmentally friendly than copper compounds.

Making PCBs at home isn’t anything new, but it’s nice to be reminded that you can do so even with minimal effort and chemicals that you could rinse your mouth with. Once you do, though, you’ll probably have to drill some holes in the board. Yes, you could use a dremel, but a nice small drill press is a pleasure, and well worth the investment.