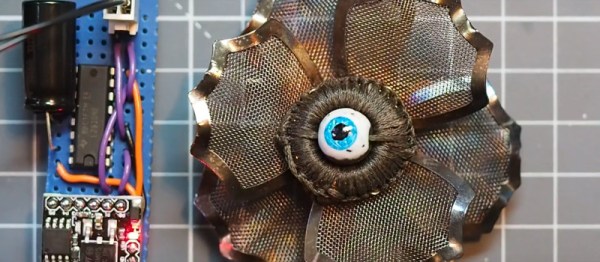
Inspired by some impressive work on textile flip-bit displays, and with creative steampunk outfits to create for Christmas, [Richard Sewell] had the idea for a flippable magnetic eye in the manner of a flip-dot display. These devices are bistable mechanical displays in which a magnet is suspended above a coil of wire, and “flipped” in orientation under the influence of a magnetic field from the coil.
In [Richard]’s case the eyeball was provided by a magnetic bead with a suitable paint job, and the coil was a hand-wound affair with some extremely neat lacing to keep it all in place. The coil requires about 200 mA to ensure the eye flips, and the job of driving it is performed by a Digispark ATTiny85 board with an LM293 dual H-bridge driver upon which the two bridges are wired in parallel. The whole is mounted in the centre of a charity shop brooch that has been heat-treated to give a suitable aesthetic.
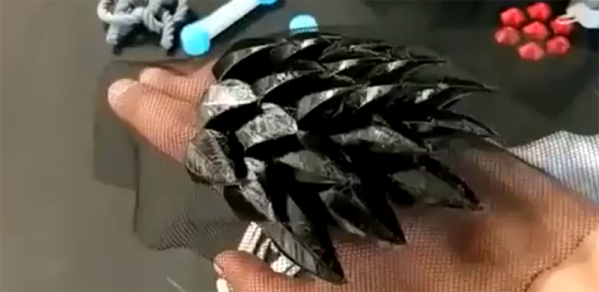
Last week, [David Shorey] came along to the monthly Hackaday meetup in Pasadena. These meetups feature speakers and drinks, projects and chit-chat, and sometimes a few demos of what the local Hackaday community has been working on. [David]’s impromptu demo was something no one had ever seen before. It’s 3D printed tiles embedded in fabric. This is the beginning of 3D printed flexible armor, a great method for cosplay builds, and a really cool way to add another trick to your 3D printing toolkit.
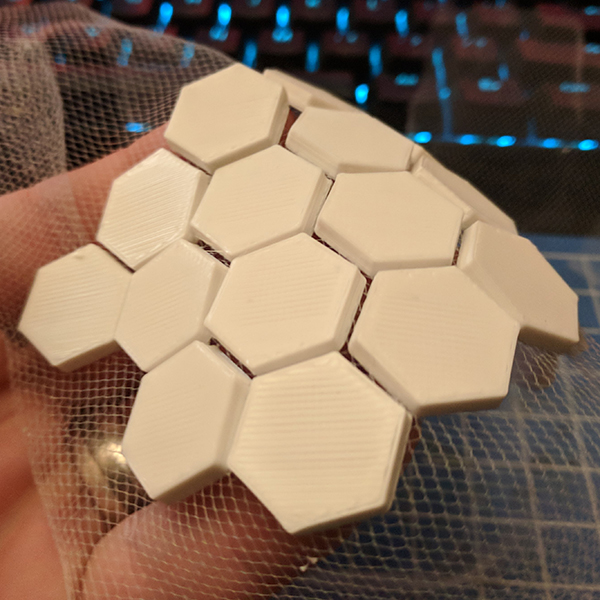
The steps to reproduce this project are actually very easy. The most important bit is the fabric itself. This is just a piece of tulle, a fine fabric mesh that’s usually used for bridal veils. According to members of the 3D printing community, you can pick up some tulle in the fabric department of any WalMart. The steps to reproduce this technique are simply to print three layers, pause the print and move the head out of the way, lay the tulle down on the print, and hit resume.
Judging from the commentary surrounding this new technique, there are a few tips and tricks to get the most out of this 3D printable fabric. The fabric should be taut and held down with either tape or binder clips. Melting or burning doesn’t seem to be an issue, but tulle made out of nylon is fairly common, and printing 3D panels with exotic filaments that require high temperatures may result in a mess.
While very cool, there are some limitations to the technique. If, for example, you are building a suit of body armor out of bendable tessallatable panels, you will have to assemble a quilt made out of panels as large as your print bed. This could be made easier by sewing (or gluing) the tulle/scale assembly onto a larger piece of fabric. Alternatively, the process could be modified for use with an Infinite Build Volume printer. This would give you yards and yards of 3D printed scales, ready to be fashioned into an outfit.
This is one of the most interesting techniques to bring 3D printing into the domain of ‘soft’ hacks and fashion we’ve ever seen. If you want to check out what’s possible with this, be sure to follow [David] on Twitter and out his Instagram. There are a lot of really great ideas there.
As with most ideas in 3D printing, this is one that’s been done before, albeit at not such a high level. [Drato] a.k.a. [RobotMama] did pretty much the same thing a few months ago, and we thank her for her contribution to the community.
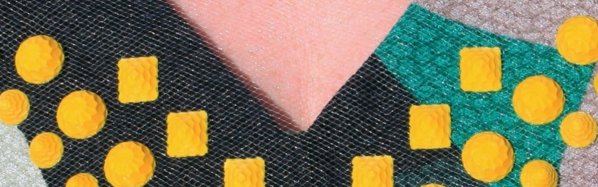
If you want to build wearables, you need to know how to sew, right? Maybe not. While we’re sure it would come in handy, [Drato] (also known as [RobotMama]) shows how she prints designs directly on a net-like fabric. You can see a video of the process below.
The video after the break shows an Ultimaker, but there’s really nothing particularly special about the printer. The trick is to print a few layers, pause, and then insert the fabric under the printer before resuming the print.
[Drato] holds the fabric down after inserting it, and mentions you can use glue to hold it down, too. We wondered if some bulldog or alligator clips might work. The only thing we worried about is if the fabric were made of some synthetic, it might not take hot plastic without melting.
[Drato] mentions she uses Organza, which is a sheer fabric often found on wedding gowns. However, she doesn’t mention if she is using the polyester, silk, or nylon type of the fabric. A little research shows that polyester and nylon fabrics melt at about 295 C. Silk was harder to track down, but since you can iron it on a medium setting, that might work, too. Of course, the temperature where it melts and the temperature where it just deforms beyond use might be different, so some experimentation is probably wise.
What really piqued our interest was the application to creating wearables without sewing. We’ll be curious what other applications you could find for printing directly on a fabric substrate.
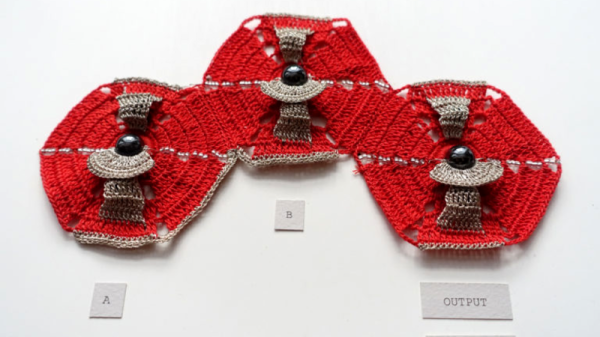
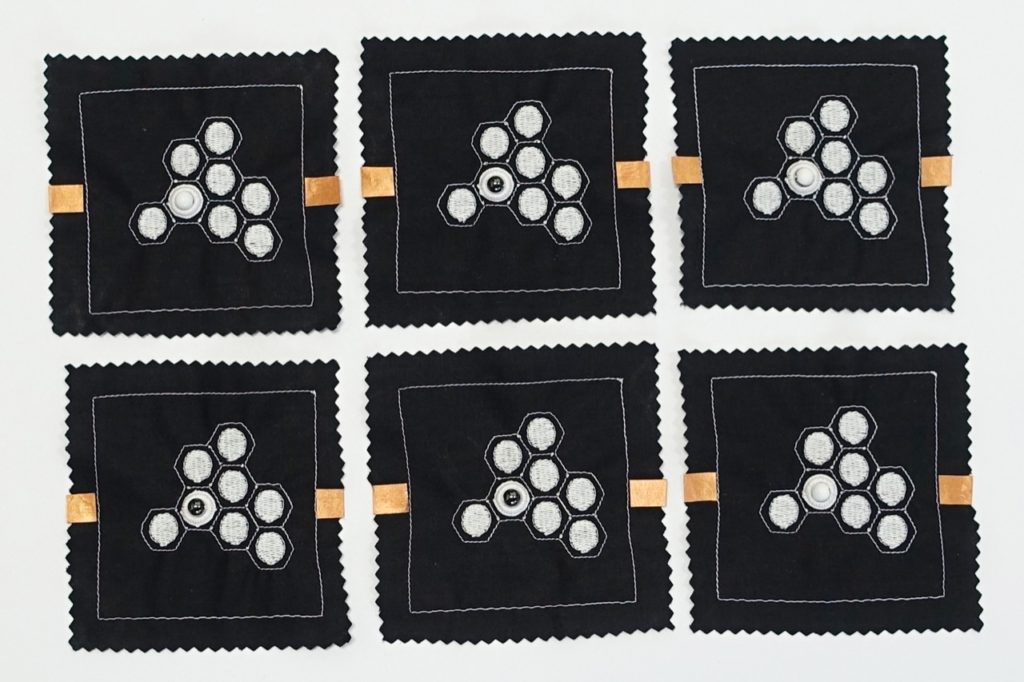
[Irene Posch] is big into knitted fabric circuits. And while most of the textile circuits that we’ve seen are content with simply conducting enough juice to light an LED, [Irene]’s sights are set on knittable crafted arithmetic logic units (ALUs). While we usually think of transistors as the fundamental building-blocks of logic circuits, [Irene] has developed what is essentially a knit crochet relay. Be sure to watch the video after the break to see it in construction and in action.
The basic construction is a coil of conductive thread that forms an electromagnet, and a magnetic bead suspended on an axle so that it can turn in response to the field. To create a relay, a flap of knit conductive thread is attached to the bead, which serves as the pole for what’s essentially a fabric-based SPDT switch. If you’ve been following any of our relay-logic posts, you’ll know that once you’ve got a relay, the next step to a functioning computer is a lot of repetition.
How does [Irene] plan to display the results of a computation? On knit-and-bead flipdot displays, naturally. Combining the same electromagnet and bead arrangement with beads that are painted white on one side and black on the other yields a human-readable one-bit display. We have an unnatural affinity for flipdot displays, and making the whole thing out of fabric-store components definitely flips our bits.
Anyway, [Irene Posch] is a textile-tech artist who you should definitely be following if you have any interest in knittable computers. Have you seen anything else like this? Thanks [Melissa] for the awesome tip!
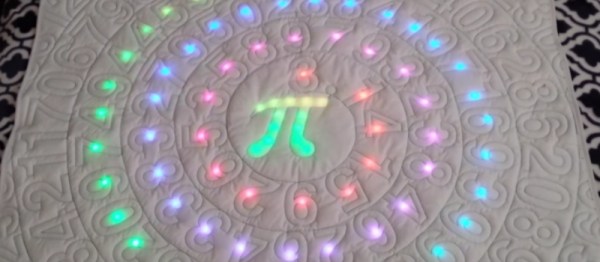
Pi Time is a psychedelic clock made out of fabric and Neopixels, controlled by an Arduino UNO. The clock started out as a quilted Pi symbol. [Chris and Jessica] wanted to make something more around the Pi and added some RGB lights. At the same time, they wanted to make something useful, that’s when they decided to make a clock using Neopixels.
Neopixels, or WS2812Bs, are addressable RGB LEDs , which can be controlled individually by a microcontroller, in this case, an Arduino. The fabric was quilted with a spiral of numbers (3.1415926535…) and the actual reading of the time is not how you are used to. To read the clock you have to recall the visible color spectrum or the rainbow colors, from red to violet. The rainbow starts at the beginning of the symbol Pi in the center, so the hours will be either red, yellow, or orange, depending on how many digits are needed to tell the time. For example, when it is 5:09, the 5 is red, and the 9 is yellow. When it’s 5:10, the 5 is orange, the first minute (1) is teal, and the second (0) is violet. The pi symbol flashes every other second.
There are simpler and more complicated ways to perform the simple task of figuring out what time it is…
We are not sure if the digits are lighted up according to their first appearance in the Pi sequence or are just random as the video only shows the trippy LEDs, but the effect is pretty nice:
[fungus amungus] was reading online about printing directly on fabrics with a home printer. He’d read a few hopeful tutorials about printing on them with a laser printer, but he didn’t own one.
Considering that you can occasionally buy an inkjet for less than the ink, he decided to take the plunge and see if he could print on a swatch of fabric with his inkjet. The technique requires a printer, some wax paper, scissors, and an iron.
By adhering the wax paper to the fabric properly, it’s possible to run it through the printer without tears. (We’ll let you pick the heteronym.) The final step is to let the ink sit for an hour before running the iron over it again. This seems to cure the ink and it can even survive a few washings.
Being able to make any pattern of cloth on demand seems like a useful thing to keep in the toolbox!
Even in this age of wearable technology, the actual fabric in our t-shirts and clothes may still be the most high-tech product we wear. From the genetically engineered cotton seed, though an autonomous machine world, this product is manufactured in one of the world’s largest automation bubbles. Self-driving cotton pickers harvest and preprocess the cotton. More machines blend the raw material, comb it, twist and spin it into yarn, and finally, a weaving machine outputs sheets of spotless cotton jersey. The degree of automation could not be higher. Except for the laboratories, where seeds, cotton fibers, and yarns are tested to meet tight specifications, woven fabrics originate from a mostly human-free zone that is governed by technology and economics.