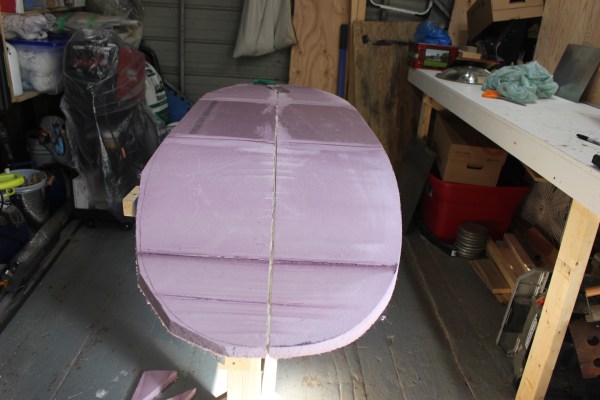
a home depot surfboard

Foam Surfboard From Scratch

Have you ever wanted to make your own surfboard, but felt held back by a lack of tools, materials, or the cost of it? Drawing almost entirely from what can be found at a well-known home improvement retailer, [AndrewW1997] details the steps needed to craft your board.

In his guide, he details the difference between XPS (expanded polystyrene) and EPS (extruded polystyrene) and how each product’s closed cell and open cell nature affects the final board. Starting with two pink sheets of XPS, he laminated them together with glue to form his blank. A stringer is a long piece of wood in the middle of the surfboard that provides additional flex and strength. Some flooring plywood curved with a jigsaw provides the shape needed. Unfortunately, the blank needs to be split in half to install the stringer. However, he has a trick for gluing the blank back together without it buckling, and that trick is ratchet straps.

He cuts the foam into roughly the right shape with a hot wire. Clean up is done with sanding blocks, a plane, and a level. The next step is laminating the board with epoxy and fiberglass. Next, [Andrew] details a few considerations around the process and gets to glassing. Sanding up to 2000 grit and some polishing compound make the board gorgeous. After a bit of final curing time, you’re ready to ride some waves.

There’s a handy playlist on YouTube detailing the process so you can follow along. Once you’ve finished your surfboard, perhaps your next project will be to power it up with a jet drive. Video after the break.

Continue reading “Foam Surfboard From Scratch”

Robot with star shaped wheels made of foam.

Build An Amphibious Robot Using Pool Noodles For Wheels

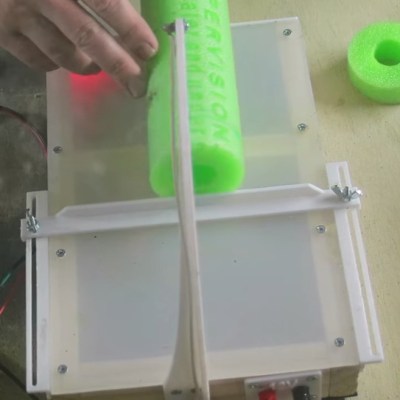
If you only think of wheels as round, you’re limiting yourself from experiencing the true wider world of whacky designs. [wadevag] has been experimenting with some such concepts, and has had success building an amphibious robot platform using star-shaped wheels built out of pool noodles.

The concept is similar to that of whegs. A portmanteau of wheel-legs, they’re in effect a form of leg that moves with a rotating motion. Essentially, the points of the stars on the wheels act like legs, pushing the robot along one by one, rather than having continuous contact with the ground as in a typical round wheel.

The flotation provided by the foam allows the robot to easily sit on top of the water’s surface, and the star shape allows them to act as viable paddles too. This is perhaps their primary advantage. A round wheel would not provide anywhere near as much forward propulsion.

[wadevag] shows off the concept’s abilities on water, concrete, and snow, and it handles them all ably. Impressively, it can both enter and exit the water under its own power. While it’s probably not a viable solution for a very heavy robot, for a lightweight design, it could work wonders. It’s not the first time we’ve seen some oddball wheel designs, either. Video after the break.

Continue reading “Build An Amphibious Robot Using Pool Noodles For Wheels”

Foam F-35 Learns To Hover

With cheap RC hardware, powerful motors, and high-capacity battery packs, getting something to fly has never been easier. It also helps that, whether you’re into fixed-wing craft or multirotors, there’s plenty of information and prior art floating around online that you can use to jumpstart your own build. But when it comes to homebrew vertical take-off and landing (VTOL) planes, things are a bit trickier.

Luckily for us, [Nicholas Rehm] has made all the plans and information necessary to duplicate his incredible RC F-35 available for anyone who wants to experiment with these relatively niche fliers. Even if it was a standard park flier, the build would be worth a close look thanks to the vectored thrust motors that give it phenomenal maneuverability and a top speed in the neighboorhood of 120 KPH (80 MPH). But with the flick of a switch, the plane transitions into a tricopter-like flight mode that allows it to land and takeoff vertically.

How does it work? The downward facing motor just behind the “cockpit” lifts up the front of the foam flier and tilts left and right to provide yaw control, while the two motors on the back tilt down to lift up the rear of the aircraft. Aviation buffs in the audience may recognize this as being fairly close to how the actual F-35B hovers, although on the real jet fighter, downward thrust under the wings is generated by redirected turbine exhaust rather than dedicated motors, and yaw control is provided by swiveling the engine’s nozzle rather than the front lift fan.

Getting the plane to takeoff vertically was one thing, but being able to transition from a hover into forward flight was quite another. To make this aerial transformation possible [Nicholas] actually had to write his own flight controller software, which he calls dRehmFlight. The GPLv3 code runs on the Teensy 4.0 and uses the common GY-521 MPU6050 gyroscope/accelerometer, so you don’t need to get any custom boards spun up just to give it a test drive flight. In the video below he walks through configuring the software for VTOL operation by defining how each control surface and motor is to respond to control input given the currently selected flight mode.

It probably won’t surprise you to hear that this isn’t the first time [Nicholas] has experimented with unusual flying machines. Last year we covered his RC Starship, which managed to stick the “belly flop” landing even before SpaceX managed to get the real life version down in one piece.

Continue reading “Foam F-35 Learns To Hover”

How Much Is Too Much?

I definitely tend towards minimalism in my personal projects. That often translates into getting stuff done with the smallest number of parts, or the cheapest parts, or the lowest tech. Oddly enough that doesn’t extend to getting the project done in the minimum amount of time, which is a resource no less valuable than money or silicon. The overkill road is often the smoothest road, but I’ll make the case for taking the rocky, muddy path. (At least sometimes.)

There are a bunch of great designs for CNC hot-wire foam cutters out there, and they range from the hacky to the ridiculously over-engineered, with probably most of them falling into the latter pile. Many of the machines you’ll see borrow heavily from their nearest cousins, the CNC mill or the 3D printer, and sport hardened steel rails or ballscrews and are constructed out of thick MDF or even aluminum plates.

All a CNC foam cutter needs to do is hold a little bit of tension on a wire that gets hot, and pass it slowly and accurately through a block of foam, which obligingly melts out of the way. The wire moves slowly, so the frame doesn’t need to handle the acceleration of a 3D printer head, and it faces almost no load so it doesn’t need any of the beefy drives and ways of the CNC mill. But the mechanics of the mill and printer are so well worked out that most makers don’t feel the need to minimize, simply build what they already know, and thereby save time. They build a machine strong enough to carry a small child instead of a 60 cm length of 0.4 mm wire that weighs less than a bird’s feather.

I took the opposite approach, building as light and as minimal as possible from the ground up. (Which is why my machine still isn’t finished yet!) By building too little, too wobbly, or simply too janky, I’ve gotten to see what the advantages of the more robust designs are. Had I started out with an infinite supply of v-slot rail and ballscrews, I wouldn’t have found out that they’re overkill, but if I had started out with a frame that resisted pulling inwards a little bit more, I would be done by now.

Overbuilding is expedient, but it’s also a one-way street. Once you have the gilded version of the machine up and running, there’s little incentive to reduce the cost or complexity of the thing; it’s working and the money is already spent. But when your machine doesn’t quite work well enough yet, it’s easy enough to tell what needs improving, as well as what doesn’t. Overkill is the path of getting it done fast, while iterated failure and improvement is the path of learning along the way. And when it’s done, I’ll have a good story to tell. Or at least that’s what I’m saying to myself as I wait for my third rail-holder block to finish printing.

Interactive CNC Foam Cutter Churns Out Abstract Art

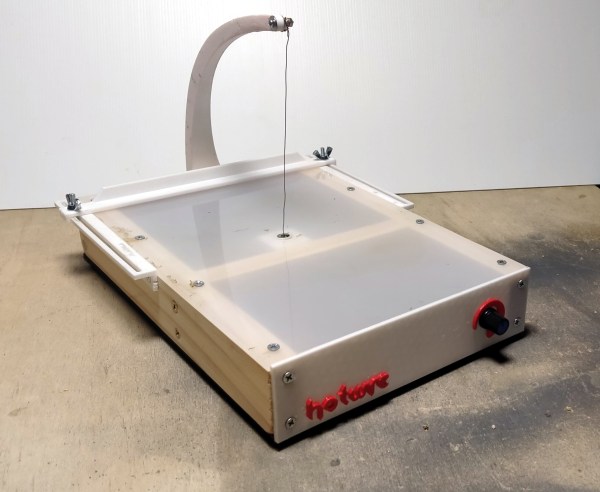
Foam is certainly an indispensable raw material for various craft and construction projects. Any serious sculptor however, inevitably grows tired of grinding through a foam block using a simple preheated utensil. The next step up, is to assemble a simple but thoroughly effective hot wire cutting contraption, formed out of a thin guitar wire held taut on a “C” shaped mounting frame. Finally, the addition of some electronics to regulate the power delivery makes this simple tool useful for most settings.

[Freddie] has taken this basic idea a step further, by building a complete multi-axis CNC foam cutter intended as an interactive exhibit on computational art. The CNC has the traditional three Cartesian axes but the platform hosting the foam piece can also rotate, introducing an additional degree of freedom. As this is indented to be controlled by attendees, there is no G-code in the mix, rather the inputs of an Xbox controller are applied directly to the work piece.

What is very interesting is how the resulting tool path is visualised and displayed. [Freddie] explains that while the user input tool path could be generated and displayed as equivalent G-code, it does not capture and convey the inherent organic nature of the finished pieces. The solution [Freddie] came up with is to display the toolpath much like a series of musical notes!

We would have loved to have a go at this machine in person, but seeing that isn’t possible in the current circumstances, you can either build a simpler machine we featured earlier or [Freddie] could perhaps fire up a camera and let us control it via the interweb, with a live video feed ofcourse!

Continue reading “Interactive CNC Foam Cutter Churns Out Abstract Art”

Dual-Wielding Robot Carves 3D Shapes From Foam With Warped Wire

“Every block of expanded polystyrene foam has a statue inside it and it is the task of the dual-arm hot wire-wielding robot to discover it.” — [Michelangelo], probably.

Be prepared to have your mind blown by this dual-wielding hot-wire 3D foam cutter (PDF). We’ve all seen simple hot-wire cutters before, whether they be manual-feed cutters or CNC-controlled like a 3D-printer. The idea is to pass current through a wire to heat it up just enough to melt a path as it’s guided through a block of polystyrene foam. Compared to cutting with a knife or a saw, hot-wire cuts are smooth as silk and produces mercifully little of that styrofoam detritus that gets all over your workspace.

But hot-wire cutters can’t do much other than to make straight cuts, since the wire must be kept taut. “RoboCut”, though, as [Simon Duenser] and his colleagues at ETH Zurich call their creation, suffers from no such limitations. Using an ABB YuMi, a dual-arm collaborative robot, they devised a method of making controlled curved cuts through foam by using a 1-mm thick deformable rod rather than a limp and floppy wire for the cutting tool. The robot has seven degrees of freedom on each arm, and there’s only so much the rod can deform before being permanently damaged, so the kinematics involved are far from trivial. Each pass through the foam is calculated to remove as much material as possible, and multiple passes are needed to creep up on the final design.

The video below shows the mesmerizing sweeps needed to release the Stanford bunny trapped within the foam, as well as other common 3D test models. We’re not sure it’s something easily recreated by the home-gamer, but it sure is fun to watch.

Continue reading “Dual-Wielding Robot Carves 3D Shapes From Foam With Warped Wire”

Bricking Your 3D Printer, In A Good Way

In our vernacular, bricking something is almost never good. It implies that something has gone very wrong indeed, and that your once-useful and likely expensive widget is now about as useful as a brick. Given their importance to civilization, that seems somewhat unfair to bricks, but it gets the point across.

It turns out, though, that bricks can play an important role in 3D-printing in terms of both noise control and print quality. As [Stefan] points out in the video below, living with a 3D printer whirring away on a long print can be disturbing, especially when the vibrations of the stepper motors are transmitted into and amplified by a solid surface, like a benchtop. He found that isolating the printer from the resonant surface was the key. While the stock felt pad feet on his Original Prusa i3 Mk 3S helped, the best results were achieved by building a platform of closed-cell packing foam and a concrete paver block. The combination of the springy foam and the dampening mass of the paver brought the sound level down almost 8 dBA.

[Stefan] also thoughtfully tested his setups on print quality. Machine tools generally perform better with more mass to damp unwanted vibration, so it stands to reason that perching a printer on top of a heavy concrete slab would improve performance. Even though the difference in quality wasn’t huge, it was noticeable, and coupled with the noise reduction, it makes the inclusion of a paver and some scraps of foam into your printing setup a no-brainer.

Not content to spend just a couple of bucks on a paver for vibration damping? Then cast a composite epoxy base for your machine — either with aluminum or with granite.

Continue reading “Bricking Your 3D Printer, In A Good Way”