Home-brew Vibration Cleaner Leaves Your SLA Prints Squeaky-Clean

If you’ve had the chance to add a Form 1+ 3D printer to your basement, you might find the post-print cleaning step a bit tedious. (A 20-minute alcohol bath? Outrageous!) Fortunately, for the impatient, [ChristopherBarr] has developed the perfect solution: a post-print agitator that cuts the time in-and-out-of the bath from 20 minutes to about two.

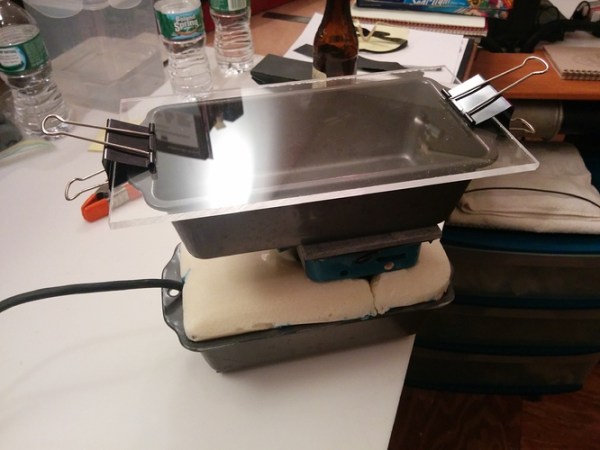
[ChristopherBarr’s] build is the right conglomerate of parts we’d expect when keeping the price down for this hack. He’s combined a palm sander, a couple pints of urethane expanding foam, and two loaf pans into one agitating mechanism that he’s dubbed “the Loafinator.” With the urethane expanding foam, [ChristopherBarr] achieved a near-perfect fit of the sander inside the loaf pan, now that the foam has filled in the remaining contours to hold the sander in place. Best of all, the sander hasn’t been sacrificed for this build; instead, the foam holder was assembled in three stages and isolated from the sander with a layer of plastic wrap to enable later extraction.

[ChristopherBarr’s] simple, yet practical, hack serves as an excellent solution to a number of hobbyists looking to “get things agitated.” While his device is able to polish off the uncured resin from his resin prints much faster than the conventional approach, we’d imagine that a similar build could greatly expedite the PCB etching process in a muriatic-acid or ferric-chloride based PCB etching procedure–far more quickly than our previous automated solution. The time-saving comes at a price; however. Once you’ve installed your very own Loafinator alongside your printer, expect a few nosy neighbors to start asking for visits to check out your new motorboat.

Continue reading “Home-brew Vibration Cleaner Leaves Your SLA Prints Squeaky-Clean”

Spline Thieving Makes Hobby Servos Even More Useful

For years the proprietary spline pattern of rc servos has been a dealbreaker for hobbyists who want to add custom shafts and gears to their servos. First, different servo sizes have different spline sizes, and each vendor equips their servos with different patterns. True, some special vendors sell custom gears that mate to these patterns, but, overall, the hard-to-replicate pattern has severely limited the output options for servos.

This pattern didn’t deter [JB], however. With some clever CAD skills, and two working implementations, he’s demonstrated that these spline patterns can be (1) harvested and (2) added into custom components, opening a new suite of design opportunities involving servos.

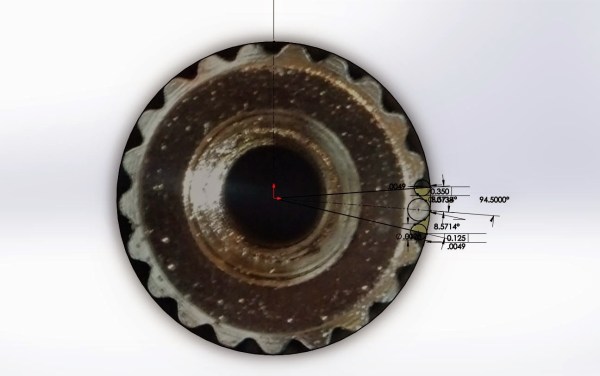
To capture the spline, [JB] imports an image into Solidworks, and traces the pattern on a properly scaled image. From there, he can embed this pattern directly into a physical model for fabrication.

To make parts that preserve this pattern, [JB] has two options. With his FormLabs printer, he can print components that already have the pattern feature, allowing him to press-fit custom links directly onto servos. Alternatively, for a sturdier component, he presents the milling method. With this technique, he drills a circle of bolt holes onto the desired output shaft and then mills out the center. From here, the shaft can also be directly pressed onto the servo spline where each spline groove fits snugly into the edge of the previously-drilled holes.

So, how well do they work? According to [JB] he’s actually managed to do some damage to himself before damaging to the 3D-printed part while trying to strip the pattern. The end-goal is to insert these shafts into transmissions for a miniature combat robot, another one of [JB’s] projects which is well-underway. Until then, we’re looking forward to seeing more servos tightly-integrated into upcoming projects.

Formlabs 3d printed speaker

3D Printed Speaker Pushes Rapid Prototyping Boundaries

We think Formlabs has really figured out the key to advertising their line of 3D printers — just design really cool stuff that you can 3D print in resin, and release them publicly! To celebrate a firmware upgrade to the Form 1+, they’ve designed and released this really cool 3D printed speaker which you can make yourself.

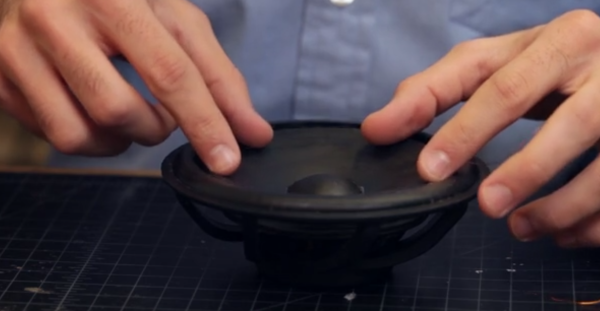
Designed by [Adam Lebovitz], the speaker can be printed in just a few jobs, using their flexible resin for the dynamic components. It even sounds pretty damn good.

As you can see in the following exploded view of the speaker, almost the entire thing is 3D printed out of just two materials — minus some copper wire, 37 disc magnets, and one cap screw.

Continue reading “3D Printed Speaker Pushes Rapid Prototyping Boundaries”

3D Printing RC Airplanes That Fly: An Engineer’s Chronicle

In the past, creating accurate replicas of models and fantasy objects was a task left to the most talented of cosplayers. These props need not be functional, though. [Steve Johnstone] takes replica model-building to the next step. He’s designing and building a model airplane that flies, and he’s documenting every step of the way.

Armed with a variety of 3D printing techniques and years of model-building experience, [Steve] is taking the lid off a number of previously undocumented techniques, many of which are especially relevant to the model-builder equipped with a 3D printer in the workshop.

As he continues his video log, [Steve] takes you through each detail, evaluating the quality of both his tools and techniques. How does a Makerbot, a Formlabs, and a Shapeways print stand up against being used in the target application? [Steve] evaluates a number of his turbine prints with a rigorous variable-controlled test setup.

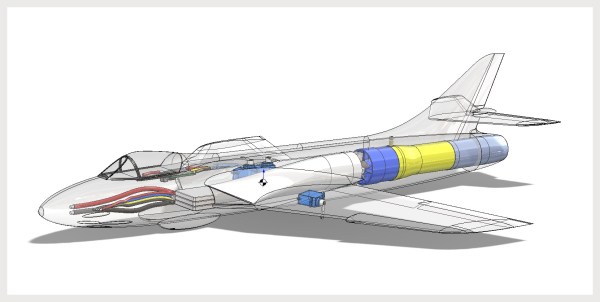
How can we predict the plane’s center-of-gravity before committing to a physical design? [Steve] discusses related design decisions with an in-depth exploration of his CAD design, modeled down to the battery-pack wires. Though he’s not entirely finished, [Steve’s] work serves as a great chance to “dive into the mind of the engineer,” a rare opportunity when we usually discover a project after it’s been sealed from the outside.

3D printing functional parts with hobbyist-grade printers is still a rare sight, though we’ve seen a few pleasant and surprisingly practical components. With some tips from [Steve], we may complete this video journey with a few techniques that bump us out of the “novelty” realm and into a space where we too can start reliably printing functional parts. We’re looking forward to seeing the maiden voyage.

Continue reading “3D Printing RC Airplanes That Fly: An Engineer’s Chronicle”

3D Printed Lens

3D Printed Lenses Open Up Possibilities

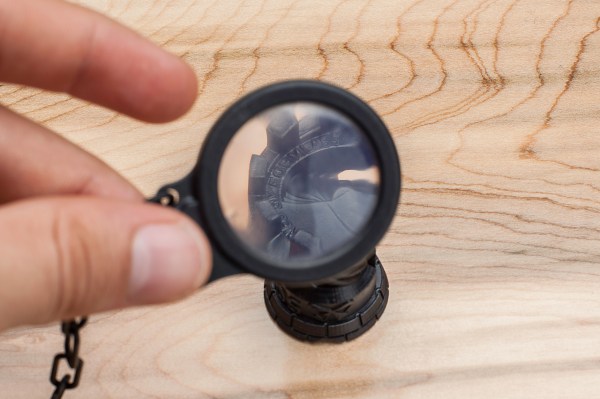
Now this is some seriously cool stuff. The folks over at FormLabs decided to try a little experiment to test the optical clarity of their clear resin. It’s pretty damn clear.

Using their own slicing software, PreForm, [Craig Broady] printed the lens piece in an orientation that would maximize resin flow around the lens to help prevent defects, keeping it as smooth as possible. While the printed part looks quite clear, all lenses require some form of polishing to become optically clear. It was printed with a 50 micron resolution, and [Craig] used a power drill to sand the lens down from 220 grit to 2000 grit sand paper.

Continue reading “3D Printed Lenses Open Up Possibilities”

Bumpy, The Beautiful DIY MP3 Player

OLYMPUS DIGITAL CAMERA

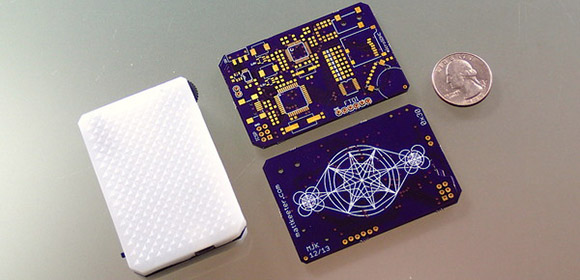
[Matt]’s been working on a small hombrew MP3 player, and although it’s not much more useful than an iPod Shuffle, sometimes that’s all you need. Besides, it turned out to be a beautiful project, completely custom, and a great example of what a high resolution 3D printer can do with an enclosure design.

Inside Bumpy is an ATMega32u4 with a VS1003 MP3 codec IC. The device is powered by a 1000mAh lithium battery, and the user interface is an exercise in simplicity; a single click/scroll wheel changes the volume, toggles play and pause, and selects the next or previous track. Eight LEDs mounted in the center of the board glow through the case for status, volume, and interface feedback.

By far the most impressive part of Bumpy is the case. It was printed at [Matt]’s place of employment – Formlabs – in white UV curing resin. The pictures show a surface finish that would be difficult to replicated on a squirting plastic style 3D printer, with a textured, bumpy surface that inspired the name.