PET-Gaming Computer Module

This 64×48 full color LED display goes much further than we expected at first glance. The display is actually a computer with a Zilog eZ80F91 core utilizing an FPGA for the hardware interface. Some nifty applications currently built include mostly games, but there is also visualizations, network file systems, video streaming, and even a MIDI synth.

It originally looked to be more of a console, with controllers, game pads, and cartridges, but the latter ended up not working out. What else would you do with a giant LED display?

SEGA Genesis Cloned With An FPGA

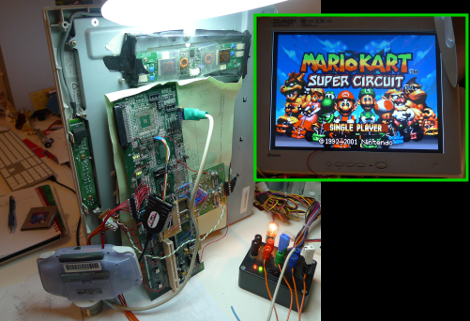
[Greg] managed to clone a SEGA Genesis using a field programmable gate array. He used a Terasic/Altera DE1 board, which will set you back about $160, during development. The onboard push buttons are currently used as the controller with VGA for the display. Who knows, maybe there’s enough programming space left to drive a PSP screen and turn this into a handheld?

You can see some gameplay footage after the break. If SEGA was never your thing don’t forget that there is an NES FPGA hack out there too.

Continue reading “SEGA Genesis Cloned With An FPGA”

Arduino Implemented On An FPGA

If you think that Arduinos are overkill in most projects we can do one better for you. [Jack Gassett] has a virtual Arduino running on a Field Programmable Gate Array. We checked in with [Jack] back in November to see his work with the AVR8 Soft Processor, an FPGA version of an AVR chip. Because the Arduino uses AVR it wasn’t too much of a leap to make this Arduino compatible. We’re lacking in imagination when hit comes to using this method productively, but we’re sure someone will find a way.

[Thanks Drone]

Suska Open Source Atari ST

Got a special place in your heart for Atari computing? Now you can quench that need using new hardware. The Suska project has achieved complete hardware emulation of the Atari ST using an FPGA. The project’s progress tracker shows implementation of the major chips at 100%. They are running EmuTOS, an Atari emulator, as the operating system because running the original would violate copyright. The chip used is an Altera Cyclone III. You could load up the code on your own hardware but judging from the number of connections needed it might be less of a headache to buy a board from these guys.

[Thanks Erik]

FPGA Keyboard Synthesizer

This synthesizer relies solely on an FPGA for key detection and sound synthesis. [Chris] and [Joe] built it for their final project at Cornell. The hardware implementation includes velocity sensing for the keys. While at rest, each key contacts a strip of copper foil. A matching strip of foil contacts the key when it is depressed. The velocity data is extrapolated by detecting when a key leaves the rest state and arrives at the depressed state. Sound synthesis is handled in hardware using the Karplus-Strong string synthesis method.  If you want to hear what it sounds like, they’ve posted a video (MP4) that shows off the creation. It sounds like an electric piano to us, so mission accomplished.

Pinball Build Throws Down The Gauntlet

[Jeri Ellsworth] is building her own pinball machine. Her build log is delivered in the form of daily videos that walk through the progress. In addition to seeing the intricate ramps, traps, and controllers she outlines her build techniques. These include reproducing parts based on old pinball machines and bending acrylic with a custom tool or a toaster oven.

The driver she’s planning to use is an Altera FPGA with a bunch of FETs to control the heavy-load components. There’s not a ton of info on the actual electronics but we had a heck of a fun time looking at the creative field components. Our favorite by far is the television from Day 7. The screen is translucent with a rear projected image. When the ramp in front of it is raised the pinball can be jumped right through the screen!

We couldn’t find a project page for this but we’ve embedded [Jeri’s] videos after the break. Continue reading “Pinball Build Throws Down The Gauntlet”

FPGA Driver For PSP Screen

Friends are constantly giving us their old electronics. We love it because our junk box is a never-ending pile of possibilities. We’re really starting to amass a collection of LCD screens that are not easily interfaced and this project gives us some hope for the future. [Philip] has been posting about using an FPGA as a driver for a replacement PSP LCD screen.

Many projects source cell phone LCD screens that have their own driver chip that can be addressed over SPI for use with a simple microcontroller. More complicated screens need a more involved control scheme and this is where the Field Programmable Gate Array takes over. [Philip] lays out the steps he’s using to implement his controller, from setting up the correct voltage levels, to planning for coordinate addressing, and even some of his follies with reverse current. We think this would be a great way to introduce yourself to FPGA projects.