Reverse-Engineered GBA Board Could Come In Handy

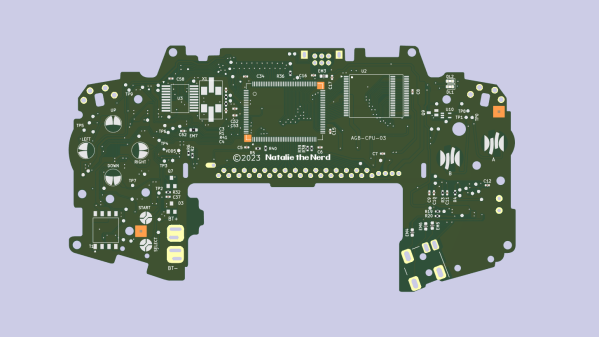
Retro gear is beloved, both for what it can do, and what it reminds us of. Nostalgia is a powerful thing, after all. But then, so is corrosion — and the latter has a habit of killing hardware and driving up prices for remaining units. Thankfully, hard workers like [NatalieTheNerd] are out there, creating reproduction PCBs to keep old hardware alive. Her Game Boy Advance (GBA) reproduction PCB is a great tool for the restoration and modding communities.

The board was reverse engineered, with [Natalie] sharing various scans and schematics of the GBA’s motherboard on the Modded Game Boy Club website. The project recreates the AGB-CPU-03 version of the GBA, and is designed to be produced on a 1 mm board with an ENIG process. You can combine the PCB with some salvaged parts and a new shell and build yourself a remarkably fresh GBA, if you so desire.

Beyond it’s intended use, [Natalie] points out the board outlines could be used as a basis for RetroPie or ESP32 projects that fit into a standard Game Boy Advance form factor. We love that idea. We’ve seen [Natalie’s] work before too, in the form of this neat little macropad. Nifty as always!

This Keyboard Doesn’t Work Without Game Boy Cartridges

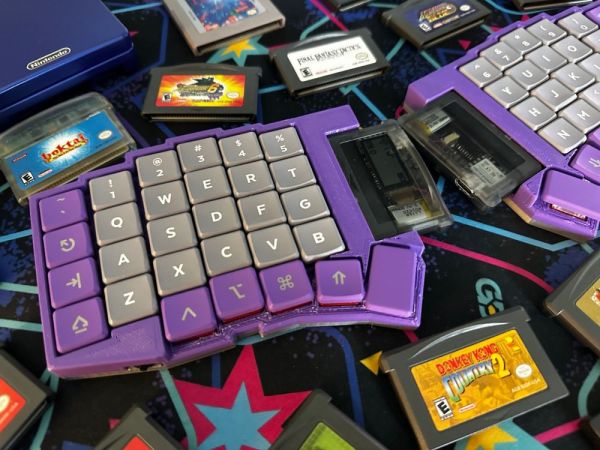
Just when we though we’d seen it all when it comes to custom keyboards (or most of it, anyway), along comes [Stu] with the TypeBoy and TypePak. Like the title implies, TypeBoy and TypePak are inseparable.

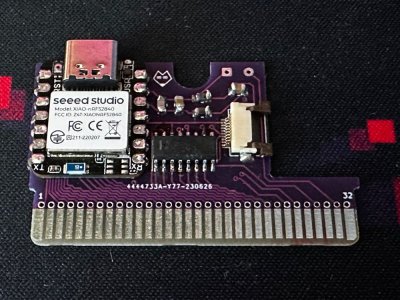
Let’s talk about TypePak first. Somehow, some way, [Stu] managed to fit the following into an aftermarket Game Boy Advance cartridge: a XIAO BLE microcontroller, a Sharp Memory Display, a shift register, and a LiPo battery. It’s all there in [Stu]’s incredibly detailed blog post linked above.

Amazing, no? And although [Stu] claims that the TypePak is mostly for aesthetics (boy howdy), it will make swapping microcontrollers much easier in the future.

If this looks sort of familiar, you may remember a likely render of [mujimaniac]’s board called the GIGA40 that also employed a cartridge system. Allegedly there is now a working prototype of the GIGA40.

Would you like to give the TypeBoy and TypePak a go? Files are available on GitHub, but this doesn’t seem like a project for the faint of heart.

Speaking of stuffing things in to Game Boy cartridges, check out this SNES cartridge turned hard drive enclosure.

Via KBD

Six GameBoy Pokemon games

Bridging Game Worlds With The ‘Impossible’ Pokémon Trade

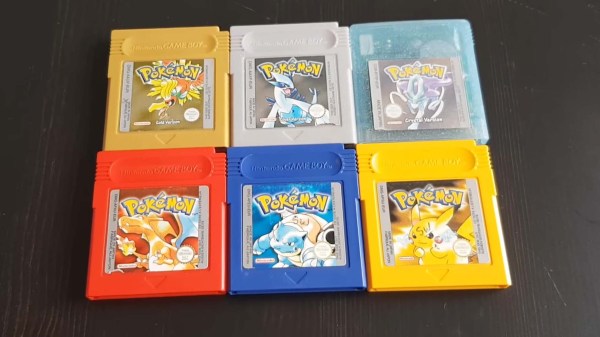
Transferring hard-earned Pokémon out of the second generation GameBoy game worlds into the ‘Advance Era’ cartridges (and vice versa) has never been officially supported by Nintendo, however [Goppier] has made these illicit trades slightly easier for budding Pokémon trainers by way of a custom PCB and a healthy dose of reverse engineering.

Changes to the data structure between Generation II on the original GameBoy (Pokémon Gold, Silver and Crystal) and Generation III on the GameBoy Advance (Pokémon Ruby, Sapphire, FireRed, LeafGreen and Emerald) meant that trades between these cartridges was never a possibility – at least not through any legitimate means. In contrast, Pokémon trades are possible between the first and second generation games, as well as from Generation III and beyond, leaving the leap from Gen II to Gen III as an obvious missing link.

Modern players have already overcome this limitation by dumping the cartridge save files onto a PC, at which point any Pokémon could be added or subtracted from the save. Thus, this method relies on self-control as well as the right hardware. [Goppier]’s solution is arguably far more elegant, and requires very little extra hardware. A simple PCB with ports for older and newer GameBoy Game Link Cables is the physical bridge between the generations. An ARM Cortex microcontroller sits between these connections and translates the game data between the old and the new.

The microcontroller is required to translate the data structure between the generations, and seems fit for purpose. Not only does the Pokémon data require conversion, but a few other hacks are needed before the two generations will talk nicely to each other. Pokémon on the GameBoy Advance brought in new features such as representing player movement in the trading rooms (i.e. you can see the other player moving on your screen), which also had to be addressed.

The concern over the legitimacy of trades within the Pokémon community is a curious, yet understandable, byproduct of the multiplayer experience. As an example, modern players have to be wary of ‘hacked’ Pokémon, which can often introduce glitches into their game world following a trade. Apart from these issues, some Pokémon players simply desire genuine Pokémon as part of fostering a fair and enjoyable gaming experience.

This literal bridge between Gen II and Gen III game worlds brings the community tantalizingly close to a ‘legitimate’ means of transferring their Pokémon out of ancient cartridges and into modern games. Could Nintendo one day officially sanction Gen II to Gen III trades with a similar device? Crazier things have happened.

We love our GameBoy hacks here on Hackaday, so why not check out this project that replaces the battery-backed SRAM in your GameBoy games with FRAM?

Continue reading “Bridging Game Worlds With The ‘Impossible’ Pokémon Trade”

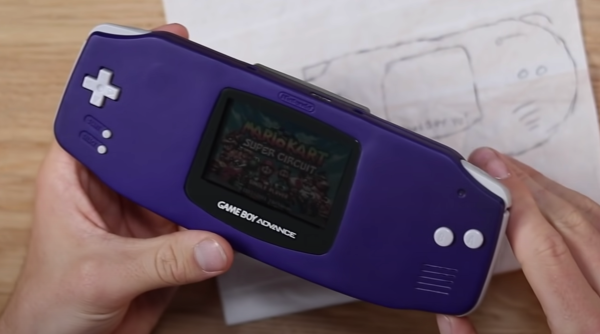
two hands holding a wider version of a purple gameboy advance

The Stretch Limo Of Game Boys

Here at Hackaday, we see all sorts of projects, some born out of a deep necessity or itch that couldn’t be scratched. Others are born out of a world of “why not” and it is perhaps these projects that put the biggest smile on our faces. The WideBoy Advance by [Elliot] of Retro Future is one such project.

Starting with a working Game Boy Advance and a donor one with a busted motherboard, the frankenstein-ification could start. A Dremel split one case in half and removed the sides on another, while trusty old car body filler helps fill and smooth the gaps. A particularly clever trick is to use the Dremel to create channels for the filler to adhere easier. Several areas had to be built up with filler and glued in bits of plastic as a base. As you can see in the video below, the countless hours of sanding, priming, sanding, and more priming led to a beautifully smooth finish. The choice of purple paint really sells the impression of a factory-fresh Game Boy Advance.

The working circuit board was desoldered and the donor board was cut into pieces to fit in the extended sides. Using some magnet wire, connections were bridged over to the original motherboard via the test points on the PCB. [Elliot] didn’t opt to swap the screen to an IPS display or add a backlight. These quality of life improvements are nice, but a dead giveaway that Nintendo didn’t make it. The goal is to get the user to wonder, even if just for a second, what if Nintendo just happened to make this wide one-off handheld console.

[Elliot] made it simply because he found it interesting and enjoyed the form of the thing he made. Is it a hack? Is it art? Probably a little bit of both. This isn’t his first modified Nintendo handheld either. He previously made a long Nintendo Gameboy DMG-01. We love seeing all the wild hacks and tweaks made to Game Boy line, such as this Game Boy Color inside the DMG-01.

Continue reading “The Stretch Limo Of Game Boys”

The Multiyear Hunt For A Gameboy Game’s Bug

[Enddrift] had a real problem trying to run a classic game, Hello Kitty Collection: Miracle Fashion Maker, into a GBA (Gameboy Advance) emulator. During startup, the game would hit an endless loop waiting for a read from a non-existent memory location and thus wouldn’t start under the emulator. The problem is, the game works on real hardware even though that memory doesn’t exist there, either.

To further complicate things, a similar bug exists when loading a saved game under Sonic Pinball Party. Then a hack for Pokemon Emerald surfaced that helped break the case. The story is pretty interesting.

Continue reading “The Multiyear Hunt For A Gameboy Game’s Bug”

A Switched Game Boy Advance SP

After Nintendo’s wild success with the Wii U, Nintendo released it’s Nintendo Switch. The switch functions primarily as a home console, stagnantly connected to a display. However, Nintendo switched things up a bit: the Switch can be removed from its dock for standalone tablet-like use. But there’s a slight problem: when the Switch is in portable mode, it leaves behind a bleak and black box. What’s one to do? Worry not: [Alexander Blake] is here to save the day with a Game Boy Advance SP and an X-Acto knife.

After casually noting that the main control board of the Switch was roughly Game Boy Advance SP sized, [Alexander Blake], aka [cptnalex], knew it was meant to be. After retrieving his broken Game Boy Advance SP from his closet, [cptnalex] set to work turning his Game Boy into a Nintendo Switch dock. When he was done, the results were stunning, especially considering the fact that this is his first console mod. Moreover, the very fact that he did it all with an X-Acto knife rather than a Dremel is astounding.

With the screen providing support to the Switch, [cptnalex’s] design leaves some to be desired for long term use. But we know for sure that [cptnalex’s] design does, in fact, work. Due to naysayers of the internetTM, [cptnalex] filmed a video of his dock in uses (embedded after the break). But, what the design lacks in structural stability, it more than makes up for in aesthetics. On the device itself, [cptnalex’s] history with controller painting shines through.

If you want to see more of [cptnalex’s] work, you can follow him on Instagram. For more console mods that will take your breath away, look no farther than [Bungle’s] vacuum formed portable N64.

Continue reading “A Switched Game Boy Advance SP”

HDMI Out On The Gameboy Advance

The Gameboy line of handheld systems from Nintendo have been wildly popular, but lack one major thing – a video output. This can be troublesome if you’d like to view the games on a bigger screen, for more comfortable gaming sessions or detail work like producing chiptunes. One option is to use the Gameboy Player for the Gamecube, however that system’s age means you’re out of luck if you want a crisp, clear picture on a modern digital display. Wouldn’t it be great if you could get HDMI output from a Gameboy Advance Instead?

A family resemblance?

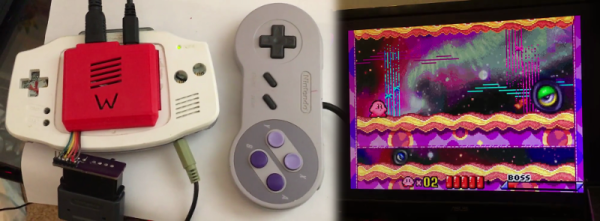
When it comes to working with video signals, FPGAs can’t be beat. [Stephen] leverages an FPGA in this project to read the GBA’s video signals and convert them to the modern digital format. Unfortunately, it’s not a seamless install – limited space means the GBA’s screen must be entirely removed, replaced with the adapter in a manner resembling the terrifying Facehugger.

Packaging aside, the output from the device is nothing short of stunning – the graphics are absolutely crystal clear when displayed on a modern HDMI television. This is because the FPGA is capturing the exact digital output from the GBA, and piping it out as HDMI – there’s no analog fuzziness, conversions or noise to spoil the image. Output is a tasty 1280×720, upscaled from the GBA’s original resolution. For more details, check out the forum thread where [Stephen] runs through the build.

The only thing missing  is details – we’d love to know more about the exact hardware used, and any trials and tribulations during the build! As far as we can tell, the build doesn’t stop at just video – a SNES controller is used instead of the original buttons, and we have a feeling sound is being passed over the HDMI channel as well sound is piped to the TV from the GBA’s headphone port.

It’s great to see these projects for old hardware come out – modern hardware has the muscle to achieve things previously unthinkable on retro consoles. We’ve seen similar projects before – like adding VGA to an original Game Boy.

Continue reading “HDMI Out On The Gameboy Advance”