Mokeylaser: A DIY Laser Engraver That You Can Easily Build

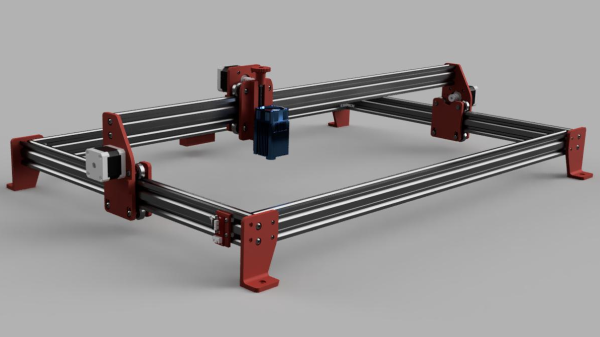
[Mark aka Mokey] borrowed his friend’s open-frame laser engraver for a while, and found it somewhat lacking in features and a bit too pricey for what it was. Naturally, he thought he could do better (video, embedded below.) After a spot of modelling in Fusion 360, and some online shopping at the usual places, he had all the parts needed to construct an X-Y bot, and we reckon it looks like a pretty good starting point. [Mark] had a Sainsmart FL55 5.5W laser module kicking around, so that was dropped into the build, together with the usual Arduino plus CNC shield combo running GRBL.

[Mark] has provided the full F360 source (see the mokeylaser GitHub) and a comprehensive bill-of-materials, weighing in at about $400, and based upon the usual 2040 aluminium extrusions. This makes MokeyLaser a reasonable starting point for further development. Future plans include upgrading the controller to something a bit more modern (and 32-bits) as well as a more powerful laser (we do hope he’s got some proper laser glasses!) and adding air assist. In our experience, air assist will definitely improve matters, clearing out the smoke from the beam path and increasing the penetration of the laser significantly. We think there is no need for more optical power (and greater risk) for this application. [Mark] says in the video that he’s working on an additional build video, so maybe come by later and check that out?

Obviously, MokeyLaser is by no means the only such beast we’ve featured, here’s the engravinator for starters. For even more minimalism, we covered a build with some smart optics doing all the work. But what if you don’t happen to have a 5W laser module “lying around” then perhaps try a more natural heat source instead?

Continue reading “Mokeylaser: A DIY Laser Engraver That You Can Easily Build”

Plotter Churns Out Labels With Roll Of Tape

Like it or not, organizing your workspace from time to time is a necessary chore. Labels can go a long way towards taming the most unruly of benches, but writing them out by hand isn’t exactly ideal. Looking for something a bit neater, [sandy] built a simple pen plotter to write labels on a roll of tape.

Pen plotter writing on roll of masking tape

The plotter uses the usual 3D printer components like steppers, drivers, belts, and rails. The tape holder is printed with flexible arms for a tight grip, and a servo is used to raise and lower the pen while writing.

The custom control board includes an Arduino Nano clone and a pair of stepper drivers, and an optional Bluetooth module and can be configured for a variety of machine control applications. A pair of Android apps are used to generate and send the G-code from a phone to the GRBL firmware loaded on the Arduino.

This seems to fall in the category of “entry-level” custom automation tools which help to save some time and effort on repetitive tasks without blowing the budget. We would include the various component tape cutters we’ve seen in this category, as well as smart build platform for manual PCB assembly

Ortur Laser Will Go Open-Source

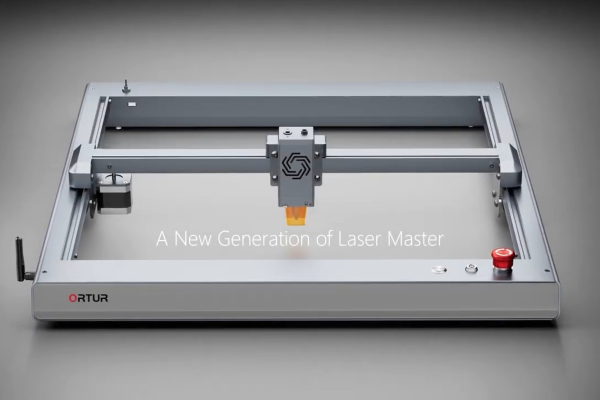
Well, that was fast! Last week, we wrote about a video by [Norbert Heinz] where he called out the Ortur laser engravers for apparently using the GPL-licensed grbl firmware without providing the source code and their modifications to it, as required by the license. Because open source and grbl are dear to our hearts and CNC machines, we wrote again about Norbert’s efforts over the weekend, speculating that it might just be unfamiliarity with the open source license requirements on Ortur’s part.

Because of [Norbert]’s persistance and publicity around the issue, the support ticket finally reached the right person within Ortur, and within two or three days [Gil Araújo], Support Admin at Ortur, managed to convince the company that going fully open source was the right thing to do. What remains is the question of how to do it, operationally.

So [Gil] asked [Norbert] to ask Hackaday: what do you want from Ortur on this, and how should they proceed? Via e-mail, he asked in particular for best practices on setting up the repository and making the code actually useful to non-programmer types. He said that he looked around at the other laser engraver companies, and didn’t find any good examples of others doing the Right Thing™, so he asked [Norbert] to ask us. And now we’re asking you!

Have you got any good examples of companies using open-source firmware, modifying it, and making it available for their users? Is a simple Github repo with a README enough, or should he spend some time on making it user-friendly for the non-coders out there? Or start with the former and work toward the latter as a goal? I’m sure [Gil] will be reading the comments, so be constructive! You’ll be helping a laser engraver company take its first steps into actually engaging with the open source community.

We said it before, and we’ll say it again. Good job [Norbert] for taking Ortur to task here, but also by doing so in a way that leaves them the option of turning around and doing the right thing. This also highlights that companies aren’t monolithic beasts – sometimes it takes getting your cause heard by just the right person within a company to change the response from a “this is a business secret” to “how should we set up our Github?” And kudos for [Gil] and Ortur for listening to their users!

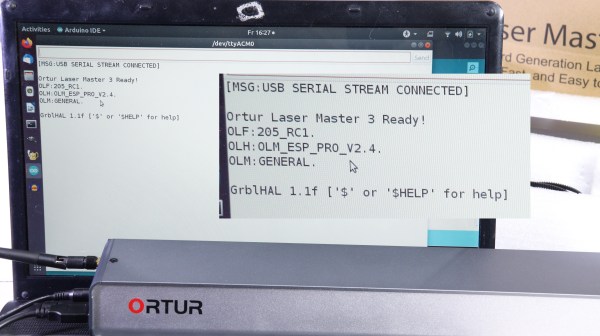
Showing an Ortur lasercutter control module in front of a screen. There's a serial terminal open on the screen, showing the "Ortur Laser Master 3" banner, and then a Grbl prompt.

Watch Out For Lasercutter Manufacturers Violating GPL

For companies that build equipment like CNC machines or lasercutters, it’s tempting to use open-source software in a lot of areas. After all, it’s stable, featureful, and has typically passed the test of time. But using open-source software is not always without attendant responsibilities. The GPL license requires that all third-party changes shipped to users are themselves open-sourced, with possibility for legal repercussions. But for that, someone has to step up and hold them accountable.

Here, the manufacturer under fire is Ortur. They ship laser engravers that quite obviously use the Grbl firmware, or a modified version thereof, so [Norbert] asked them for the source code. They replied that it was a “business secret”. He even wrote them a second time, and they refused. Step three, then, is making a video about it.

Unfortunately [Norbert] doesn’t have the resources to start international legal enforcement, so instead he suggests we should start talking openly about the manufacturers involved. This makes sense, since such publicity makes it way easier for a lawsuit eventually happen, and we’ve seen real consequences come to Samsung, Creality and Skype, among others.

Many of us have fought with laser cutters burdened by proprietary firmware, and while throwing the original board out is tempting, you do need to invest quite a bit more energy and money working around something that shouldn’t have been a problem. Instead, the manufacturers could do the right, and legal, thing in the first place. We should let them know that we require that of them.

Continue reading “Watch Out For Lasercutter Manufacturers Violating GPL”

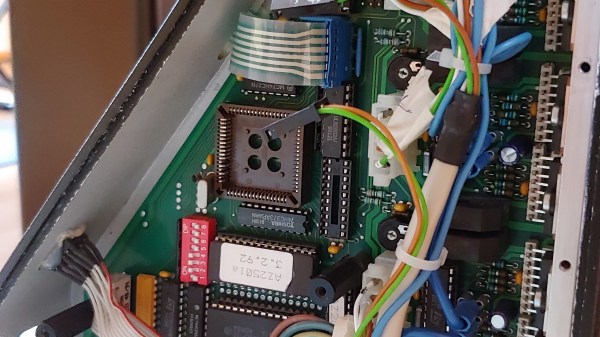
photo of the CNC controller, with the PLCC socket for the CPU, surrounded by driver ICs

Old CNC Brain Swapped With An Arduino

[Sebastian] and [Stefan Shütz] had a ISEL EP1090 CNC machine at home, sitting unused, and they decided to bring it to life. With pretty good mechanical specs, this CNC looked promising – alas, it was severely constrained by its controller. The built-in CPU’s software was severely outdated, had subpar algorithms for motor driving programmed in, and communication with the CNC was limited because the proprietary ISEL communications protocol that isn’t spoken by other devices.The two brothers removed the CPU from its PLCC socket, and went on to wiring a grbl-fueled Arduino into the controller box.

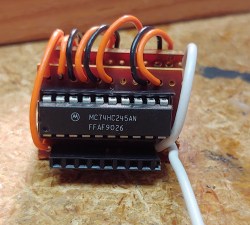
The interposer PCB, with an extra 74HC245 buffer on itThey reverse-engineered the motor driver connections – those go through a 74HC245 buffer between the original CPU and the drivers. Initially, they put an Arduino inside the control box of the CNC and it fit nicely, but it turned out the Arduino’s CPU would restart every time the spindle spun up – apparently, EMC would rear its head. So, they placed the Arduino out of the box, and used two CAT7 cables to wire up the motor and endstop signals to it.
For tapping into these signals, they took the 74HC245 out of its socket, and made an interposer from two small protoboards and some pin headers – letting them connect to the STEP and DIR lines without soldering wires into the original PCB. There’s extensive documentation, GRBL settings, and more pictures in their GitHub repo, too – in case you have a similar CNC and would like to learn about upgrading its controller board!

After this remake, the CNC starts up without hassles. Now, the brothers shall CNC on! Often, making an old CNC machine work is indeed that easy, and old controller retrofits have been a staple of ours. You can indeed use an Arduino, one of the various pre-made controller boards like Gerbil or TinyG, or even a Raspberry Pi – whatever helps you bridge the divide between you and a piece of desktop machinery you ought to start tinkering with.

Masking Tape Pen Plotter Gets An Upgrade

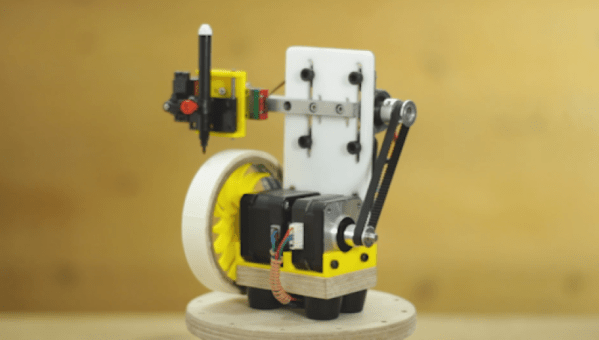
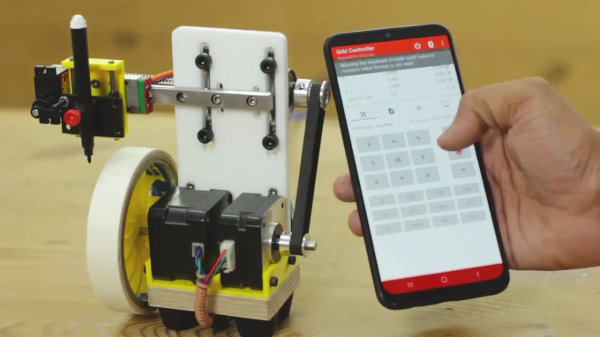
[Mr Innovative] decided to make his version of a small pen plotter (video after the break) to make labels on masking tape. The result is an impressive compact machine that is remotely controlled using your smartphone. The plotter is constructed using several different techniques, a piece of plywood as the base, a 3D printed bracket for the motors and pen carriage, and a routed acrylic plate that holds the lead screw and linear rail assembly. The whole thing is controlled by an Arduino Nano mounted on a custom motor driver carrier board.

The inspiration for this build came from a project by [michimartini] aka [Molten Cheese Bear] that we covered a few months ago. [Mr Innovative] went for belt vs direct drive and no local screen. It also appears to plot a little bit faster, but that might be due to differences in the ink pens used. An Android app called TextToCNC converts label text into G-Code, and the Grbl Controller app sends those commands to the plotter.

We like continued iterations of open source projects and look forward to seeing what the next generations look like. Thanks to [keithfromcanada] for submitting this tip.

Continue reading “Masking Tape Pen Plotter Gets An Upgrade”

All The Sticky Labels You Could Ever Need: No DRM, Just Masking Tape

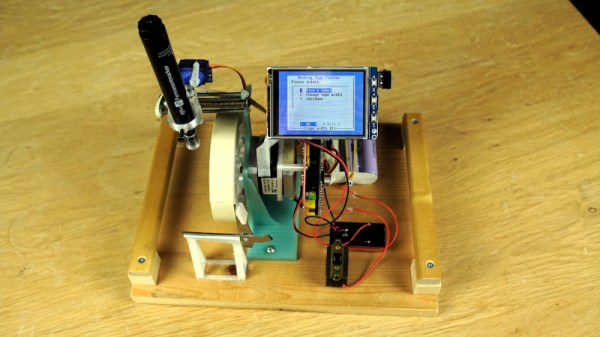
Printable sticky labels are a marvelous innovation, but sadly also one beset by a variety of competing offerings, and more recently attempts by manufacturers to impose DRM on their media. Fortunately they don’t have to rely on expensive printers or proprietary rolls of stickies, as [michimartini] demonstrates with the masking tape plotter. It’s a tiny pen plotter that writes your label onto the tape.

At its heart is the popular grbl G-code to motion parser, and its mechanism uses the lead screw axis from a DVD drive. Not for this project simply another hacked-apart drive mechanism though, for it has a custom-designed carriage for the axis. It’s 3D printed, and to ensure the least friction possible for a pen using only its weight to keep contact with the tape it was heated up once assembled to ensure all parts had a chance to bed in. Meanwhile the tape roll forming the X axis is turned directly by a standard stepper motor.

We like this project a lot, and look forward to any refinements to the idea. Meanwhile, it’s not the first custom label printer we’ve shown you.