You Can Use An Old Tape Deck As A Distortion Pedal

Distorted guitars were a big part of the rock revolution last century; we try to forget about the roll. As a youth, [David Hilowitz] couldn’t afford a loud aggressive amp, a distortion pedal, or even a proper electric guitar. This experience ended up teaching him that you can use random old audio hardware as a distortion effect.

[David’s] guitar journey started when he found a classical guitar on a dumpster. He learned to play, but longed for the sound of a proper electric guitar. Family friends gifted him a solitary pickup, intending he build a guitar, but he simply duct-taped it to his steel-strung classical instead. The only thing he lacked was an amp. He made do with an old stereo system and a record pre-amp. With his his faux-electric guitar plugged into the microphone input, he was blessed with a rudimentary but pleasant distortion that filled his heart with joy.

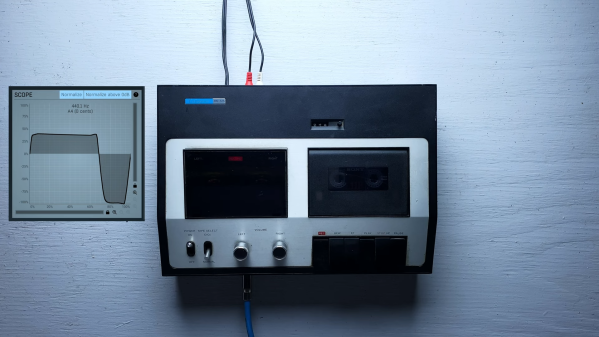
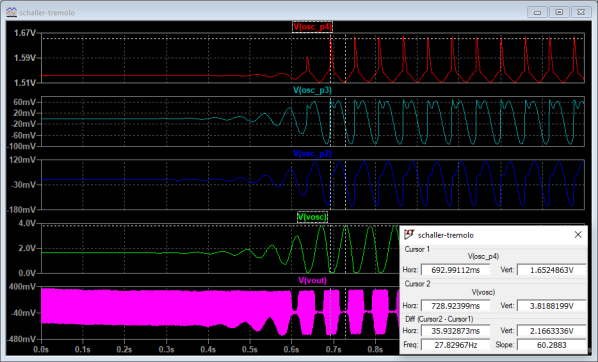
[David] goes on to explain the concepts behind distorted guitar sounds, and how his home hi-fi was able to serve as a passable starter amp when he was young and couldn’t afford better. He then goes on the hunt for more old gear at a local Goodwill store, finding a neat old tape deck that similarly produced some nice warm distorted tones. In [David’s] experience, old hi-fi gear with microphone inputs can generally do a decent job in this role, with electric guitar pickups typically overloading the preamps which expect a lower-level signal. It’s different to what you’d get from a Big Muff or Boss DS-1, but it’s a neat sound nonetheless.

We’ve looked at distortion effects before, including rolling your own and putting it into production. Video after the break.

Continue reading “You Can Use An Old Tape Deck As A Distortion Pedal”

Rockin’ Out In LTSpice: Simulating Classic Guitar Pedals

Musicians have a fantastic language to describe signals. A sound can be fat, dark, crunchy, punchy — the list goes on. These aren’t very technical terms, but they get the job done. After all, it’s much easier to ask to guitarist for a crisper sound than to ask them to sharpen the edges of the waveform, while amplifying the high-frequency components and attenuating the low-frequency components. Of course, it’s fun to look at signals this way as well, especially when you can correlate shifts in sound quality to changes in the waveform and, ideally, the circuit that produces it.
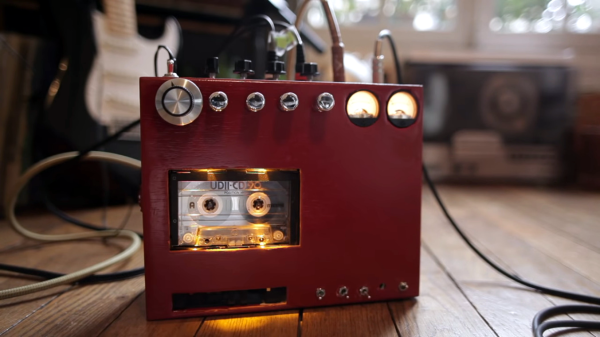
To undergo such an investigation, [Nash Reilly] has been simulating guitar effects pedals in LTSpice. Able to find most of the schematics he needs online, [Nash] breaks down the function of each part of the circuit and builds a simulation of the entire system. His write-up clearly explains, and often demonstrates, what’s going on inside the box. On the surface, it’s an interesting tour of the inner workings of your favorite effects pedals. Beyond that, it’s an excellent survey of analog design that is well-worth the read for anybody interested in audio, electronics, or audio electronics.

For those interested in taking the physical route rather than the simulated one, we’ve taken a look at pedal design before. Anybody who wants to try their hand at creating simulations can grab a copy of LTSpice, or check out a package called LiveSpice, which lets you simulate circuits in realtime and use them to process live audio — pretty useful for prototyping guitar effects.

DIY Cassette Tape Guitar Delay

Digital delay pedals are pretty good nowadays and even the cheaper ones do a pretty good job at emulating the sound of old analog delay effects. And that’s good, because the original delay effects can run you a pretty penny. If you’re in to DIY electronics, though, analog delay effects can still be built without breaking the bank, and, as an example, [Matsound] has made a tape delay using an old tape deck and regular cassette tapes.

The core of the build is a portable 3-head cassette recorder, in this case a Marantz PMD430. The circuit has been around for a while – it was originally found in an issue of Stompboxology in the 90’s. The basic idea is that with a three-head recorder (erase, record, play) the distance between the record and play heads creates a delay and you increase this delay by slowing down the recorder’s motor. You combine the output from the recorder with the dry signal from your input and, viola, tape delay.

[Matsound] added a cool feature where you can control the speed of the motor with a control voltage, so if you connect it to a keyboard and produce different voltages from different keys, you get weird, spacey effects. The video gives an overview of the features and some details of the build process are in the video’s description.

A nice build built into a nice case and a great effect! Maybe you wouldn’t take it out gigging with you, but it sure sounds pretty good!  Other delay pedals have been mentioned on the site before, like this digital delay pedal and here’s another take on the cassette tape delay.

Continue reading “DIY Cassette Tape Guitar Delay”

A Candle Powered Guitar Pedal

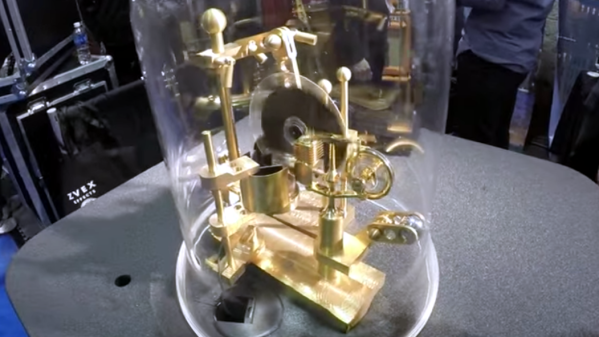
When it comes to guitar effects pedals, the industry looks both back and forward in time. Back to the 50’s and 60’s when vacuum tubes and germanium transistors started to define the sound of the modern guitar, and forward as the expense and rarity of parts from decades ago becomes too expensive, to digital reproductions and effects. Rarely does an effects company look back to the turn of the 19th century for its technological innovations, but Zvex Effects’ “Mad Scientist,” [Zachary Vex], did just that when he created the Candela Vibrophase.

At the heart of the Candela is the lowly tea light. Available for next to nothing in bags of a hundred at your local Scandinavian furniture store, the tea light powers the Zvex pedal in three ways: First, the light from the candle powers the circuit by way of solar cells, second, the heat from the candle powers a Stirling engine, a heat engine which powers a rotating disk. This disc has a pattern on it which, when rotated, modifies the amount of light that reaches the third part of the engine – photoelectric cells. These modulate the input signal to create the effects that give the pedal its name, vibrato and phase.

Controls on the engine adjust the amount of the each effect. At one end, the effect is full phasor, at the other, full vibrato. In between a blend of the two. A ball magnet on a pivot is used to control the speed of the rotating disk by slowing the Stirling engine’s flywheel as it is moved closer.

While more of a work of art than a practical guitar effect, if you happen to be part of a steam punk inspired band, this might be right up your alley. For more information on Stirling engines, take a look at this post. Also take a look at this horizontal Stirling engine.

Continue reading “A Candle Powered Guitar Pedal”

Portable Guitar Amp – Is That A Linux In Your Pocket?

When it comes to music production and audio engineering, Linux isn’t the most common choice. This isn’t for lack of decent tools or other typical open source usability issues: Ardour as a highly capable, feature-rich digital audio workstation, the JACK Audio Connection Kit for powerful audio routing, and distributions like Ubuntu Studio packing all the essentials nicely together, offer a great starting point as home recording setup. To add variation to your guitar or bass arrangement on top of that, guitarix is a virtual amp that has a wide selection of standard guitar effects. So when [Arnout] felt that his actual guitar amp’s features were too limiting, he decided to build himself a portable, Linux-based amp.

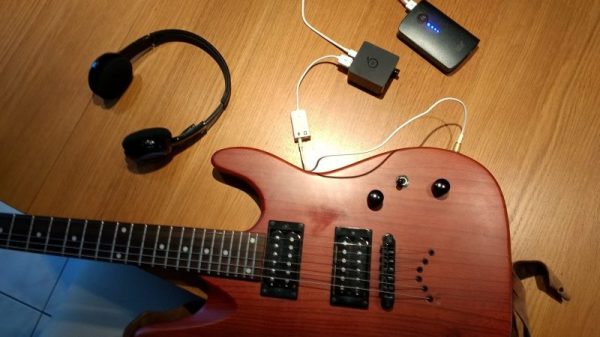
[Arnout] built the amp around an Orange Pi Zero with an expansion board providing USB ports and an audio-out connector, and powers it with a regular USB power bank to ensure easy portability. A cheap USB audio interface compensates the lacking audio-in option, and his wireless headphones avoid too much cable chaos while playing. The amp could theoretically be controlled via a MIDI pedalboard, but [Arnout] chose to use guitarix’s JSON API via its built-in Python web interface instead. With the Orange Pi set up as WiFi hotspot, he can then use his mobile phone to change the effect settings.

One major shortcoming of software-based audio processing is signal latency, and depending on your ear, even a few milliseconds can be disturbingly noticeable. To keep the latency at a minimum, [Arnout] chose to set up his Orange Pi to use the Linux real-time kernel. Others have chosen a more low-level approach in the past, and it is safe to assume that this won’t be the last time someone connects a single-board computer to an instrument. We surely hope so at least.

Pedal-Pi, Simple Programmable Guitar Pedal

For several years, [Ray] and [Anna], the team behind ElectroSmash, have been smashing audio electronics and churning out some sweet DIY audio gear. This time around, they’ve built Pedal-Pi — a simple programmable guitar pedal based around the Raspberry-Pi Zero. It is aimed at hackers, programmers and musicians who want to experiment with sounds and learn about digital audio. A lot of effort has gone in to documenting the whole project. Circuit analysis, a detailed BoM, programming, assembly and background information on related topics are all covered on their Forum.

The hardware is split in to three parts. On the input, a MCP6002 rail-to-rail op-amp amplifies and filters the analog waveform and then a MCP3202 ADC digitizes it to a 12-bit signal. The Pi-Zero then does all of the DSP, creating effects such as distortion, fuzz, delay, echo and tremolo among others. The Pi-Zero generates a dual PWM signal, which is combined and filtered before being presented at the output. The design is all through hole and the handy assembly guide can be useful for novices during assembly.  The code examples include a large number of pedal effects, and if you are familiar with C, then there’s enough information available to help you write your own effects.

Even if you don’t plan on building one, technical background such as the Basics of Audio DSP in C for Raspberry Pi Zero, Using MCP3202 ADC with Raspberry Pi Zero and PWM Audio on Raspberry Pi Zero ought to make for interesting reading. Check out the video after the break detailing the build.

If you’d like to check out some of their earlier work, check out 1WAMP, an Open Hardware Guitar Amplifier and pedalSHIELD, an opensource Arduino Guitar Pedal.

Continue reading “Pedal-Pi, Simple Programmable Guitar Pedal”

Hackaday Prize Entry: DIY Guitar Multieffects

Guitar effects and other musical circuits are a great introduction to electronics. There’s a reason for this: with audio circuits you’re dealing with analog signals and not just the ones and zeros of blinking a LED. Add in the DSP aspects of audio effects, and you have several classes of an EE degree wrapped up in one project.

For his Hackaday Prize entry, [randy.day] is building a guitar multieffect. Instead of just a single distortion, fuzz, or chorus circuit, this tiny little PCB is going to have several flavors of pitch shifting, a flanger, chorus, echo, harmony, and stranger ‘digital-ish’ effects like bitcrushing.

This effects unit is built around a PIC32 and a TI audio codec which processes the audio at 64k 32-bit samples/second. This takes care of all the audio processing, but the hard work for a guitar pedal is actually the enclosure and mechanicals – it’s a hard life for stage equipment. For the foot pedal input, [randy] is using a magnetic position sensor, but there’s no word if he’ll be using a fancy die-cast enclosure or a plastic injection molded unit.

The 2015 Hackaday Prize is sponsored by: