Need A Curved Plastic Mesh? Print Flat, Curve Later

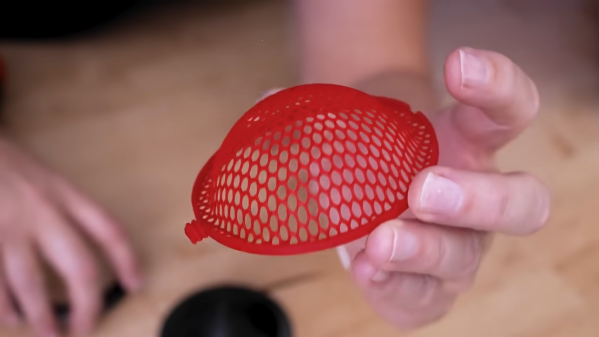
Need a plastic mesh in a custom pattern? 3D print it, no problem. But what if one needs a curved plastic mesh? That’s considerably harder to 3D print, but [Uncle Jessy]’s figured out a simple approach: 3D print the mesh flat, then break out a mold and a heat gun.

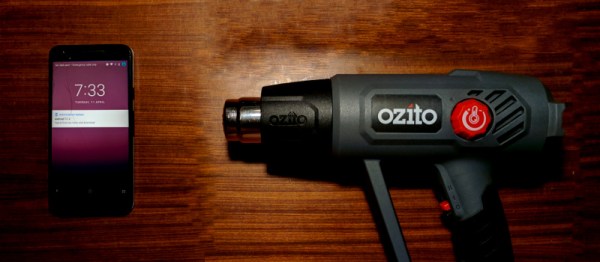
Of course, there are a few gotchas, but [Uncle Jessy] shares his tips for getting the most reliable results. The important part is to design and 3D print a mold that represents the final desired shape. Then print the mesh, and fit it into a frame. Heat things up with a heat gun, and press into the mold to deform the mesh while it’s still soft. It’s much easier seen than explained, so take a few moments to check out the video, embedded below the page break.

Custom eye inserts become a breeze.

Because the plastic in a mesh is so thin, [Uncle Jessy] says to keep the heat low and slow. The goal is to have the mesh stretch and deform, not melt.

Speaking of heat, when thermoforming, one usually needs to make the mold out of heat-resistant material. But the thermal mass of a mesh is so small that it really doesn’t matter much — there just isn’t enough heat trapped in the mesh to really damage a mold. As long as the mold is reasonably dense, there’s no need to go overboard with making it heat resistant.

The whole process takes a little practice, but since the meshes are so fast to print and use so little plastic it’s easy to experiment a little.

As for the meshes themselves, a simple way to print a mesh is just to print a disc with no top or bottom layers, only infill. Set the infill pattern to honeycomb, for example, for an easy hexagon mesh. We’ve seen a variant of this “exposed infill” idea used to create a desiccant container, and using it to print a mesh pattern easily is a neat trick, too.

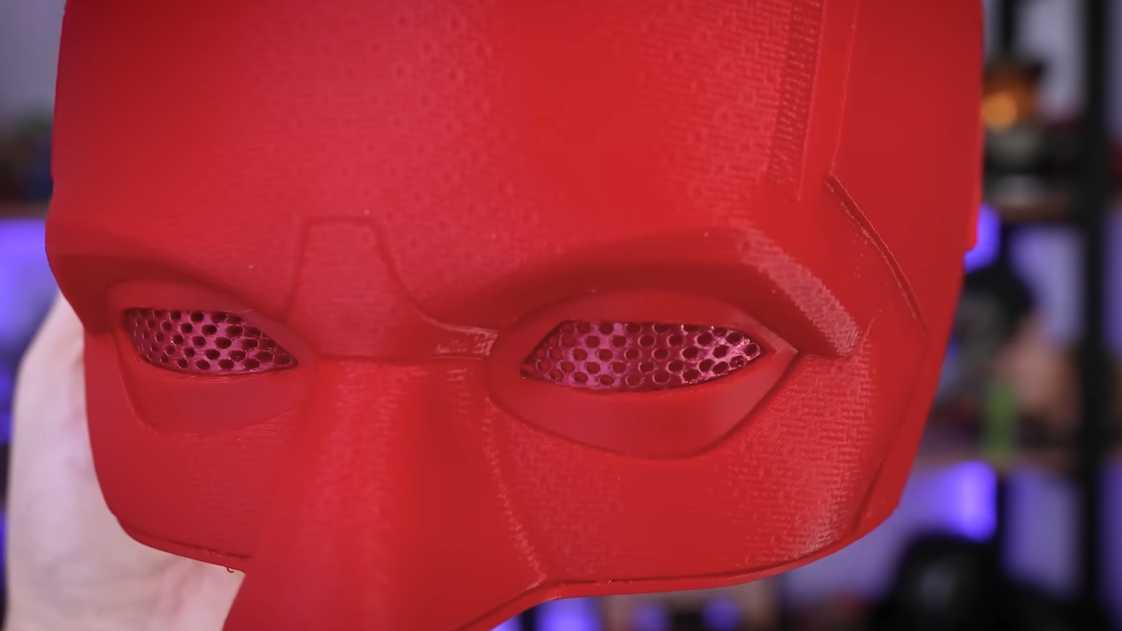
Why might one need to reshape a mesh into a curve? Perhaps to custom-fit a costume piece, or make custom eye inserts for masks, as shown here. In any case, it’s a good technique to keep in the back of one’s mind, and if you put it to good use, drop us a tip!

Continue reading “Need A Curved Plastic Mesh? Print Flat, Curve Later”

Wobble Disk Coffee Roaster Looks Good In Wood

If you love coffee, you probably make it yourself at home most of the time using beans from some hipster coffee shop where the employees have full-sleeve tattoos and strong opinions. Maybe you even buy whole beans and grind them right before you use them. If you want to go all the way, you gotta roast those beans yourself. There are various ways to go about it, like repurposing a hot air corn popper. If you’re [Larry Cotton], you buy heaps of green beans and keep building wobble disk roasters until you’ve achieved DIY perfection.

[Larry]’s latest roaster boasts all-wood construction with no metal brackets or housings in the structural parts. This is good because you’re less likely to burn yourself on anything, and you aren’t sinking heat away from the beans. Nothing should get hot except the sifter, the beans, and the stiff triangle of wire that holds the heat gun nozzle in place. Once the roasting cycle is complete, [Larry] just shakes out the beans onto an adjacent screen that’s situated over a fan so they can cool off.

Unlike some of [Larry]’s previous designs, this one uses an 8-cup flour sifter situated over a heat gun. A battery-powered screwdriver drives the wobbling disk that churns the beans and helps them roast evenly, and a wooden arm holds down the power button. We love the simplicity of this machine, and think wobble disk roasters are mesmerizing to watch. Check out the video after the break to see it in action and learn how to build your own.

There’s more than one way to roast beans, and one of them is even officially sanctioned by Hackaday editor [Elliot Williams].

Continue reading “Wobble Disk Coffee Roaster Looks Good In Wood”

How To Cobble A Wobble Disk Roaster Together

As with anything else, once your knowledge of coffee expands, the more attractive it becomes to control as much of the process as possible. Buying whole beans and grinding them at home is one thing, but you’re not a real coffee geek unless you’re buying big bags of green beans and roasting them yourself in small batches.

[Larry Cotton] has made an even more portable version of the wobble disk roaster we saw last summer. Beneath the housing made of aluminium flashing is the guts of a $15 Harbor Freight heat gun pointing upward at a metal strainer. A large metal disk mounted at a 45-degree angle to the spinning axis tosses and turns the beans as they get blasted with heat from below. [Larry] used a 12 VDC motor to run the wobble disk, and an an adapter to change the heat gun from 120 VAC to 12 VDC. This baby roasts 1½ cups of beans to city plus (medium) level in 12-15 minutes. Grab a cup of coffee and check it out after the break.

Roasting beans isn’t rocket science. Even so, there are some things you would benefit from knowing first, so here’s our own [Elliot Williams] on the subject of building DIY roasters.

Continue reading “How To Cobble A Wobble Disk Roaster Together”

This Hot Air Gun Is Either A Work Of Genius Or Lethal, We Can’t Decide

One of the essentials on the bench is some form of hot air gun. Whether it’s a precision tool intended for reworking PCBs or the broad-stroke item used for paint stripping, we’ve all got one somewhere. The paint-stripping variety are pretty cheap, but not as cheap as [Porcas Pregos e Parafusos]’s home made hot air gun. This slightly hair-raising device is made from a variety of junk parts and delivers hot air, though we suspect the possibility for burning the operator remains high.

At its heart is one of those mains powered water boiler elements designed to be lowered into a cup or similar, and since such devices would burn out if not cooled in some way, there is a fan from a microwave oven passing air over it. The whole thing sits inside an aluminium cone cut from a circular cake tin, and is held together on a wooden chassis to which the handle and power switch from a defunct electric drill provide the operator with something to hold on to.

As you can see from the video below the break it makes for an effective hot air gun, but one that we’re guessing you’d soon learn to avoid touching on the metal cone. Still, as a community we’re used to this with our soldering irons, as the RevSpace T-shirt puts it: “If it smells like chicken, you’re holding it wrong“.

Strangely, this isn’t the first DIY heat gun we’ve seen.

Continue reading “This Hot Air Gun Is Either A Work Of Genius Or Lethal, We Can’t Decide”

BST-863 Hot Air Rework Station Teardown

[Voltlog] has had a 952 hot air rework station for a long time. You’ll recognize it when you see it — they are the ubiquitous soldering iron and hot air gun combination from China sold under numerous brand names. He didn’t think the old station was as good as some of the newer devices available, and did a teardown and review of the BST-863 station that can be had for well under $200. You can see the video below.

He was impressed with the build quality of the workpiece holder. It lets you store the hot air gun and keep it in standby mode. He liked the touchscreen, too, although the beeping seemed a bit annoying. However, in general, the operating noise was less than the older unit it replaced.

Continue reading “BST-863 Hot Air Rework Station Teardown”

Fix-A-Brick 2: Nexus 5X Rises From The Ashes

It was but two weeks ago when I told my story of woe —  the tale of an LG Nexus 5X that fell ill, seemingly due to a manufacturing fault at birth. I managed to disassemble it and made my way through a semi-successful attempt at repair, relying on a freezer and hairdryer to coax it back to life long enough to backup my data. Try as I might, however, I simply couldn’t get the phone running for more than ten minutes at a time.

All was not in vain, however! I was rewarded for documenting my struggles with the vast experience and knowledge of the wider Internet: “Hairdryers don’t get as hot as heatguns!”

It turned out I had just assumed that two similar devices, both relying on a hot bit of metal and a fan as their primary components, must be virtually identical if rated at a similar power draw. I was wrong! Apparently the average hairdryer stays well cooler than 150 degrees Celsius to avoid melting one’s silky locks or burning the skin. I even learned that apparently, wet hair melts at a lower temperature than dry hair. Who knew?

Armed with this knowledge, I rushed out and bought the cheapest heat gun I could find — around $50. Rated up to 600 degrees C, this was definitely going to be hotter than the hairdryer. With the prevailing opinion being that I had not applied enough heat in general, I decided to also increase the heating period to 90 seconds, up from a quick 30 second pass originally.

Continue reading “Fix-A-Brick 2: Nexus 5X Rises From The Ashes”

Fix-a-Brick: Fighting The Nexus 5X Bootloop

Oh Nexus 5X, how could you? I found my beloved device was holding my files hostage having succumbed to the dreaded bootloop. But hey, we’re hackers, right? I’ve got this.

It was a long, quiet Friday afternoon when I noticed my Nexus 5X was asking to install yet another update. Usually I leave these things for a few days before eventually giving in, but at some point I must have accidentally clicked to accept the update. Later that day I found my phone mid-way through the update and figured I’d just wait it out. No dice — an hour later, my phone was off. Powering up led to it repeatedly falling back to the “Google” screen; the dreaded bootloop.

Stages of Grief

I kept my phone on me for the rest of the night’s jubilant activities, playing with it from time to time, but alas, nothing would make it budge. The problem was, my Nexus still had a full day’s video shoot locked away on its internal flash that I needed rather badly. I had to fix the phone, at least long enough to recover my files. This is the story of my attempt to debrick my Nexus 5X.

Continue reading “Fix-a-Brick: Fighting The Nexus 5X Bootloop”