ImHex: An Open Hex Editor For The Modern Hacker

It’s little surprise that most hackers have a favorite text editor, since we tend to spend quite a bit of time staring at the thing. From writing code to reading config files, the hacker’s world is filled with seemingly infinite lines of ASCII. Comparatively, while a hex editor is a critical tool to have in your arsenal, many of us don’t use one often enough to have a clear favorite.

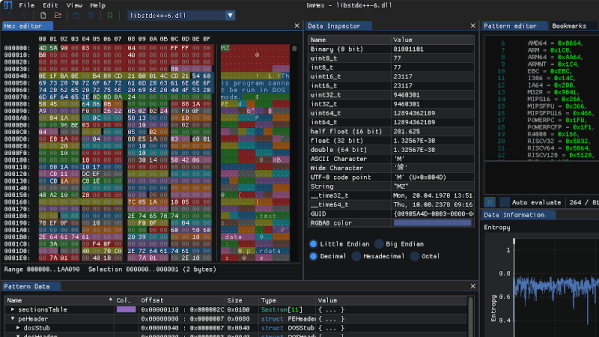
But we think that might change once you’ve taken ImHex for a spin. Developer [WerWolv] bills it specifically as the hex editor of choice for reverse engineering, it’s released under the GPL v2, and runs on Windows, Linux, and macOS. Oh, and did we mention it defaults to a slick dark theme designed to be easy on the eyes during those late night hacking sessions — just like your favorite website? Continue reading “ImHex: An Open Hex Editor For The Modern Hacker”

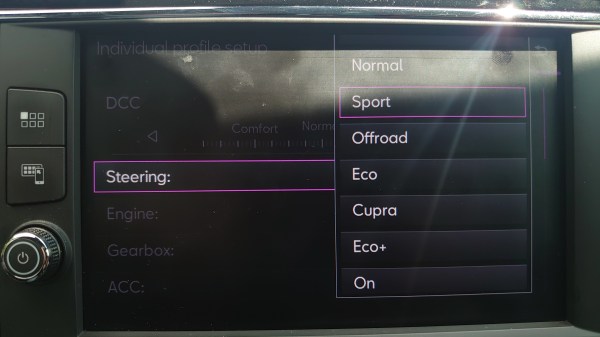
Showing a car dash screen with options menu, showing a "Steering" entry and a bunch of options one can change, i.e. Normal, Sport, offroad, Eco etc.

Your Car Has Driving Profiles – Here’s How To Change Them

Just like mobile phones of yesteryear, modern cars have profiles. They aren’t responsible for the sounds your car produces, however, as much as they change how your car behaves – for instance, they can make your engine more aggressive or tweak your steering resistance. On MQB platform cars, the “Gateway” module is responsible for these, and it’s traditionally been a black box with a few user-exposed profiles – not as much anymore, thanks to the work of [Jille]. They own a Volkswagen hybrid car, and had fun changing driving modes on it – so naturally, they decided to reverse-engineer the configuration files responsible.

Now, after two years of experimentation, tweaking values and observing changes, there’s quite some sense made of the configuration binaries. You can currently edit these binaries, also referred to as datasets, in a hex editor – there’s profiles for the 010 hex editor that make sense of the data you load, and explanation of the checksums involved. With this, you are no longer limited by profiles the manufacturer composed – if a slightly different driving combination of parameters makes more sense to you, you can recombine them and have your own profile, unlock modes that the manufacturer decided to lock out for non-premium cars, and even fix some glaring oversights in factory modes.

This is pretty empowering, and far from ECU modifications that introduce way more fundamental changes to how your car operates – the parameters being changed are within the range of what the manufacturer has implemented. The smarter our cars become, the more there is for us hackers to tweak, and even in a head unit, you can find things to meaningfully improve given some reverse-engineering smarts.

Swapping The ROMs In Mini Arcade Cabinets

You’ve probably seen a few of these miniature arcade games online or in big box retailers: for $20 USD or so you get scaled-down version of a classic arcade cabinet, perfect for a desk toy or to throw up on a shelf as part of your gaming collection. Like any good Hackaday reader, you were probably curious about what makes them tick. Thanks to [wrongbaud], we don’t have to wonder anymore.

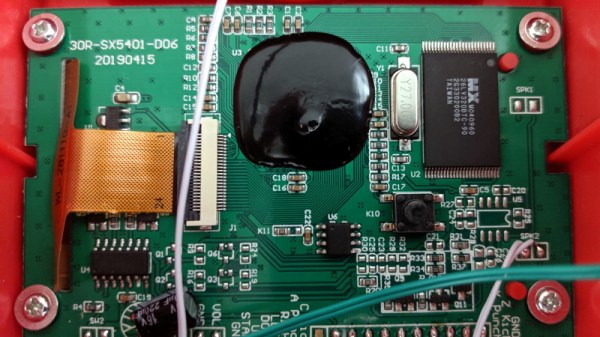
Over the course of several blog posts, [wrongbaud] walks readers through the hardware and software used in a few of these miniature games. For example, the Rampage cabinet is using a so-called “NES on a Chip” along with a SPI flash chip to hold the ROM, while Mortal Kombat is using a Genesis emulation solution and parallel flash. It wouldn’t be interesting if they didn’t throw you a few curves now and again, right?

But these are more than simple teardowns. Once [wrongbaud] gives an overview of the hardware, the next step is reading the respective flash storage and trying to make sense of the dumped data. These sort of games generally reuse the hardware among a number of titles, so by isolating where the game ROM is and replacing it, they can be made to play other games without hardware modification. Here, this capability is demonstrated by replacing the ROM data for Rampage with Yoshi’s Cookie. Naturally it’s one of those things that’s easier said than done, but it’s an interesting proof of concept.

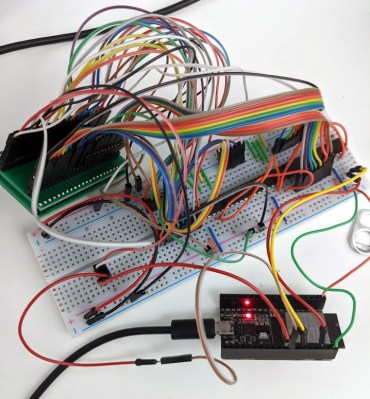
The Mortal Kombat cabinet is a newer addition to the collection, so [wrongbaud] hasn’t progressed quite as far with that one. The parallel flash chip has been dumped with the help of an ESP32 and a MCP23017 I/O expander, and some Genesis ROM headers are identifiable in the data, but there’s still some sifting to be done before the firmware structure can be fully understood.

Even if you’re not in the market for a diminutive arcade experience, the information that [wrongbaud] has collected here is really phenomenal. From understanding protocols such as I2C and SPI to navigating firmware dumps with a hex editor, these posts are an invaluable resource for anyone looking to get started with reverse engineering.

BitBench Helps Parse Binary Data

Maybe its a capture file from a network dump. Maybe it’s from an Arduino. Maybe it is a random file off the Internet. But there will be a time when you have a file full of seemingly meaningless numbers and you need to impose order. We usually resort to a printout and highlighter, but BitBench seems like a better option. That link will take you to the code, but if you want to play with a live instance, the author has one loaded with example data.

If you look at the live example, there’s an area up top with a lot of raw hex data. The area below that shows a format string. By default that’s:

hh ID:hh b CH3d TEMP_C:12d HUM:d CRC:8h | 8h 16h 16h

From the page, here’s the description of the format:

Use “h” for hex (default 4 bits), “b” for binary (default 1 bit), “d” for decimal (default 8 bits).
Use optional bit length prefix numbers. Use “~” to invert bits, use “^” to reverse LSB/MSB. Other characters are output as-is.

So in the example string, hh is an 8-bit hex number. ID: is just a label, followed by another 8-bit number.  Then the bottom displays the data formatted as you wish and gives you a way to pad the fields with extra bits and see the results. You can also invert or shift all the bits.

Continue reading “BitBench Helps Parse Binary Data”

A Watch Only A Ham Can Use

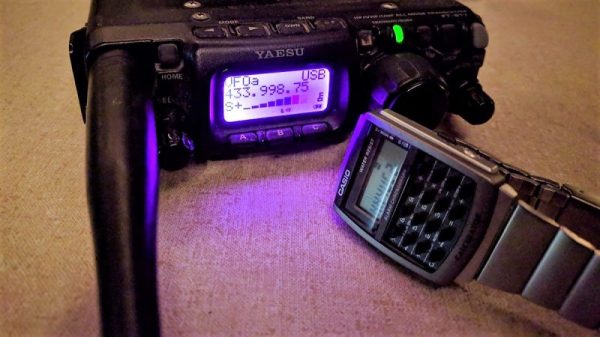
We’re not sure what to make of this one. With the variety of smartwatches and fitness trackers out there, we can’t be surprised by what sort of hardware ends up strapped to wrists these days. So a watch with an RPN calculator isn’t too much of a stretch. But adding a hex editor? And a disassembler? Oh, and while you’re at it, a transceiver for the 70cm ham band? Now that’s something you don’t see every day.

The mind boggles at not only the technical prowess needed to pull off what [Travis Goodspeed (KK4VCZ)] calls the GoodWatch, but at the thought process that led to all these features being packed into the case of a Casio calculator watch. But a lot of hacking is more about the “Why not?” than the “Why?”, and when you start looking at the feature set of the CC430F6137 microcontroller [Travis] chose, things start to make sense. The chip has a built-in RF subsystem, intended no doubt to enable wireless sensor designs. The GoodWatch20 puts the transceiver to work in the 430-MHz band, implementing a simple low-power (QRP) beacon. But the real story here is in the hacks [Travis] used to pull this off, like using flecks of Post-It notes to probe the LCD connections, and that he managed to stay within the confines of the original case.

There’s some real skill here, and it makes for an interesting read. And since the GoodWatch is powered by a coin cell, we think it’d be a great entry for our Coin Cell Challenge contest.

[via r/AmateurRadio]

Edit Hex In The Browser

If you can’t stand the thought of using an application in your browser, you might as well jump ahead to the comments and start flaming.

Still with us? Imagine this scenario. You are at the office, at a client’s site, at a school, or visiting your mom. Suddenly, for some strange reason, you need to edit a hex file. We don’t know why, but if you are reading Hackaday, it isn’t that big of a stretch to imagine it. What do you do? Download and install a hex editor? Maybe you can’t. Or, if it is mom’s computer, maybe you just don’t want to. Your next option is to navigate to HexEd.it.

The application, by [Jens Duttke], uses HTML5 and JavaScript and is actually a nicely capable editor. It shows the data in hex and ASCII as you’d expect. It also shows the current cursor location in a number of formats like 8-bit integer, 32-bit integer, date and time, and more. It even shows all the representations as big endian and little endian.

Continue reading “Edit Hex In The Browser”

Manual Data Recovery With A Hex Editor

Let’s say you use an SD card-base portable audio recorder for work – doing an interview, perhaps. Things go well until one day, you turn the recorder off before stopping the recording. Without pressing that big red Stop button, the file doesn’t close, and you’re left with a very large 0kB file on the SD card. How do you get it back?  There are tools that will do it for you, but they cost money. You can do it yourself with a hex editor, though, and it’s actually pretty easy.

The software required for this feat of data recovery is Roadkil’s Disk Imager to dump all the bits on the SD card to an image file, the free version of ISO Buster to show the block addresses and length of each file, and the hex editor of your choice. The process starts as simply an experiment for hot to create an MP3 file by cutting and pasting bits into a hex editor. A good file was found in the hex editor, copied to a new file, and played. Everything works so far; great.

For the actual data recovery, a spreadsheet was created to make an educated guess as to where the lost file should be. Starting at this address, about 90MB of data was copied into a new hex editor window. This is where the recovery hit a snag. Because the SD card was plugged into a Mac before, a bunch of data was written on the card. This went into the first available place on the disk, which just happened to be the header of the lost MP3 file.

That’s not a problem; there’s already the header from an MP3 file sitting in a hex editor from the first experiment to see if this was possible. By copying a few hundred bytes to the front of the lost file, the file was corrected just enough that an MP3 player could reconstruct the file.

It’s not perfect – the first fifty seconds of the interview was garbled. The rest of the interview was saved, though, and that’s much better than losing the entire thing. Thanks [Lewin] for sending this one in.

Continue reading “Manual Data Recovery With A Hex Editor”