The Champagne Of Light Bulbs

We’re all used to making our own lighting projects. Triac dimmers, LEDs, Neopixels, EL wire, there is a huge array of lighting components and technologies at our fingertips. But how many of us have made our own lighting rather than buying off-the-shelf? [Confined Maker] set out to do just that by creating an incandescent light bulb from scratch, and since he’s obviously a hacker with a bit of class he did it in an empty Dom Perignon champagne bottle.

It might seem a daunting project, but as he shows us in the video below the break, it turns out to be surprisingly straightforward with no exotic tooling required. He starts by winding a fine coil of thin tungsten wire round a dowel to act as his filament, before bringing a pair of enameled copper wires through holes drilled in the base of the bottle and out of the neck. The ends of these wires are then spliced to his filament and secured with conductive epoxy before the whole assembly is carefully slid back into the bottle. The holes are caulked with silicone, and the bottle is then carefully charged with argon. Argon is heavier-than-air, so he can do this on the bench with nothing more than a bicycle tube inflator and a drinking straw. The bottle is then sealed with a cork and more silicone, and his bulb is ready.

The first power-up with 120V mains power sees a puff of smoke inside the bottle as a coating on the tungsten is vapourised, but after that the bulb does its job well. He’s concerned about his epoxy melting, and the filament has moved to one side of the bottle so he’s not sure about the lifetime he can expect, but to make a working light bulb with such basic equipment is still an impressive accomplishment. His video below the break is eleven and a half minutes long, but well worth watching every minute.

Continue reading “The Champagne Of Light Bulbs”

Using WS2811 Chip To Drive Incandescent Lamps

What makes the WS2812-style individually addressable pixel LEDs so inviting? Their rich colors? Nope, you can get RGB LEDs anywhere. Their form factor? Nope. Even surface-mount RGBs are plentiful and cheap. The answer: it’s the integrated controller. It’s just so handy to speak an SPI-like protocol to your LEDs — it separates the power supply from the data, and you can chain them to your heart’s desire. Combine this controller and the LEDs together in a single package and you’ve got a runaway product success.

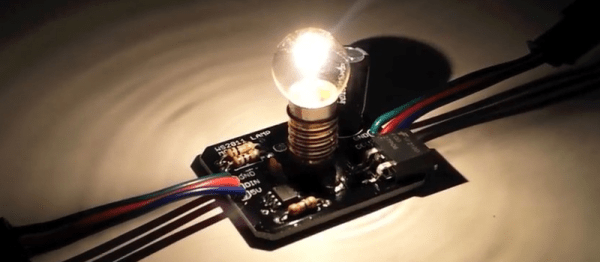
But before the WS2812, there was the WS2811 — a standalone RGB controller IC. With the WS2812s on the market, nobody wants the lowly WS2811’s anymore. Nobody except [Michael Krumpus], that is. You see, he likes the old-school glow of incandescent, but likes the way the WS2812 strings are easy to drive and extend. So he bought a bag of WS2811s and put the two together.

The controller IC can’t handle the current that an incandescent bulb requires, so he added a MOSFET to do the heavy lifting. After linking a few of these units together, he discovered (as one does with the LED-based WS2812s eventually) that the switching transients can pull down the power lines, so there is a beefy capacitor accompanying each bulb.

He wanted each bulb to be independently addressable, so he only used the blue line of the RGB controller, which leaves two outputs empty. I’m sure you can figure out something to do with them.

Needless to say, we’ve seen a lot of WS2812 hacks here. It’s hard to pick a favorite. [Mike] of “mike’s electric stuff” fame built what may be the largest installation we’ve seen, and this hack that effectively projection-maps onto a randomly placed string of WS2812s is pretty cool. But honestly, no project that blinks or glows can go far wrong, right?

Continue reading “Using WS2811 Chip To Drive Incandescent Lamps”

Retrotechtacular: 100 Watts 120 Volts

If you read our recent feature about the Tal-y-Llyn Railway, the world’s first preserved line, you may have taken a while to watch the short film about the railway in the early 1950s. It was the work of an American film maker, [Carson “Kit” Davidson].

His other work includes some films that might be of interest to Hackaday readers, including one filmed in 1977: “100 Watts 120 Volts”. In it, he follows the manufacture of Duro-Test 100-watt light bulbs through all the stages of their assembly as neck, filament and envelope are brought together in strangely beautiful twentieth century production machinery.

Continue reading “Retrotechtacular: 100 Watts 120 Volts”

[Mike] Illuminates Us On LED Filaments

LED filaments started showing up in light bulbs a few months back. [Mike] discovered that the strips are available in bulk from ebay and Alibaba. Always keen to work with new LED technologies, [Mike] ordered a few for experimenting and posted the results on his [mikeselectricstuff] YouTube channel. He also added the information to his website.

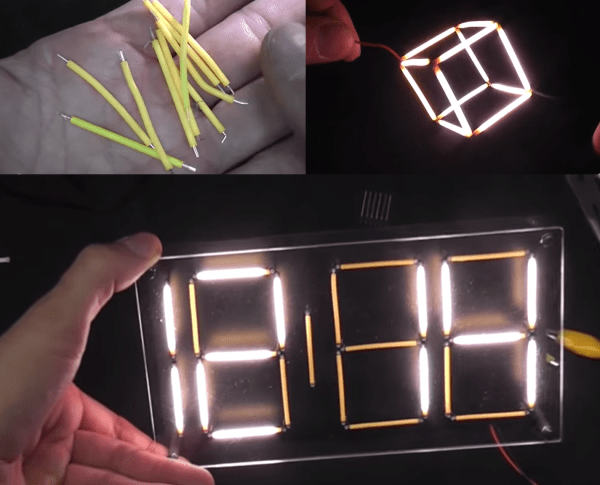
The filaments consist of 28 LEDs connected in series. The blue LEDs are covered by the typical yellow phosphors to make them glow white. It’s interesting to note that some of the filaments use a removable silicone sleeve to hold the phosphor coating, while others are coated with a resin material. The LEDs themselves are bare dies mounted to a metal strip and joined by bond wires. The entire strip can be bent, but be careful, or you’ll break the fragile bond wires.

The strips do require a fair bit of voltage to operate. The entire strip runs best at around 75 and 10~15 mA, while putting out about 1 Watt of light. [Mike] tested a strip to destruction by pumping 40 mA through it. Predictably the strip went out when the bond wires melted. The surprising part was that the strip blinked back on as the wires cooled and re-connected. The strip and wires were working as a temperature controlled switch, similar to the bimetalic strip found in old fashioned “twinkling” incandescent Christmas lights.

Not satisfied with simple tests, [Mike] went on to build a clock using the filaments as elements of a seven segment display. Inspired by numitron and minitron displays, [Mike] built a single sided PCB which held the clock circuit on the bottom and the LED filaments on top. The filaments are spaced off the board by tall wire wrap sockets, which proved to be difficult to keep from shorting out. Texas Instruments TPIC6B595 chips were used to control the LED filaments. Logically the chip functions the same as a 75LS595, which means it can be driven with a SPI bus. The open drain outputs can handle 50 volts – which makes them perfect for this application.  The clock is tremendously bright, but there is still a bit of room for improvement. [Mike] notes that the phosphor of un-powered filaments tend to glow a bit due to light absorbed from nearby illuminated filaments. He’s experimenting with color filters to reduce this effect. At full power though, [Mike] says this clock would easily be daylight readable, and we don’t doubt it!

[Mike’s] final test was a bit whimsical – he built a cube entirely from the LED filaments. The cube looks awesome, but we can’t wait to see who will move things into the 4th dimension and build a tesseract!

Continue reading “[Mike] Illuminates Us On LED Filaments”

Edison’s Cradle Is A Bright Idea

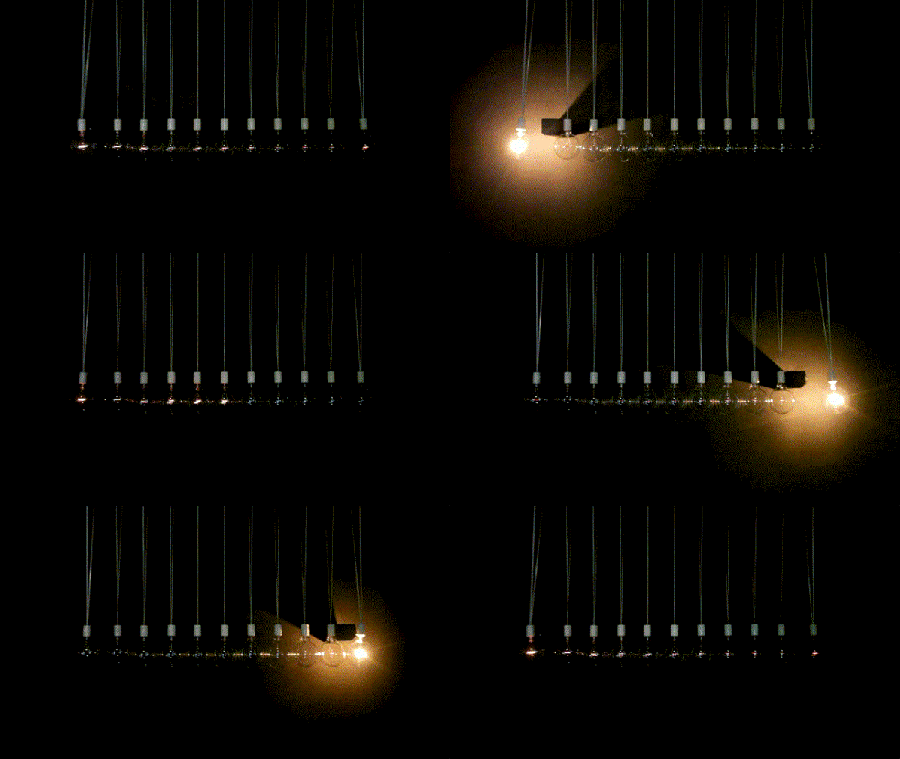
This interesting take on Newton’s Cradle is called “Asobi” and was created by [Yasutoki Kariya]. However, [Johnny] at Spoon and Tamago dubbed it “Edison’s Cradle”, which we think is a great name.

As you can make out in the video, it isn’t really a Newton’s Cradle. There is a solenoid pushing the bulbs at the end out at the correct time, but that’s fine. The overall result is quite brilliant. Unfortunately, we don’t know much about the setup. Anyone have more information? Anyone want to take a stab at making “Tesla’s cradle”?

[via Make]

Continue reading “Edison’s Cradle Is A Bright Idea”

Controllable LEDs Spice Up The Living Room

[youtube=http://www.youtube.com/watch?v=YyjDcAzNJQ0]

[Sprite_tm] brings us another great hack by lighting up the living room. Unsatisfied with just replacing incandescent bulbs with an LED alternative he went with strips of LEDs to illuminate the length of a wall. Starting with a seven-meter strip of the lights, he cut it down to fourteen pieces in order to make the RGB devices individually controllable. [Sprite_tm] whipped up a design for controller boards using RS-485 to communicate with each, and sourcing an ATtiny2313 for the PWM necessary to generate any color. As you can see in the video above, the finished project is brilliant. Oh, and the Lounge Music as a background is nice too.