We see a lot of traffic on the tips line with projects that cover old ground but do so in an instructive way, giving us insight into the basics of electronics. Sure, commercial versions of this IR-controlled light dimmer have been available for decades. But seeing how one works might just help you design your Next Big Thing.
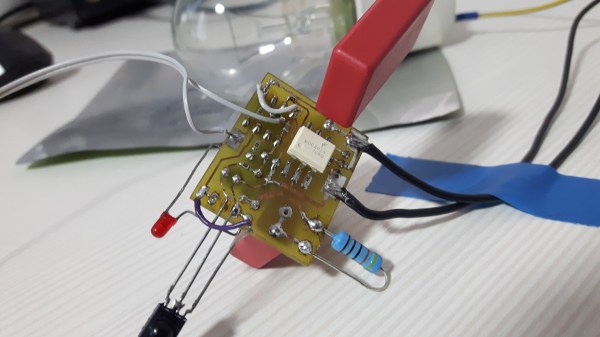
Like many electronic controls, the previous version of this hack required a connection to a neutral in addition to the hot. This version of the circuit relies on passing a small current through the light bulb the dimmer controls to avoid that extra connection. This design limits application to resistive loads like incandescent bulbs. But it’s still a cool circuit, and [Muris] goes into great detail explaining how it works.
We think the neatest bit is the power supply that actually shorts itself out to turn on the load. A PIC controls a triac connected across the supply by monitoring power line zero-crossing. The PIC controls dimming by delaying the time the triac fires, which trims the peaks off of the AC waveform. The PIC is powered by a large capacitor while the triac is conducting, preventing it from resetting until the circuit can start stealing power again. Pretty clever stuff, and a nice PCB design to boot.
Given the pace of technological and cultural change, it might be that [Muris]’ dimmer is already largely obsolete since it won’t work with CFLs or LEDs. But we can see other applications for non-switched mode transformerless power supplies. And then again, we reported on [Muris]’s original dimmer back in 2009, so the basic design has staying power.


 Fail of the Week is a Hackaday column which celebrates failure as a learning tool. Help keep the fun rolling by writing about your own failures and