Ask Hackaday: How Do You Make A Hotplate?

Greetings fellow nerds. The Internet’s favorite artificial baritone chemist has a problem. His hotplates burn up too fast. He needs your help to fix this problem.

[NurdRage] is famous around these parts for his very in-depth explorations of chemistry including the best ways to etch a PCB, building a thermometer probe with no instructions, and chemical synthesis that shouldn’t be performed by anyone without years of experience in a lab. Over the past few years, he’s had a problem: hotplates suck. The heating element is usually poorly constructed, and right now he has two broken hotplates on his bench. These things aren’t cheap, either: a bare-bones hotplate with a magnetic stirrer runs about $600.

Now, [NurdRage] is asking for help. He’s contacted a few manufacturers in China to get a hundred or so of these hotplate heating elements made. Right now, the cost for a mica and metal foil hotplate is about $30 / piece, with a minimum order quantity of 100. That’s $3,000 that could be better spent on something a bit more interesting than a heating element, and this is where you come in: how do you build the heating element for a hotplate, and do it cheaply?

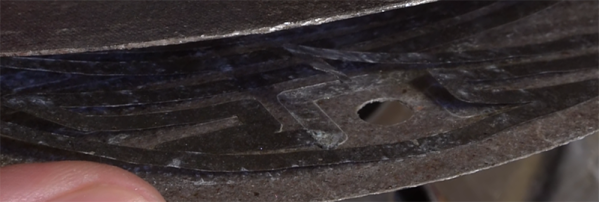
If you buy a hotplate from the usual lab equipment supplier, you’ll get a few pieces of mica and a thin trace of metal foil. Eventually, the metal foil will oxidize, and the entire hotplate will stop working. Repairs can be done with copper tape, but by the time that repair is needed, the heating element is already on its way out.

The requirements for this heating element include a maximum temperature of around 350 ºC. That’s a fair bit hotter than any PCB-based heat bed from a 3D printer gets, so consider that line of reasoning a dead end. This temperature is also above what most resins, thermoplastics, and composites can handle, which is why these hotplates use mica as an insulator.

Right now, [NurdRage] will probably end up spending $3,000 for a group buy of these heating elements. That’s really not that bad – for the price of five hotplates, he’ll have enough heating elements to last through the rest of his YouTube career. There must be a better way, though, so if you have an idea of how to make a high-temperature heating element the DIY way, leave a note in the comments.

Lego-Like Chemistry And Biology Erector Set

A team of researchers and students at the University of California, Riverside has created a Lego-like system of blocks that enables users to custom build chemical and biological research instruments. The system of 3D-printed blocks can create a variety of scientific tools.

The blocks, which are called Multifluidic Evolutionary Components (MECs) appeared in the journal PLOS ONE. Each block in the system performs a basic lab instrument task (pumping fluids, making measurements or interfacing with a user, for example). Since the blocks are designed to work together, users can build apparatus — like bioreactors for making alternative fuels or acid-base titration tools for high school chemistry classes — rapidly and efficiently. The blocks are especially well suited for resource-limited settings, where a library of blocks can create a variety of different research and diagnostic tools.

Continue reading “Lego-Like Chemistry And Biology Erector Set”

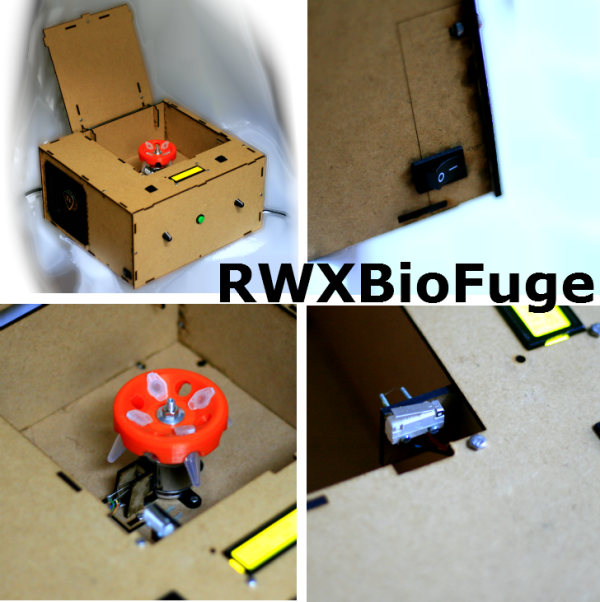
RWXBioFuge collage v0.1

Take Your Samples For A Spin With The RWXBioFuge

We have a confession to make: we love centrifuges. We’ve used all shapes and sizes, for spinning bags of whole blood into separate components to extracting DNA, and everything in between. Unfortunately, these lab staples are too expensive for many DIY-biologists unless they buy them used or build them themselves. [Pieter van Boheemen] was inspired by other DIY centrifuges and decided to make his own, which he named the RWXBioFuge.

[Pieter] designed the RWXBioFuge using Sketchup, OpenSCAD, and InkScape. It features a Thermaltake SMART M850W ATX power supply, an R/C helicopter Electronic Speed Controller (ESC), and brushless outrunner motor. For user output it utilizes a 16×2 LCD character display with an I2C interface.The frame is laser-cut from 3mm MDF while the 3D-printed PLA rotor was designed with OpenSCAD.

An Arduino handles the processing side of things. [Pieter] used an Arduino Ethernet – allowing a web interface to control the centrifuge’s settings and operation from a distance. We can see this being useful in testing out the centrifuge for any rotor/motor balance issues, especially since [Pieter] states that it can be configured to run >10,000 rpm. We wouldn’t want to be in the room if pieces start flying off any centrifuge at that speed!  However, we feel that when everything’s said and done, you should have a centrifuge you can trust by your side when you’re at your lab bench.

While there are similarities to the Openfuge, the larger RWXBioFuge has rotor capacities of eight to twenty 1.5-2.0ml microcentrifuge tubes. Due to the power supply, it is not portable and a bit more expensive, but not incredibly so. There are some small touches about this centrifuge that we really like. The open lid detector is always a welcome safety feature. The “Short” button is very handy for quick 5-10 second spins.

A current version of the RWXBioFuge is being used at the Waag Society’s Open Wetlab. [Pieter’s] planned upgrades for the next version include a magnetic lid lock, different rotor sizes, an accelerometer to detect an improperly balanced rotor, and optimizing the power supply, ESC, and motor setup. You can never have enough centrifuges in a lab, and we are looking forward to seeing this project’s progress!

Check out a few more pictures of the RWXBioFuge after the break.

Continue reading “Take Your Samples For A Spin With The RWXBioFuge”

Nice Looking DIY Magnetic Stirrer

DIY Magnetic Stirrer Looks Professional

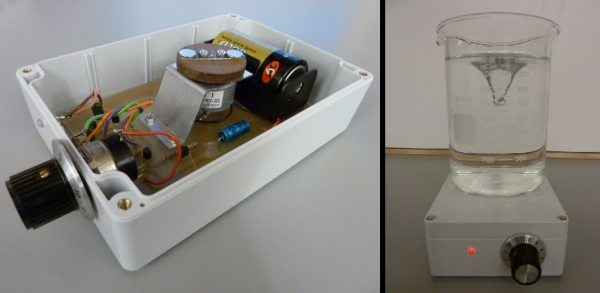
Stirrers are used in chemistry and biology labs to mix containers full of liquids. Magnetic stirrers are often preferred over the mechanical types because they are more sterile, easier to clean and have no external moving parts. Magnetic stirrers quickly rotate a magnet below the glass beaker containing the liquids that need mixing. The magnetic field travels effortlessly through the glass and reacts against a small magnetic cylinder called the stir bar. The spinning stir bar mixes the contents and is the only part of the mixer that touches the liquids.

[Malcolm] built his own magnetic stirrer. Unlike some DIY stirrers out on the ‘web, this one gets an “A” for aesthetics. It’s clean white lines allow it to look right at home in the professional laboratory. The graduated knob looks good and is functional too as the the potentiometer it is attached to allows multiple mixing speeds. Surprisingly, a D-size battery is all that is needed to power the stirrer. Most of the parts required for this project can be found in your spare parts bin. [Malcolm] has written some excellent instructions on how he made the stirrer including a parts list and schematics.

Want to make a magnetic stirrer but aren’t into chemistry or biology? No worries… I pity the fool who don’t build one of these….

DIY High Stability Timebase Hack For ~$25. Why? Frequency Stability Matters!

DIY High Stability Timebase OCXO

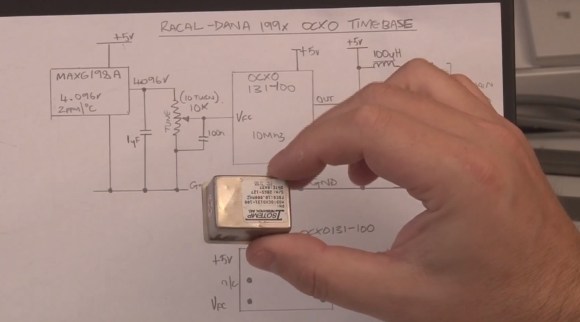
If you have an old “Racal-Dana 199x” frequency counter or similar 10 MHz internally referenced gear with a poor tolerance “standard quartz crystal oscillator” or bit better “temperature compensated crystal oscillator” (TCXO) you could upgrade to a high stability timebase “oven controlled crystal oscillator” (OCXO) for under $25. [Gerry Sweeney] shares his design and fabrication instructions for a DIY OCXO circuit he made for his Racal-Dana frequency counter. We have seen [Gerry] perform a similar upgrade to his HP 53151A, however, this circuit is more generic and can be lashed up on a small section of solderable perf board.

Oven controlled oscillators keep the crystal at a stable temperature which in turn improves frequency stability. Depending on where you’re starting, adding an OCXO could improve your frequency tolerance by 1 to 3 orders of magnitude. Sure, this isn’t as good as a rubidium frequency standard build like we have seen in the past, but as [Gerry] states it is nice to have a transportable standalone frequency counter that doesn’t have to be plugged into his rubidium frequency standard.

[Gerry’s] instructions, schematics and datasheets can be used to upgrade any lab gear which depends on a simple 10 MHz reference (crystal or TXCO). He purchased the OCXO off eBay for about $20 — it might be very old, yet we are assured they get more stable with age. Many OCXO’s require 5 V, 12 V or 24 V so your gear needs to accommodate the correct voltage and current load. To calibrate the OCXO you need a temperature stable variable voltage reference that can be adjusted from 1 to 4 volts. The MAX6198A he had on hand fit the bill at 5 ppm/°C temperature coefficient. Also of importance was to keep the voltage reference and trim pot just above the oven for added temperature stability as well as removing any heat transfer through the mounting screw.

You can watch the video and get more details after the break.

Continue reading “DIY High Stability Timebase Hack For ~$25. Why? Frequency Stability Matters!”

Turning A Rubidium Standard Into A Proper Tool

Rb

You can find rubidium frequency standards all over eBay and various surplus dealers. They’re actually quite interesting devices, able to generate a 10 MHz sine wave with enough precision to be a serviceable atomic clock. While these standards can find themselves very useful in a lab, they’re only a component, and not a working-out-of-the-box device. [Gerry] decided he would fix that, turning his rubidium standard into a proper piece of bench equipment, all in a single afternoon.

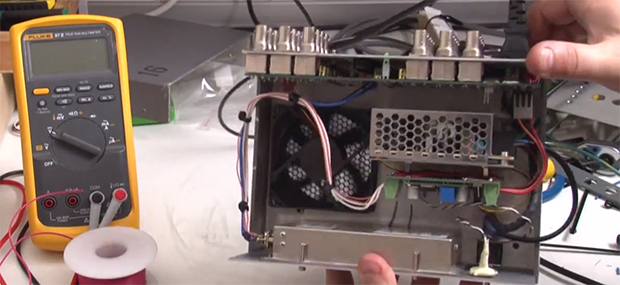
[Gerry]’s first step was finding a proper enclosure for his new piece of equipment. Most of the time, choosing an enclosure is practice in the art of compromise. This time, though, [Gerry] found the perfect enclosure: an old piece of video distribution equipment. On the back of this box, there are a ton of BNC plugs, perfect for attaching to random lab equipment and feeding them a signal from the rubidium standard.

After going through the video circuit and changing the 75 Ohm outputs to 50 Ohms, [Gerry] wired up an eBay power supply, fan, and a small circuit with an 8-pin PIC to complete his new tool. The rubidium standard does get freakishly hot, but hopefully mounting it to a large aluminum box with a bit of cooling will keep all the added electronics in working order.

[Gerry] did all this in just under 5 hours. An impressive feat, given that he probably spent that much time editing the video, available below.

Continue reading “Turning A Rubidium Standard Into A Proper Tool”