MSP430-based Wristwatch Project

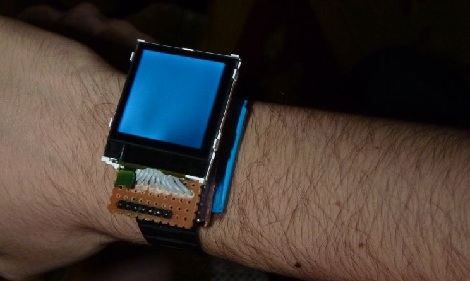
[Nav] is working on a scratch-built wristwatch. Although it is based on an MSP430 microcontroller, it’s not the ready-to-hack ezCronos that you might be thinking of. Instead, [Nav] started with a different TI development tool that we’ve looked at before, the ez430-F2013.

The breakout board for the F2013 is small enough to meet his needs, but still provides easy soldering with 0.1″ vias that break out each pin. To make sure the timepiece is accurate he added a 32.768 kHz clock crystal. A small, square, LCD screen acts as the face of the watch, but we didn’t find specific part information for the display.

Currently the watch can run for a few days on the CR2032. We’d bet some work with sleep modes for the microcontroller can help with that. The watch has a couple of buttons that let you control it, and [Nav] discovered that he could fit everything into the watch case for an iPod nano. That’s creative!

We’ve seen other hacks with tiny batteries. The next logical step here would be to swap out the disposable coin cell for something that can be topped off with an external charger.

Bluetooth Wristwatch Based On An Arduino

We hate to admit it, but we missed out on the TI Chronos watch deal last week. While we’re still a little bit burned over the fact that these watches sold out so fast, [Ahmet] sent in his Open Source Bluetooth Watch and we’re thinking this could eventually be a decent replacement.

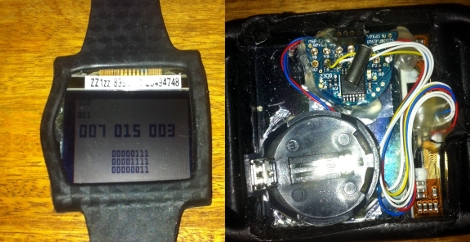
The watch is built around an Arduino Pro Mini, a scavenged Nokia LCD, and a BlueSMiRF Gold. The Bluetooth connects to a Nokia N900 with a little Bluetooth client app [Ahmet] wrote. He also wrote a small GUI for the watch’s LCD display. Afterwards, he was able to display missed calls, new email, and is now working on support for changing songs on his N900’s media player.

Admittedly, a little work needs to be done on the enclosure. Still, the potential for this watch is much greater than the iPod as a watch project we saw last year. Right now, we’re thinking about what could be added to [Ahmet]’s watch. An accelerometer would probably be on the top of our list, but if you have any ideas feel free to leave them in the comments.

Check out the walk through of the watch’s functions after the break.

Continue reading “Bluetooth Wristwatch Based On An Arduino”

laptop_screen_polarized_art_fixture

Polarized Art Fixture Made From A Busted Laptop Screen

[Pedro] had a busted laptop LCD screen on his hands, but rather than throw it out, he brainstormed what he could possibly do with what would typically be considered a worthless item. He decided to make a simple art installation using the scrapped part, so he gathered a few other supplies and got to work.

The first thing he did was pull the LCD screen from the laptop, separating the front panel from the backlight panel. He drained the liquid crystal fluid from the display, and set it inside a picture frame in place of the glass. He added spacers around the edge of the frame so that the backlight could be mounted several inches behind the LCD panel.

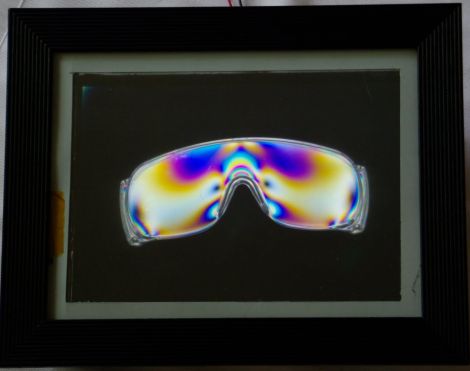
[Pedro] then found a few polystyrene and polycarbonate plastic items from around the house, and placed them inside the frame. As you can see in the picture above, the polarizing filter built into the LCD screen makes for some pretty cool effects.

While you could debate for hours over exactly what is art, there’s no denying that his PolFrame looks cool and is a great way to save electronics from the scrap heap. We just want to know what he did with the LC fluid he drained from the screen!

Automated Water Distiller Gets An Overhaul

automated_water_distiller_stillduino_v2

One thing we love about the hacking community is the drive that most people have to revamp and rework their “finished” projects. A few weeks ago, we wrote about a water distilling rig that [Kyle] hacked together, which allowed him to automate his distillation process. He took his project back into the workshop and tweaked a few things, giving us the heads up when he was finished.

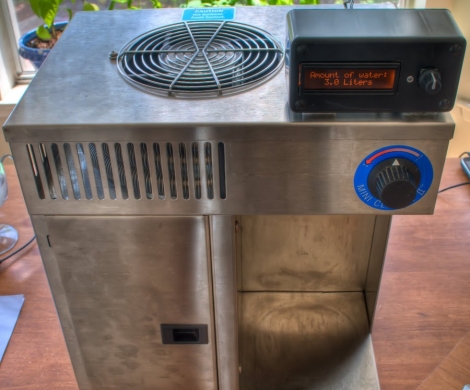
He got his hands on a new distillation unit and decided that he wanted to transfer over his automation setup. He cleaned things up by ditching most of the components from his first distiller, including the toy clock tower dial (which we happened to think was pretty fun). The same relays and Arduino were used in the second version of the still, but he reworked all of his code to make use of his new control interface.

The new model sports an LCD panel that allows the user to interact with the machine via a push button rotary encoder. Now he can easily navigate through a series of menus that enable him to set the distillation quantity and start time, leaving the distiller to do the hard work. The still also does a quick safety check each time it starts up, to ensure that things are in good working order before firing up the heating element.

[Kyle] says he will continue to tweak the distiller, though we think it looks great already.

Continue reading to see a quick video of his Stillduino v2 in action.

Continue reading “Automated Water Distiller Gets An Overhaul”

Running Android On Large Touch Screen Displays

32_inch_android_touch_screen_display

Forget Microsoft Surface, what do you think about having a 32-inch Android-powered touchscreen display in your living room? That possibility might not be too far off, thanks to the engineers over at SKR Technology in Japan.

Primarily a company that designs and builds digital signage, they were approached by several customers who wanted a large screen device that had multi-touch functionality similar to a smartphone. Since they frequently work with Windows, they tried building a solution around Windows 7, but it just didn’t function as smoothly as they would like. Instead they turned towards Android, but were disappointed to find out that none of their suppliers supported the OS.

Instead of scrapping the project, they build their own interface that allows an Android-powered device to interact with multi-touch displays. As you can see in the video embedded below the display works quite well, mirroring everything on the Android device’s screen.

While the product is not yet available commercially, we should see it come to market later this year. We hope to see an open source version sometime in the future as well, even if we can’t quite afford a 32” touch panel display.

Continue reading “Running Android On Large Touch Screen Displays”

Waterfall Signal Visualizer From Arduino And Cellphone LCD

[Leigh] is a HAM operator (you may know him as wa5znu). He is familiar with a signal visualization tool called a waterfall which plots signal strength and frequency over time. He wanted to build his own waterfall and ended up with this Arduino-based version which he calls Cascata. Cascata means waterfall in Italian which meshes nicely with Arduino’s country of origin

The display he chose is a Nokia LCD shield from SparkFun. It’s easy to plug in and there were already libraries available to drive the display. The audio input just connects to a headphone plug (you can just make it out at the bottom right in the image above) using some electrical tape. A free-formed resistor divider ensures that the signal is within a measurable range. [Leigh] found that signal noise was a bit of a problem but was able to improve his results by adding a capacitor to the Arduino headers between the VREF and GND pins.

See it in action after the break.

Continue reading “Waterfall Signal Visualizer From Arduino And Cellphone LCD”

ChibiMo – An AVR-based USB Display

chibimo_usb_arduino_external_monitor

[Ko] wanted to add an extra monitor to his computer, but he wasn’t looking for something huge that would sit atop his desk – he desired something smaller, much smaller.

His ChibiMo mini USB monitor is a neat little creation that lets you extend or mirror your Windows desktop onto a tiny 128×64 pixel LCD panel. At first glance you might think that it is too small to be useful, but it is recognized in Windows in the same fashion as any standard monitor. This means that it would be quite easy to load system monitoring software solely on the LCD panel, keeping the clutter off of your main display.

The display is wired to an Arduino like any other standard shield, and is connected to his computer via a USB cable. Once the ChibiMo sketch is uploaded to the Arduino, the display driver needs to be loaded on the PC. This allows you to tweak the ChibiMo’s display settings in Windows’ display manager.

It’s a great concept, one we would love to see explored further. As of right now, the ChibiMo is only supported on x86 versions of Windows XP, and we weren’t able to find source links anywhere on his site. Perhaps there are some talented members of our community who would be interested in taking a whack at it…