Hacking Hue Lightbulbs

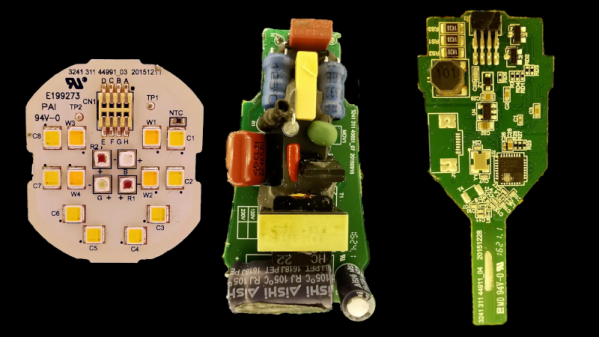
What do you do with a Hue smart lightbulb? Well, if you are [Chris Greening], you take it apart and get hacking. If you ever wondered what’s inside, the teardown is pretty good, and you can also watch the video below. The potting compound, however, makes a mess.

Once you get the potting undone, there are three PCBs: an LED carrier, a power supply, and a logic board. The arrangement of the LEDs is a bit confusing, but [Chris] explains it along with providing schematics for all of the boards.

Continue reading “Hacking Hue Lightbulbs”

LED Matrix Displays Get New Look Thanks To SMD Stencils

Even if surface-mount skills aren’t in your repertoire, chances are pretty good that most of us are at least familiar with SMD stencils. These paper-thin laser-cut steel sheets are a handy way to apply a schmear of solder paste to the pads of a PCB before component placement and reflowing. But are stencils good for anything else?

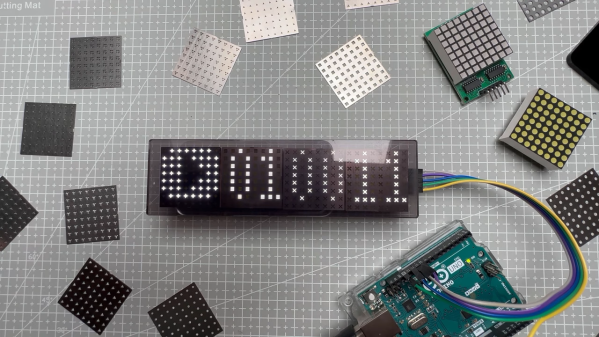
It turns out they are, if you’ve got some plain old 8×8 LED matrix displays you want to jazz up a bit. In this case, [upir]’s displays were of the square pixel type, but this trick would work just as well for a matrix with circular elements. Most of the video below is a master class in Adobe Illustrator, which [upir] used to generate the artwork for his stencils. There are a lot of great tips here that make creating one simple shape and copying it over the whole array with the proper spacing a lot easier. He also details panelizing multiple stencils, as well as the workflow from Illustrator to manufacturing.

When lined up properly over the face of the LED matrix, the stencils have quite an effect. We really liked the narrow vertical bars, which make the LED display look a bit like a VFD. And just because [upir] chose to use the same simple shape over all the LEDs in a matrix doesn’t mean that there aren’t other options. We can see how you might use the same technique to create different icons or even alphanumeric characters to create custom LED displays. The possibilities are pretty much limited to your imagination.

This isn’t the first time we’ve seen [upir] teaching old displays new tricks.

Continue reading “LED Matrix Displays Get New Look Thanks To SMD Stencils”

The Eyes Have It With This Solid State Magic Eye

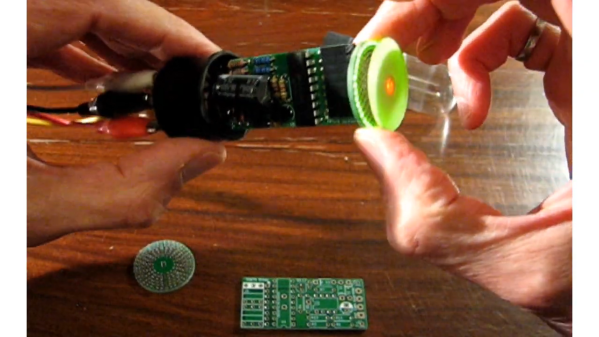
The classic “Magic Eye” tuning indicator was a fantastic piece of vacuum tube technology that graced all kinds of electronic gear for a fair fraction of the 20th century. But despite its prevalence, finding a new-old-stock Magic Eye tube is a tall order these days, especially for the rare versions like the 6T5. No worries, though, since direct plug-in solid-state replacements for the 6T5 are now a thing, thanks to [Gord Rabjohn]. Continue reading “The Eyes Have It With This Solid State Magic Eye”

IOT Message Board Puts Fourteen-Segment Displays To Work

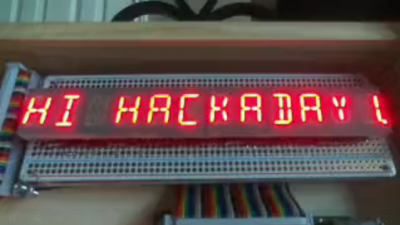
We’re not sure, but the number of recognizable alphanumeric characters that a seven-segment display can manage seems to have more to do with human pattern recognition than engineering. It takes some imagination, and perhaps a little squinting, to discern some characters, though. Arguably better is the fourteen-segment display, which has been pressed into service in this just-for-funsies IOT message board.

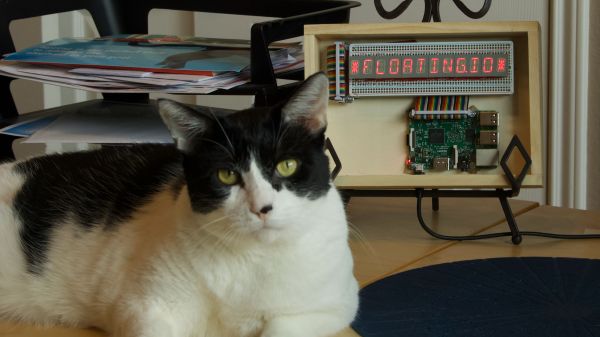
As [Steve] tells the story, this is one of those “boredom-buster” projects that start with a look through the junk bin to see what presents itself. In his case, some fourteen-segment common-cathode LEDs presented themselves, and the result was a simple but fun build. [Steve] used some clever methods to get the display stuffed onto two protoboards, including mounting the current-limiting resistors cordwood-style between the boards. A Raspberry Pi drives the display through a very neatly routed ribbon cable, and the whole thing lives in a tidy wooden box.

The IOT part of the build allows the display to show messages entered on [Steve]’s web page, with a webcam live stream to close the loop. Strangely, the display seems stuck on the “HI HACKADAY!” we entered as a test after [Steve] tipped us off, so we’re not sure if we busted it or what. Apologies if we did, [Steve]. And by the way, if your cats are named [Nibble] and [Pixel], well done!

No matter what you do with them, multi-segment displays are pretty cool. But if you think they’re something new, you’ve got another think coming.

Spin Up To Speed With This Stroboscope

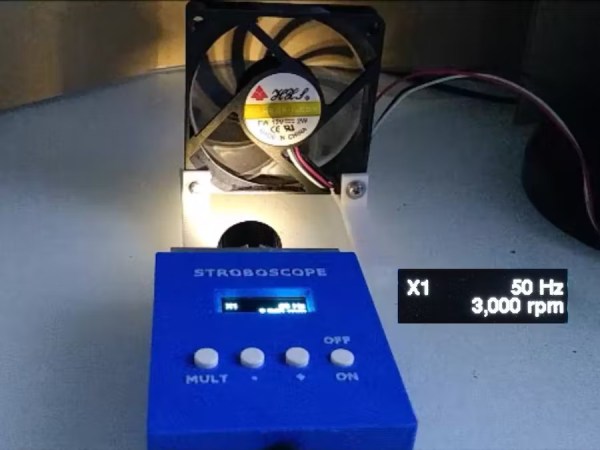
A stroboscope is not the most common tool, and while they can be purchased fairly inexpensively from various online stores, they are straightforward enough tools that plenty of us could build our own mostly from parts laying around. The basic idea is to shine a flashing light on a spinning object, and when it appears stationary the stroboscope will indicate the rotational speed. There are a few specialty parts that might not be in everyone’s parts drawers, though, and [John] shows us the ins-and-outs of his own DIY stroboscope.

The effect relies on extremely precise timing, and as such the most important part of a build like this is making sure to get the LED circuitry correct so its duty cycle and frequency can be tightly controlled. [John] is using a PT4115E driver board for the LED, and is using it to power a 1W white LED which also includes its own heat sink and lens. The controls for the stroboscope are handled by an ATtiny1614 microcontroller which shows its pulse rate on a small screen. The user can control the rate the LED flashes with simple controls, and when the spinning object appears to come to a stop the only thing left to do is read this value off of the screen.

While it might seem like an overly niche tool, stroboscopes have plenty of day-to-day uses. Older cars that used a central distributor made use of a specialty stroboscope called a timing light in order to properly advance the ignition timing of the engine. They also retain some use in medical applications, and plenty of older readers may be familiar with their use adjusting the speed on record players. They can also be used to make sure the shutter speeds on cameras are calibrated correctly.

Continue reading “Spin Up To Speed With This Stroboscope”

Adversarial IR Hoodie Lets You Own The Night In Anonymity

If you’re in the market for something to obfuscate your nefarious nocturnal activities, rejoice — this adversarial infrared hoodie may be just what you’re looking for.

Not that we condone illegal activities, of course, and neither does artist [Mac Pierce], who created “The Camera-Shy Hoodie.” His purpose seems to be exploring the nature of the surveillance state, or rather to perplex it in the name of anonymity. The idea is simple — equip a standard hoodie with a ring of super-bright IR LEDs, and control them with an RP2040.

We’ve seen blinding hoodies before, but here the LEDs strobe on and off in one of three different patterns, all of which are timed to confound the autoexposure mechanism in just about any surveillance camera by not giving it time to adjust to the rapidly and drastically changing light level. The result is near-total obfuscation of the wearer’s facial features, at least when the camera is in night-vision mode. Check out the results in the video below.

There are some nice touches to [Mac]’s approach, like aluminum PCBs for the LEDs and the use of soldered-on fabric snaps to attach them to the inside of the hoodie, making them easy to remove for laundering. With the LEDs peeking through holes in the fabric, the hoodie looks pretty run-of-the-mill — until, of course, night falls and the USB battery bank in the hoodie’s pocket powers up the light show.

Granted, this won’t exactly help you avoid detection — the big ball of light around your head will be instantly seen by even the most casual observer. But at least it makes it easier to keep your face to yourself. And it won’t help much in daylight — for that, you might want something a little more like this passive adversarial ugly sweater.

Continue reading “Adversarial IR Hoodie Lets You Own The Night In Anonymity”

LED Filament Lamp Is Subtle, Warm, And Elegant

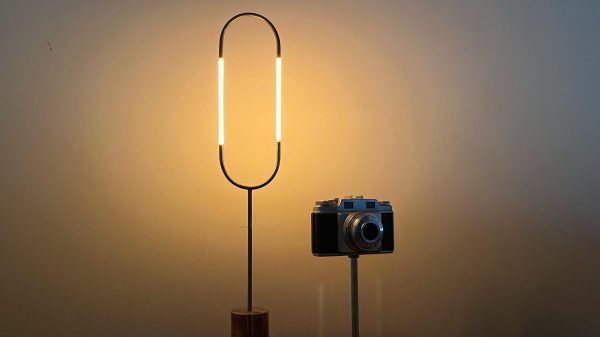
Hackers have loved LEDs from day one, back when they gave us little more than a dim spot of colored light in the darkness. These days, they’re big, bright, and beautiful, and can be used to create some exquisite lighting fixtures. This lamp build from [lonesoulsurfer] is a great example of that.

The build uses LED filaments, which have grown popular for the way they emulate old-fashioned Edison filament bulbs. The filaments consist of tiny LEDs all in a row, covered in flexible material to allow them to act like a filament. They’ll happily power up from just 3V, and deliver great brightness and lovely warm light.

[lonesoulsurfer] bent up an elegant oval-shaped frame for the lamp, using common brass tubing. In the middle of the are two lengths of white plastic tubing with the LEDs inside. The brass is painted black, with the LEDs providing two bright glowing lines on the arms of the oval. The base is then made out of wood and copper tubing, providing a pop of material contrast to the rest of the frame.

It’s an elegant build, and one you can readily recreate at home. If you do so with enough finesse, it will stunt on anything Ikea or (Australian) Kmart has put out in the last decade, in both material quality and uniqueness. We do love a good lamp build around these parts, after all. Video after the break.

Continue reading “LED Filament Lamp Is Subtle, Warm, And Elegant”