Dumb Down Your Xiaomi Smart Lamp With A Custom Firmware

Undoubtedly, the ESP8266’s biggest selling point is its WiFi capability for a ridiculously low price. Paranoid folks probably await the day its closed-source firmware bits will turn against humanity in a giant botnet, but until then, hobbyists and commercial vendors alike will proceed putting them in their IoT projects and devices. One of those devices is the Yeelight desk lamp that lets you set its color temperature and brightness via mobile app.

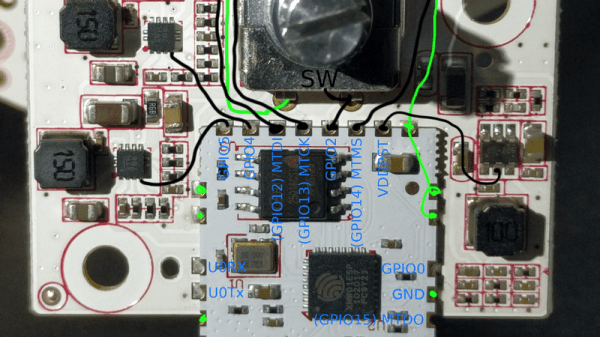
[fvollmer] acquired such a lamp, and while he appreciated its design and general concept, he wasn’t happy that it communicates with external servers. So he did the only reasonable thing and wrote his own firmware that resembles the original functionality, but leaves out the WiFi part. After all, the ESP8266 has still a lot to offer in its core essence: a full-blown 32-bit microcontroller with support for the most common, hobbyist-friendly SDKs.

The lamp’s color temperature and brightness are set with a rotary encoder / push button combo switch, and the LEDs themselves are controlled via PWM. All things considered, it’s a rather straightforward endeavour, for which [fvollmer] chose the standalone C SDK. And in the end, it’s not like he’s unreasonably cautious to keep some control over his household items.

An LED Effect For Every Occasion

Quality software development examples can be hard to come by. Sure, it’s easy to pop over to Google and find a <code> block with all the right keywords, but having everything correctly explained can be hit or miss. And the more niche the subject, the thinner the forum posts get. Bucking the downward trend [HansLuijten] provides an astoundingly thorough set of LED strip patterns in his comprehensive post titledĀ Arduino LED strip effects.

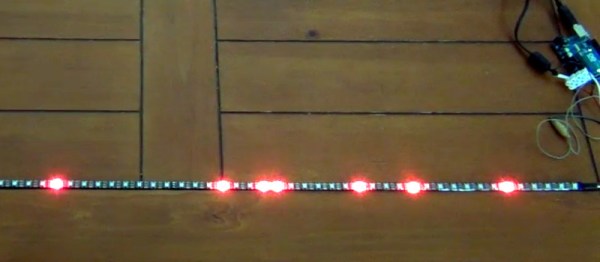
Don’t let the unassuming title lead you astray from the content, because what’s on offer goes beyond your average beginner tutorial on how to setup a strand of NeoPixels. [HansLuijten] is thorough to a fault; providing examples for everything from simple single color fades and classic Cylon eyes to effects that look likeĀ meteors falling from the sky. Seriously! Check out the videos on their webpage. Those chasing lights you see around theater signs? Check. Color twinkle and sparkle? Check. Color wipes and rainbow fades? Check, and check. Continue reading “An LED Effect For Every Occasion”

LED Strips Are So Hot Right Now

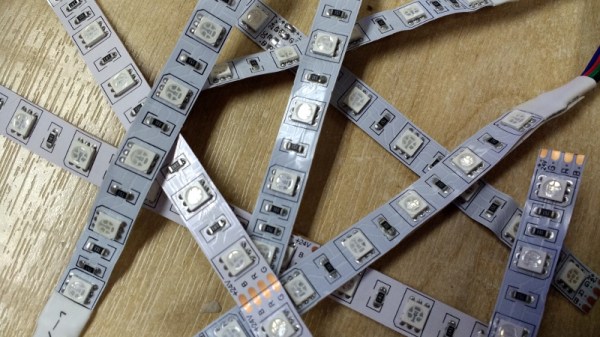
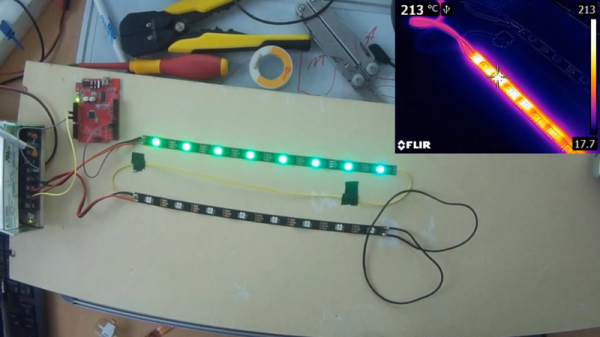
Sometimes there will appear a figure that flies in the face of reason, and challenges everything you think you know about a subject. Just such a moment came from [Chris Taylor] at Milton Keynes Makerspace when he characterised a set of LED strips, and the figure in question was that he found an LED strip creates the same amount of heat as its equivalent incandescent bulb.

We can hear your coffee hitting the monitor and your reaching for the keyboard to place a suitably pithy comment, because yes, that’s a pretty unbelievable statement. But it’s no less true, albeit that the key to it lies in its details. If you have a 100 W incandescent bulb, 88% of the energy is radiated as light and infra-red, leaving 12 W heating the bulb itself. To get the same light output from an LED meanwhile we’d only need 17 W, of which 11.9 W would be left to heat the LED. Which means that an LED strip can get as hot as an incandescent bulb with equivalent light output, and he’s run some tests to prove it.

If you’ve worked with LEDs, you’ll know that they get hot. But to learn that they have the potential to get as hot as their incandescent equivalents is something of a eye-opener, and should demonstrate the need for adequate thermal mitigation. It’s easy to take them for granted, and we’ve taken a look before at some of their safety pitfalls.

Disclosure: [Jenny List] is a member of MK Makerspace.

The Engineering Case For Fusing Your LED Strips

Modern LED strips are magical things. The WS2812 has allowed the quick and easy creation of addressable RGB installations, revolutionizing the science of cool glowy things. However, this accessibility means that it’s easy to get in over your head and make some simple mistakes that could end catastrophically. [Thomas] is here to help, outlining a common mistake made when building with LED strips that is really rather dangerous.

The problem is the combination of hardware typically used to run these LED strings. They’re quite bright and draw significant amounts of power, each pixel drawing up to 60 mA at full-white. In a string of just 10 pixels, the strip is already drawing 600 mA. For this reason, it’s common for people to choose quite hefty power supplies that can readily deliver several amps to run these installations.

It’s here that the problem starts. Typically, wires used to hook up the LED strips are quite thin and the flex strips themselves have a significant resistance, too. This means it’s possible to short circuit an LED strip without actually tripping the overcurrent protection on something like an ATX power supply, which may be fused at well over 10 amps. With the resistance of the wires and strip acting as a current limiter, the strip can overheat to the point of catching fire while the power supply happily continues to pump in the juice. In a home workshop under careful supervision, this may be a manageable risk. In an unattended installation, things could be far worse.

Thankfully, the solution is simple. By installing an appropriately rated fuse for the number of LEDs in the circuit, the installation becomes safer, as the fuse will burn out under a short circuit condition even if the power supply is happy to supply the current. With the example of 10 LEDs drawing 600 mA, a 1 amp fuse would do just fine to protect the circuit in the event of an accidental short.

It’s a great explanation of a common yet dangerous problem, and [Thomas] backs it up by using a thermal camera to illustrate just how hot things can get in mere seconds. Armed with this knowledge, you can now safely play with LEDs instead of fire. But now that you’re feeling confident, why not check out these eyeball-searing 3 watt addressable LEDs?

Continue reading “The Engineering Case For Fusing Your LED Strips”

Reading Out An EPROM – With DIP Switches

We’re all too spoiled nowadays with our comfortable ways to erase and write data to persistent memory, whether it’s our microcontroller’s internal flash or some external EEPROM. Admittedly, those memory technologies aren’t exactly new, but they stem from a time when their predecessors had to bathe under ultraviolet light in order to make space for something new. [Taylor Schweizer] recently came across some of these quartz-window decorated chips, and was curious to find out what is stored in them. Inspired by the BIOS reverse engineering scene in Halt and Catch Fire, he ended up building his own simple reader to display the EPROM’s content.

The 2732 he uses is a standard EPROM with 32kbit memory. Two pins, Chip Enable and Output Enable, serve as main control interface, while 12 address pins select the data stored in the chip’s internal 4K x 8 arrangement, to output it on the 8 data output pins. You could of course hook up the EPROM to a microcontroller and send what you read via serial line, but [Taylor] opted for a more hands-on approach that lets him read out the data in a manual way. He simply uses a bank of DIP switches to set the address and control pins, and added a row of LEDs as display.

As you can see from the short demonstration in the video after the break, reading out the entire EPROM would be a rather tedious task this way. If you do have more serious intentions to read out the content, you could have a look at one of those microcontroller based solutions sending data via serial line after all.

Continue reading “Reading Out An EPROM – With DIP Switches”

A Mini Stacker Arcade Cabinet

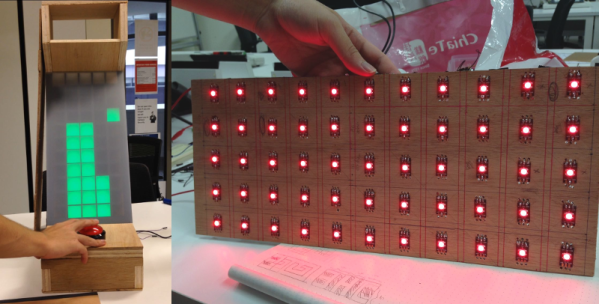
For [LumoW], what started as a school project turned into a passion project. He and his team made a hardware implementation of an arcade game called Stacker. Never heard of it? It’s pretty fun, kind of like an inverse Tetris. You can play the flash version here and see their mini arcade version after the break.

The game is based around the Mojo FPGA which the class required, and it’s programmed entirely in bitwise operators. It uses WS2812 RGB LEDs to represent the individual tower building blocks, and these are mounted on plywood in a matrix and separated into cells by a grid of foam board. After some trial and error, the team found the perfect shade of acrylic to diffuse the bright dots into glowing squares.

Since the game only needs one input, we don’t think [LumoW] should apologize at all for using the biggest, baddest button they could find. Besides, the game has that edge-of-your-seat action that can turn panic into heavy-handedness and cool DIY arcade games into shards of sadness.

Looking for something more advanced to do with an FPGA? Try your hand at vector games.

Continue reading “A Mini Stacker Arcade Cabinet”

Joule Thief Steals In Favor Of Christmas

A lot of things tend to get stretched during the holiday season, like shopping budgets and waistbands and patience. This year, [Chris] is stretching the limits of both the mini breadboard and the humble 1.5 V LR44 coin cell with his joule thief-driven LED mini Christmas tree.

With the push of a micro momentary, the joule thief circuit squeezes enough power from an LR44 to boot an MSP430 microcontroller, which needs 1.8 V – 3.6 V. After boot, the micro takes control of the joule thief circuit and milks it whenever the voltage falls below 3.2 V. This tree may be small in stature, but it’s feature-rich. A push of the same momentary button cycles through four different light shows, ending with a medley of all four. Be dazzled after the break.

The code for this tiny tree, which features an awesome ASCII breadboard layout and schematic, is up on GitHub. [Chris] has it listed among a few other manageable bare-metal ‘430 projects that would be great for beginners at pure C. If that sounds like you, why not give yourself the gift of learning a new language?

We’ve seen some spirited ways of lighting LEDs, but doing it with candle power takes the fruitcake.

Continue reading “Joule Thief Steals In Favor Of Christmas”