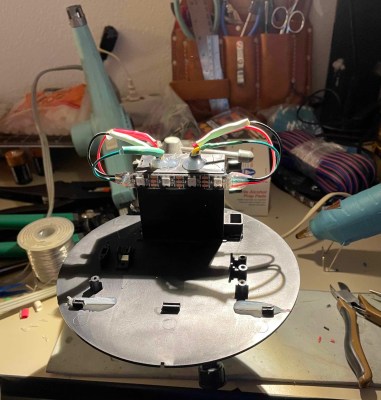
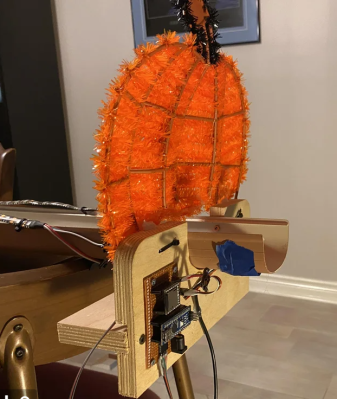
Now first of all, [Steph] grants that you can already take your pick of several LED pumpkin badges out there on IO. That’s not the point. The point is that this flickering pumpkin pin is nicely-built as well as being open source.
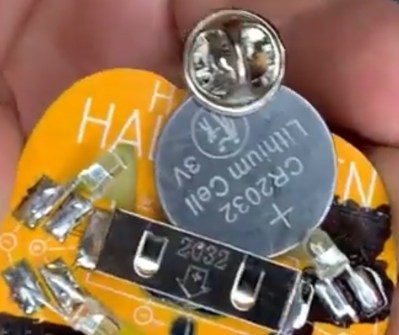
Even though it’s fully featured — it flickers, it’s wearable, and it’s lightweight — the build couldn’t be more simple. It’s fancy through-hole LEDs and a coin cell holder, plus a tack pin to stick it through your shirt. But the final result is quite elegant thanks to clever use of PCB layering.
The first version was to get all the layers right to let the light through and embellish the jack-o-lantern’s lines with manufacturer-applied silver solder, but as [Steph] points out, it looked ‘like something a disturbed child might carve into their desk in detention’. So [Steph] enlisted [Mx. Jack Nelson], who improved the artwork.
Pretty much every component does double duty here, including the tack pin — it serves as a switch because it can hold the battery in place. The battery’s edges reflect the glowing light quite nicely around the edge of the pin. And the LEDs beneath the battery prevent it from slipping out. You can see how it goes together in the video after the break.
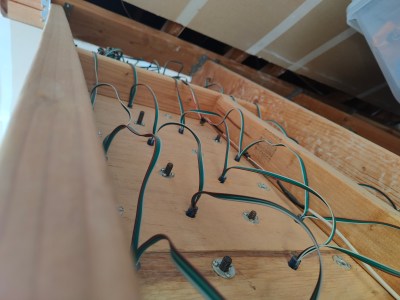
When you can’t climb actual rocks all the time, what do you do to train and keep sharp? You go to a rock-climbing gym, naturally. But what do you do when it’s 2020 and your rock-climbing gym has shuttered for the foreseeable? You build the best darn rock-climbing wall possible, and you outfit it with an LED for every hold and write an app that lets you plan your route and repeat it later.
This is essentially a DIY version of something called a Moonboard, which, aside from being expensive, was quickly going out of stock back in 2020. [Pegor] started the Peggyboard by building a climbing woody, which is a legendary home climbing wall built by a legendary climber about 20 years ago.
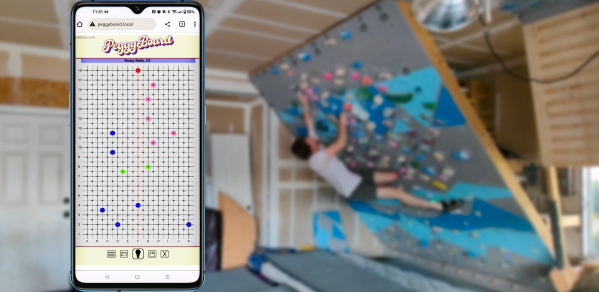
The Peggyboard is Raspberry Pi-powered and has a rather nice app going for it, which [Pegor] has kindly decided to open source.
On the initial screen, the user can select a route and assign the holds as either starting holds, foot holds, hand holds, or finishing holds, each with a different color LED. Another screen lets the user choose a previously-saved route, then apply it to the Peggyboard’s LEDs with the light bulb icon.
Even though it seems the worst of COVID has passed, October generally kicks off cold and flu season, so why not continue to pass out Halloween treats in a socially-distanced fashion?
That is, of course the idea behind [Gord Payne]’s Halloween Treat Trough of Terror. Lay a treat at the top of the trough and it will activate the LED strips that follow the treat down to the end, as well as some spooky sounds. The treat in question is detected by an SR-04 ultrasonic distance sensor connected to an Arduino Nano.
All in all this was a highly successful build as far as neighborhood entertainment value goes. Toddlers stared in awe at the blinkenlights, teenagers proclaimed it ‘sick’, and we can only assume that the adults were likely happy to see something aimed at kids that’s not scary.
[Gord] has a nice how-to if you want to build your own, and of course, the Arduino sketch is available. Be sure to check it out in action after the break.
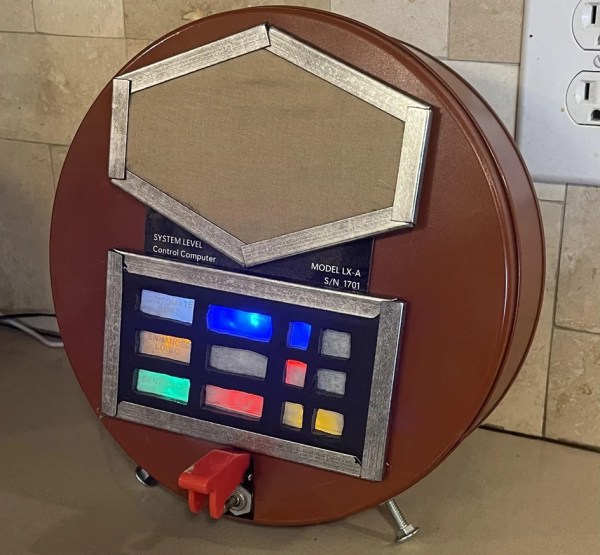
Back in the last century, especially in the ’40s to the ’60s, one of the major home decor trends was to install various home appliances, like the television or stereo, into its own piece of furniture. These were usually bulky, awkward, and incredibly heavy. And, since real life inspires art, most of the futuristic sci-fi technology we saw in movies and TV of the time was similarly conspicuous and physical. Not so with modern technology, though, where the trend now is to hide it out of the way and forget it exists. But [dermbrian] wanted some of his modern technology to have some of the mid-century visibility aesthetic so he made some modifications to his Amazon Echo.
The Echo itself remains largely unmodified, other than placing it inside a much larger cookie tin with some supporting electronics. For that, [dermbrian] found a relay board with a built-in microphone which switches the relay off when it detects sound so that when the Echo is activated, the sound from its speaker activates the module. From there it drives a series of blinkenlights which mimic the 60s computer aesthetic. Some custom fabrication and light diffusion methods were needed to get it to look just right, and a switch on the outside can disable the mechanism if it is getting triggered by background noise like music from his stereo.
While the appeal of this style may be lost on anyone who wasn’t a fan of the original Lost in Space, Star Trek, or Jetsons, it certainly holds a special significance for those who grew up in that era. It’s certainly not the first project we’ve seen to take a look back at the aesthetics of bygone eras, either. Take a look at this project which adds lenses to modern displays to give them the impression of antiquated CRT displays.
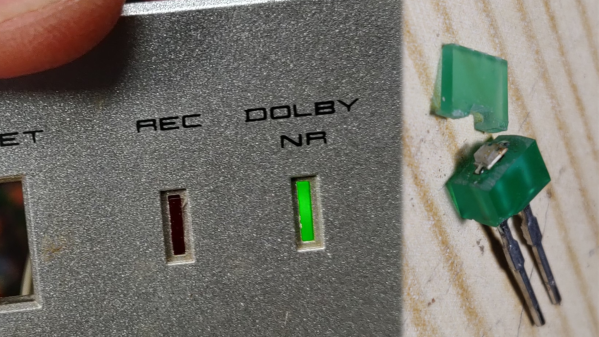
[Chris Jones] recently found himself in a pickle. An indicator LED off an old piece of stereo equipment had failed. It was a strange rectangular type for which he could source no modern substitute. Using a different LED would ruin the aesthetic. Thus, what else was [Chris] to do, but attempt surgery on an LED!
The first attempt was the simplest. [Chris] tried soldering a small SMD LED between the legs of the existing part, which was open circuit. It worked, but the light didn’t really propagate to the top of the LED’s plastic. It was too dim to do the job.
Unperturbed, [Chris] instead elected to cut the LED apart. he soldered the SMD LED to the original LED’s leads, inside its body this time. The top part of the plastic lens was then notched to fit snugly over the new SMD part. A bit of superglue then joined everything back together. The finished product looks a touch messy on the PCB. However, installed back inside the stereo, it’s a perfectly stealth fix that looks great.
Some will consider this fix frivolous and a waste of time. Others will appreciate the way it preserved the attractive retro look of a piece of vintage audio gear. In any case, we can all agree that modern LEDs are often a great replacement for older parts in many cases. If you’ve pulled off your own weird, oddball repair hacks, don’t hesitate to share us with them on the tipsline!
This green LED has stopped working. I think it's my fault – one leg shorted to the chassis while it was switched on and gave it 15V which it didn't like. It's an odd shape so we can't buy a new one. Can we fix it? 🧵 /1 pic.twitter.com/DX71Kk0TP5
The program is known as TwinkleFOX, and relies on the popular FastLED library for addressable LEDs. [Mark’s] demo setup is built around using WS2811 LEDs, put together in a string with plastic diffusers on each bulb. The Arduino is programmed to vary the brightness of each LED according to a triangle wave function. To create the twinkling effect, each LED has its own unique clock signal, so they vary in brightness at different times and at different rates.
Using an Arduino Uno or Leonardo, [Mark] reports its possible to twinkle 300 individual LEDs at a rate of over 50 updates a second. Using a faster microcontroller should net reliable performance with longer strings. Meanwhile, if you’re wondering how the older-style lights used to twinkle, we’ve covered that before too. Video after the break.
The infinity dodecahedron is one of those super eye-catching builds that many of us hardware hackers have on our ‘build one day’ project list. The very thought of actually doing it strikes a little fear into the heart of even the most intrepid maker, once you start to think about all the intricate little details and associated ways it could all go horribly wrong. Luckily for us, [Hari Wiguna] has documented his latest build as a long video build log, showing lots of neat tricks and highlighting many problems along the way. With the eventual goal of removing many of the issues that make such a build tricky, [Hari] hopes to make it practically easy. Let’s see how that turns out!
A common route for such a build relies on appropriately shaped 3D printed frame parts, with some kind of clear plastic for the 12 faces, and LED strips stuck to the inside of each of the 30 edges. Whilst this works, [Hari] thought he could do a bit better, using butt-jointed PCBs as the frame material.
The PCBs handily double up as something to solder LEDs onto (because that’s what PCBs are mostly intended for!) as well as a way to pass power and data signals around the frame in a minimally visible way. As will become obvious from the lengthy discussion in the video, a few simple tricks here and there are needed to make this strategy work. With the recent proliferation of PCB modules using castellated edges for termination, the usual Chinese PCB fab services have all started offering very good value services for this feature. Once a PCB feature that was a specialized (read that as ‘expensive’) offering, it is now quite affordable on your average maker’s budget.
One immediate practical issue was how to pass the data connection around from edge to edge, given that there are three edges per vertex. The solution [Hari] came up with was simple, just duplicate the signals on each end of the PCB, so the data out signal can be tapped from either end, as required.
Even with 3D printed jigs to hold the PCBs at just the right angles, there’s still some wiggle and a little risk of edges not quite aligning, due to accumulated errors around the frame. It did come together in the end, with the expected spectacular visuals. We’re sure many of you will be waiting for [Hari] to release the next version of the design to the community, hopefully with even more of the ease-of-build issues resolved, because we want one even more now.
Naturally, this is by no means the first infinity platonic solid we’ve seen, here’s a smaller one for starters. If you remove the mirrors and LEDs, then you’re just left with a plain old dodecahedron, like this cool folding project.