The program is known as TwinkleFOX, and relies on the popular FastLED library for addressable LEDs. [Mark’s] demo setup is built around using WS2811 LEDs, put together in a string with plastic diffusers on each bulb. The Arduino is programmed to vary the brightness of each LED according to a triangle wave function. To create the twinkling effect, each LED has its own unique clock signal, so they vary in brightness at different times and at different rates.
Using an Arduino Uno or Leonardo, [Mark] reports its possible to twinkle 300 individual LEDs at a rate of over 50 updates a second. Using a faster microcontroller should net reliable performance with longer strings. Meanwhile, if you’re wondering how the older-style lights used to twinkle, we’ve covered that before too. Video after the break.
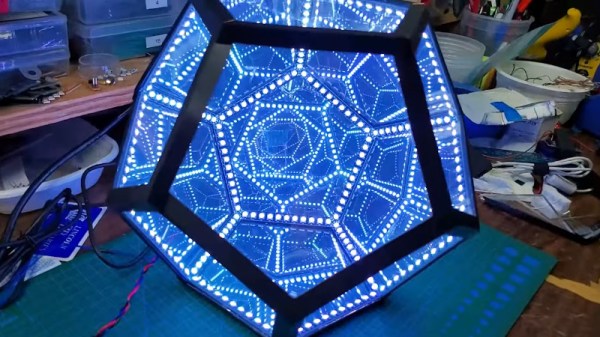
The infinity dodecahedron is one of those super eye-catching builds that many of us hardware hackers have on our ‘build one day’ project list. The very thought of actually doing it strikes a little fear into the heart of even the most intrepid maker, once you start to think about all the intricate little details and associated ways it could all go horribly wrong. Luckily for us, [Hari Wiguna] has documented his latest build as a long video build log, showing lots of neat tricks and highlighting many problems along the way. With the eventual goal of removing many of the issues that make such a build tricky, [Hari] hopes to make it practically easy. Let’s see how that turns out!
HASL-finished castellated (half hole) edge contacts make butt-jointing a breeze
A common route for such a build relies on appropriately shaped 3D printed frame parts, with some kind of clear plastic for the 12 faces, and LED strips stuck to the inside of each of the 30 edges. Whilst this works, [Hari] thought he could do a bit better, using butt-jointed PCBs as the frame material.
The PCBs handily double up as something to solder LEDs onto (because that’s what PCBs are mostly intended for!) as well as a way to pass power and data signals around the frame in a minimally visible way. As will become obvious from the lengthy discussion in the video, a few simple tricks here and there are needed to make this strategy work. With the recent proliferation of PCB modules using castellated edges for termination, the usual Chinese PCB fab services have all started offering very good value services for this feature. Once a PCB feature that was a specialized (read that as ‘expensive’) offering, it is now quite affordable on your average maker’s budget.
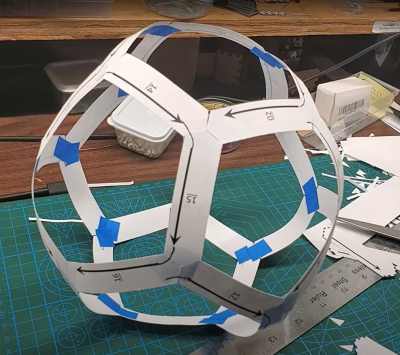
Data path planning? Just use paper and tape!
One immediate practical issue was how to pass the data connection around from edge to edge, given that there are three edges per vertex. The solution [Hari] came up with was simple, just duplicate the signals on each end of the PCB, so the data out signal can be tapped from either end, as required.
Even with 3D printed jigs to hold the PCBs at just the right angles, there’s still some wiggle and a little risk of edges not quite aligning, due to accumulated errors around the frame. It did come together in the end, with the expected spectacular visuals. We’re sure many of you will be waiting for [Hari] to release the next version of the design to the community, hopefully with even more of the ease-of-build issues resolved, because we want one even more now.
Naturally, this is by no means the first infinity platonic solid we’ve seen, here’s a smaller one for starters. If you remove the mirrors and LEDs, then you’re just left with a plain old dodecahedron, like this cool folding project.
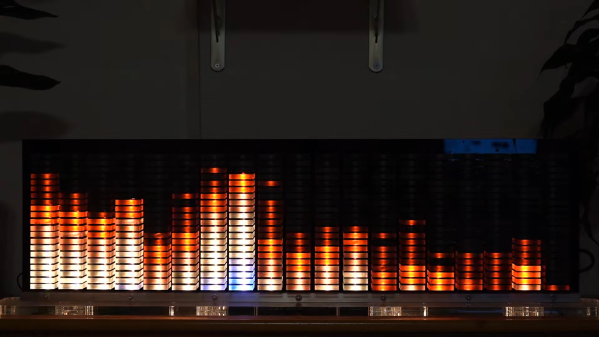
An ESP32 microcontroller serves as the heart of the build, with its high clock rate and dual cores making it a highly capable choice for the job. Audio from a microphone is amplified and pumped into the ESP32’s analog input. Core 0 on the ESP32 then runs a Fast Fourier Transform on the input audio in order to determine the energy in each frequency band. The results of this FFT are then passed to Core 1, which is used to calculate the required animations and pipe them out to a series of WS2812B LEDs.
Where this build really shines, though, is in the actual construction. Big chunks of acrylic serve as diffusers for the LEDs which light up each segment of the spectrum display. Combine the big pixel size with a nice smooth 30 Hz refresh rate on the LEDs, and the result is a rather large spectrum analyzer that really does look the business.
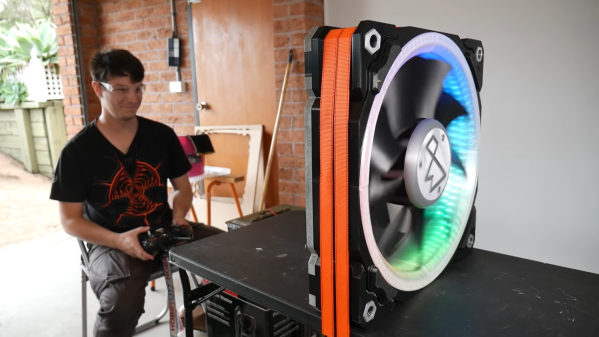
It’s getting close to the time of year when we need to start carefully vetting projects here at Hackaday. After all, nobody likes to get punked by an early April Fool’s joke. But as silly as this outsized PC fan looks, it sure seems like a legit build, if a bit on the pointless side.
Then again, perhaps pointless is too harsh a word to use. This 500-mm fan is by [Angus] over at Maker’s Muse, and it represents a lot of design work to make it buildable, as well as workable and (mostly) safe. Using both CNC-cut MDF and printed parts, the fan is an embiggened replica of a normal-sized case fan. The fan’s frame had to be printed in four parts, which lock together with clever interlocking joints. Each of the nine blades locks into a central hub with sturdy-looking dovetails.
And sturdy is important, as the fan is powered by a 1,500 Watt brushless DC motor. With a 4:1 reduction thanks to a printed gear train, the fan spins at around 3,300 RPM, which makes a terrifying noise. There’s a little bit of “speed-wobble” evident, but [Angus] managed to survive testing. The fan, however, did not — the 3D-printed gears self-destructed after a full-speed test, but not before the fan did its best wind tunnel imitation. And the RGB LEDs looked great.
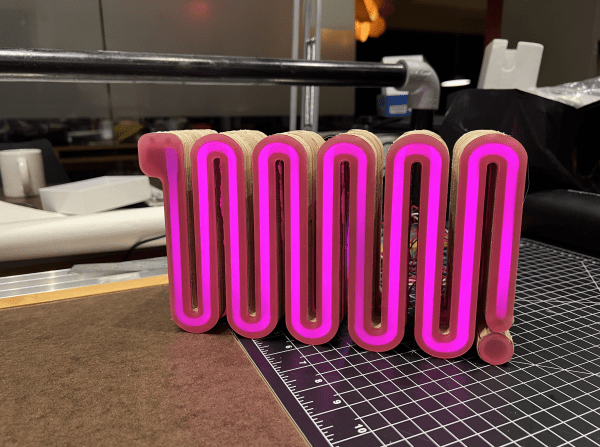
Have you already broken that New Year’s resolution to get more exercise? Yeah, us too. Maybe the problem is simply that we didn’t gamify the goal. A simple visual aid that shows your progress can help make a goal more achievable and easier to stick to, day after January day. That’s the idea behind [skhackett]’s Slither, the visual pedometer.
Although Slither uses the Fit Bit app, no actual Fit Bit is required — great news for those of us who don’t like to wear accessories. But you will have to carry your phone everywhere if you want your steps to count. By tracking the steps taken each day, the sum of Slither’s segments signifies a weekly total goal of 50,000 steps.
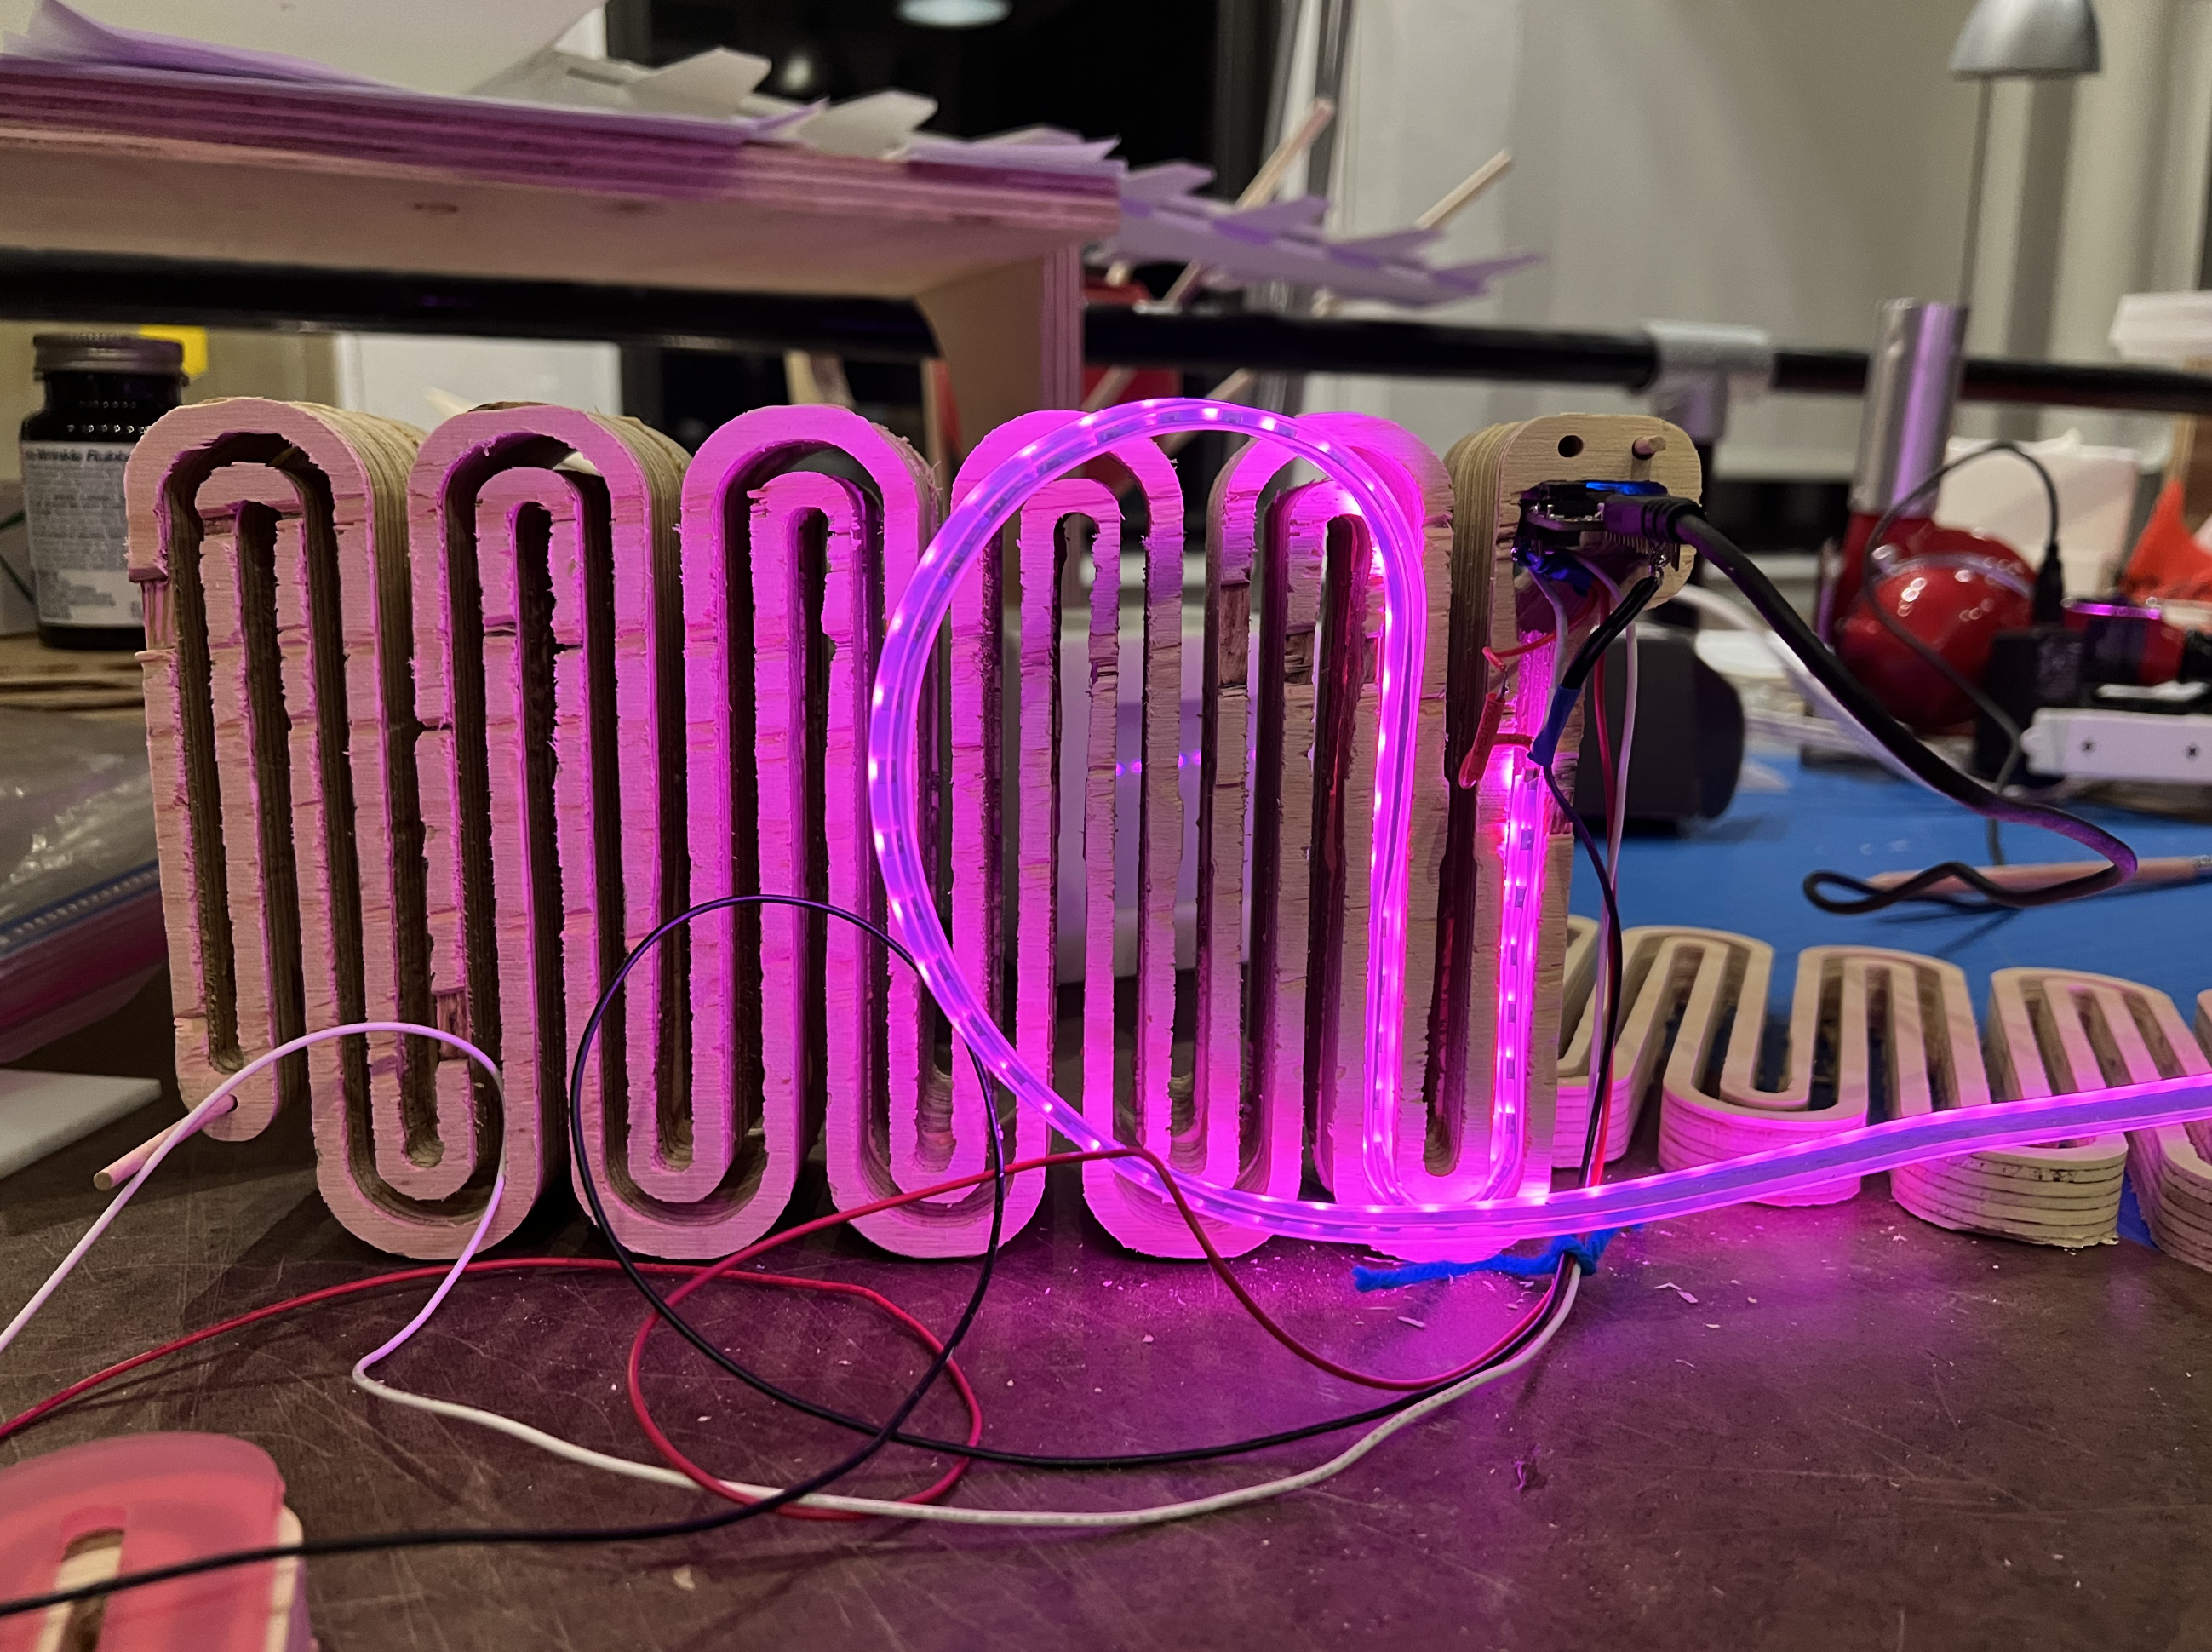
Around back is a Feather Huzzah that receives step data from the phone and drives a strand of side-lit LED strips. There’s a Hall effect sensor in the tail, and Slither is powered on and off with a small, separate piece of wood and acrylic with a magnet embedded inside. Isn’t that a classy way to switch a snake?
We really like the look of the plywood here, though [skhackett] recommends using MDF instead because they experienced a fair amount of chipping. If you just want to watch the snake light up, it shouldn’t be too hard to cheat the pedometer.
Music visualizers were all the rage back in era of Winamp and Windows Media Player. They’re even cooler when they don’t just live on your computer screen, though, as [Emily Velasco’s] latest project demonstrates.
The build consists of two mannequin arms on a board mounted on the wall. The arms were sourced for just $5 from a Sears that went out of business, and originally fastened to the mannequin thanks to magnets inside. Thus, putting two steel plates on the board allowed the arms to be attached, and they can be freely arranged as [Emily] sees fit.
The ESP32-based Pixelblaze LED controller serves as the brains of the operation, controlling LEDs mounted inside the arms themselves. Using a dedicated controller makes working with addressable LEDs a cinch. As a further bonus, the board serves up a web interface, allowing patterns to be changed without having to hook up a cable to the device. Meanwhile, a sensor board inside the arms uses a microphone to enable the light show to react to sound and music.
It’s one of the more obscure uses for an old mannequin, but definitely one that appeals to our love of everything that flickers and glows. It’s a build very much up [Emily’s] alley; as a prolific maker, she loves to build weird and wonderful creations, as shared during her talk at the 2019 Hackaday Superconference. Video after the break.
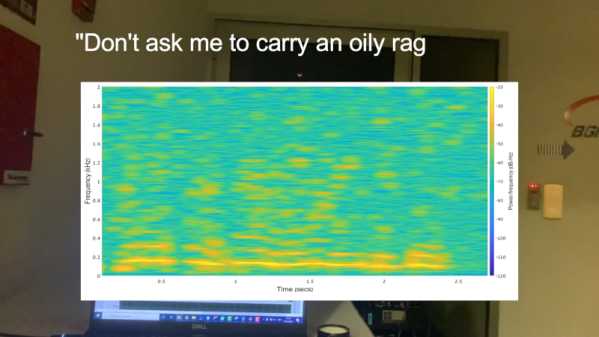
If you ever get the feeling someone is watching you, maybe they are listening, too. At least they might be listening to what’s coming over your computer speakers thanks to a new attack called “glow worm.” In this novel attack, careful observations of a power LED on a speaker allowed an attacker to reproduce the sound playing thanks to virtually imperceptible fluctuations in the LED brightness, most likely due to the speaker’s power line sagging and recovering.
You might think that if you could see the LED, you could just hear the output of the speaker, but a telescope through a window 100 feet away appears to be sufficient. You can imagine that from a distance across a noisy office you might be able to pull the same trick. We don’t know — but we suspect — even if headphones were plugged into the speakers, the LED would still modulate the audio. Any device supplying power to the speakers is a potential source of a leak.

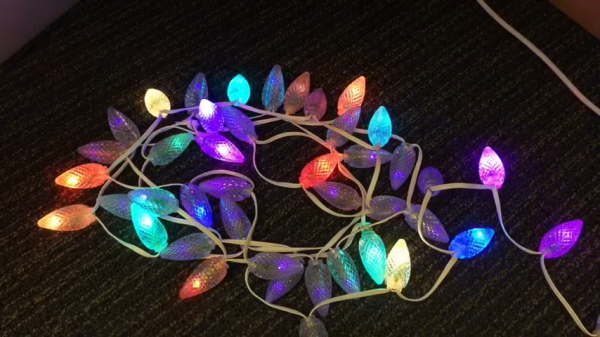
 The program is known as TwinkleFOX, and relies on the popular FastLED library for addressable LEDs. [Mark’s] demo setup is built around using WS2811 LEDs, put together in a string with plastic diffusers on each bulb. The Arduino is programmed to vary the brightness of each LED according to a triangle wave function. To create the twinkling effect, each LED has its own unique clock signal, so they vary in brightness at different times and at different rates.