At the beginning of March this year LEGO released their new SMART brick, which looks like a 2×4 stud brick and is filled to the brim with sensors, LEDs, NFC and Bluetooth functionality, as well as a purported custom ASIC. The central idea behind it appears to be to add a lot of interactivity to LEGO builds while allowing for mesh-style communication with other SMART bricks. Naturally, this makes it a great subject for a teardown, which is what [EvilmonkeyzDesignz] over on YouTube did in a recent video.
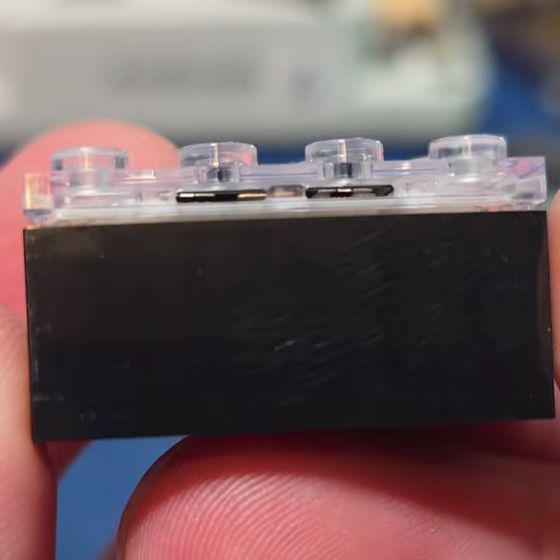
Normally the only way you can purchase one of these new bricks is by buying them as part of a ‘Smart Play’ set, but someone was selling singular bricks on EBay. As the brick is inductively recharged, it’s pretty well-sealed, requiring a fairly destructive opening method.
Directly below the transparent top is a speaker, with the opposing PCB on the main body containing a microphone as well as a number of RGB LEDs. On the opposite side of this PCB we find the photo sensor, but to get to this part of the PCB the copper wires that wrap around the entire main assembly have to be disconnected from the PCB’s side pads with some force as they’re apparently pressed in place without the use of solder.


![The LEGO-lookalike displaying [Paul]'s dashboard](https://hackaday.com/wp-content/uploads/2026/03/Screenshot-2026-03-04-at-14-08-38-Watt-IV-–-the-M2x2.png?w=600&h=450)