Ancient Robot Creates Modern Art

They say that there’s more to a Jackson Pollock painting than randomly scattering paint on a canvas, and the auction value of his work seems to verify that claim. If you want to create some more conventional artwork, however, but are missing the artistic muse that inspired Pollock, maybe you can put your creative energies to work building a robot that will create the art for you.

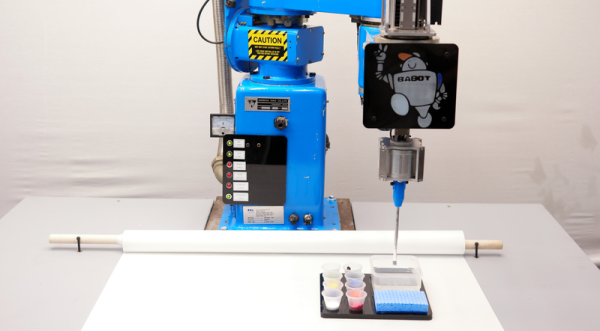
[Dane Kouttron] was able to get his hands on an old SCARA robotic arm, and was recently inspired to create a paintbrush-weilding robot with it for the 2nd Annual Robot Art competition. Getting one of these ancient (circa 1983) robots working again is no easy task though. [Dane] used LinuxCNC to help reverse engineer the robot’s controls and had to build a lot of supporting hardware to get the extremely heavy robot to work properly. The entire process took around two months, and everything from color selection to paint refill to the actual painting itself is completely automated.

Be sure to check out the video after the break to see the robot in action. The writeup goes into great detail about the robot, and includes everything from reverse engineering the encoders to auto-cleaning a paintbrush. If you don’t have a SCARA robot arm in your parts drawer, though, there are lots of other options to explore for robot-created artwork.

Continue reading “Ancient Robot Creates Modern Art”

‘LinuxCNC-Features’ Is The Garage-Fab’s Missing CAM Tool

It takes a long toolchain to take the garage-machinist-to-be through all the hoops needed to start cranking out parts. From the choice of CAD software to the CAM tools that turn 3D models into gcode, to the gcode interpretters that chew up this source code and spit out step and direction pulses to turn the cranks of a cnc mill, there’s a multitude of open-and-closed source tools to choose from and even an opportunity to develop some of our own. That’s exactly what [Nick] and the folks over on the cnc-club forums did; they’ve written their own CAM tool that enables the end user to design a procedure of cuts and toolpaths that can export to gcode compatible with LinuxCNC.

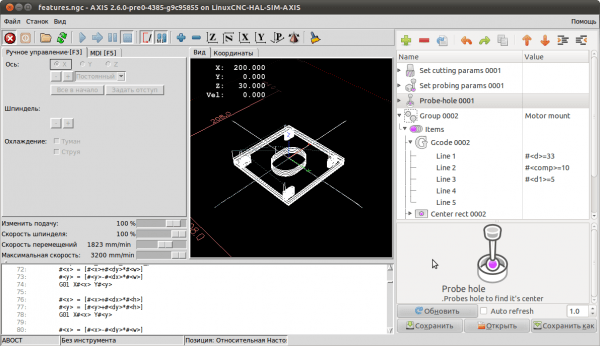
Their tool, dubbed “LinuxCNC-features”, embeds a LinuxCNC-compatible graphical gcode programming interface directly into the LinuxCNC native user interface. Creating a part is a matter of defining a list of sequential cuts along programmable toolpaths. These sequential cuts are treatments like drilled holes, square pockets, bolt holes, and lines. The native embedding enables the machinist to preview each of the 3D toolpaths in LinuxCNC’s live view, giving him-or-her a quick-and-dirty check to make sure that their gcode performs as expected before running it. [Nick] has a couple of videos to get you up-and running on either your mill or lathe.

LinuxCNC-features has been out in the wild for almost two years now, but if you’re looking to get started cranking out parts in the garage, look no further for a CAM tool that can quickly generate gcode for simple projects. In case you’re not familiar with LinuxCNC, it’s one of the most mature open-source gcode interpreters designed to turn your PC into a CNC controller, and it’s the brains behind some outstanding DIY CNC machines like this plasma cutter.

Continue reading “‘LinuxCNC-Features’ Is The Garage-Fab’s Missing CAM Tool”

Milling Curved Objects With A G-Code Ripper

HaD Mouse

Milling and routing flat surfaces is pretty much the point of a CNC router, but how about curved surfaces? Auto leveling of hobby CNC machines and 3D printers is becoming commonplace, but Scorch Works is doing just the opposite: using a probe touch probe on a CNC machine to transform a G-Code file into something that can be milled on a curved surface.

The technique is pretty much the complete opposite of Autoleveller, the tool of choice for milling and routing objects that aren’t completely flat or perpendicular to the bed with a MACH3 or LinuxCNC machine. In this case, a touch probe attached to the router scans a curved part, applies bilinear interpolation to a G-Code file, and then starts machining.

The probe can be used on just about anything – in the videos below, you can see a perfect engraving in a block of plastic that’s about 30 degrees off perpendicular to the bed, letters carved in a baseball bat, and a guaranteed way to get your project featured on Hackaday.

Continue reading “Milling Curved Objects With A G-Code Ripper”

LinuxCNC Based Plasma Cutter Router

If a wood CNC router just isn’t enough for you, you’re going to need something a little bit more powerful. Relatively speaking, the next most affordable step up is a CNC plasma cutter. Mhmm… Plasma…

maker-works

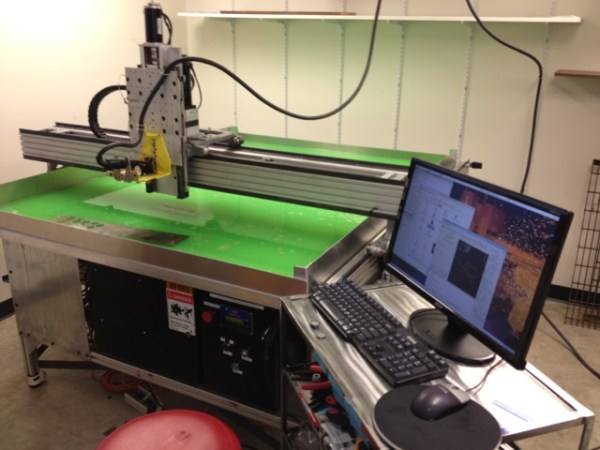
[Maker Works] of Ann Arbor decided it was time to add some serious metal working capabilities to their already impressive mech shop. The design is based on of  [JoesCNC], however they’ve opted for some seriously beefy servo motors, instead of steppers.

The frame is made out of 8020 aluminum extrusions, which certainly adds to the cost, but results in a very professionally built machine. X and Y axis’ make use of NEMA 34 Servo motors, driven by Granite Devices VSD-E servo drivers. The Z-axis uses a NEMA 23 with a Gecko 320X driver. To further increase the power of these guys, 10:1 reduction gearboxes are used on both the X and Y.

All in all the project cost approximately $8,000, though after lessons learned, they think they could redo it for around $6,000.

When they first started testing it, they were dismayed with how dirty the room got from the fine dust created by the plasma cutter — so they’ve upgraded to a water tray bed (2″ deep), which helps immensely. In fact, the part doesn’t even need to be fully submerged in water for it to cut down pretty much all of the dust. The water also helps prevent damage to the aluminum bed underneath.

Continue reading “LinuxCNC Based Plasma Cutter Router”

Building A Wood CNC Router From Scratch

home made cnc router

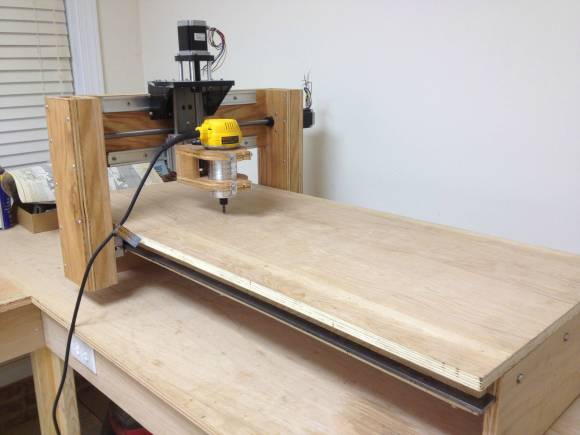
[David Taylor] needed a CNC router to do some more complex projects — so he did what any maker would do if they’re strapped for cash — make it from scratch!

The impressive part of this build is that it was built entirely in his workshop, using tools he already had. A chop saw, wood lathe, drill and a drill press, and finally a table saw — nothing fancy, but now with the CNC router he has a world of possibilities for projects! The mechanical parts he had to buy cost around $600, which isn’t too bad considering the size of the router. He lucked out though and managed to get the Y-axis and Z-axis track and carriages as free samples — hooray for company handouts!

The router is using an old computer loaded with LinuxCNC which is a great (and free!) software for use with CNC machines. It’s driving a cheap Chinese TB6560 motor controller which does the trick, though [David] wishes he went for something a bit better.

Some examples of the projects he’s already made using this baby include an awesome guitar amp, a wooden Mini-ATX computer case, and even a rather sleek wooden stereo with amp!

Did we mention it can even cut non-ferrous materials?

[via Reddit]

Blobless Printing With Velocity Extrusion

velocity

The current crop of 3D printers are technically four-axis machines, with three axes of movement and a fourth for the position of the filament. [Bas] had an entirely different idea – why not link the speed of the extruder to the speed of the nozzle? It turns out this technique gives you more ‘plasticy-looking’ prints and a vast reduction in blobbiness.

[Baz] has been working with LinuxCNC, a BeagleBone Black and the BeBoPr-Bridge cape, and there’s been a lot of development with that system in turning many straight lines into one smooth arc. This led him to adjusting the flow rate of a nozzle while the printer is running, but this is difficult if the extrusion is controlled by position as in a traditional printer setup. A new configuration was in order.

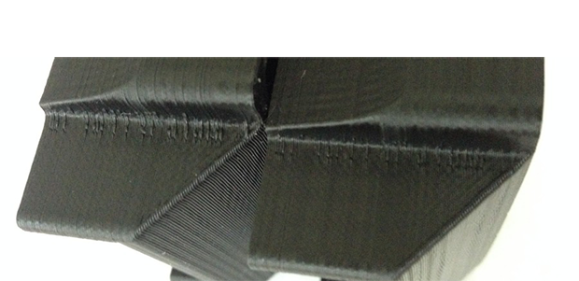
What [Baz] ended up with is a config that calculated the speed of the extruder based on the speed the nozzle is moving over the print surface. This gave him the ability to add live nozzle pressure adjustment, and as a result, a near complete disappearance of the little blobs that appear at the start of each layer.

For a well calibrated machine, it’s only a small difference between the ‘normal’ and ‘velocity’ methods of controlling an extrusion rate. It’s a noticeable difference, though, and one that vastly improves the visual quality of a print.


BeagleBone Black Does CNC With RAMPS

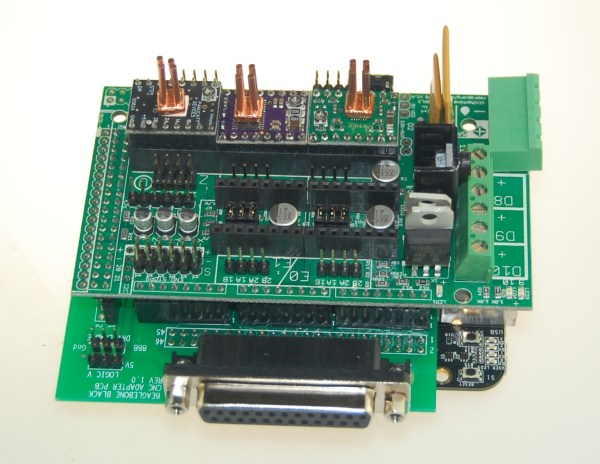
[Bart] Wanted to try controlling a CNC with his BeagleBone black, but didn’t want to invest in a CNC Cape. No problem – he created his own translator board for RAMPSLinuxCNC for the BeagleBone Black has been available for a few months now, and [Bart] wanted to give it a try. He started experimenting with a single stepper motor and driver.  By the time he hooked up step, direction, and motor phases, [Bart] knew he needed a better solution.

Several CNC capes are available for the BeagleBone boards, but [Bart] had a RAMPS board just sitting around, waiting for a new project.  Most RepRap fans have heard of the RAMPS – or Reprap Arduino Mega Pololu Shield.  In fact, we covered them here just a few days ago as part of our 3D Printering series.   RAMPS handle all the I/O needed for 3D printing, which carries over quite nicely to other CNC applications as well.   The downside is that they’re specifically designed for the Arduino Mega series. Continue reading “BeagleBone Black Does CNC With RAMPS”