Demystifying The ESP8266 With A Series Of Tutorials

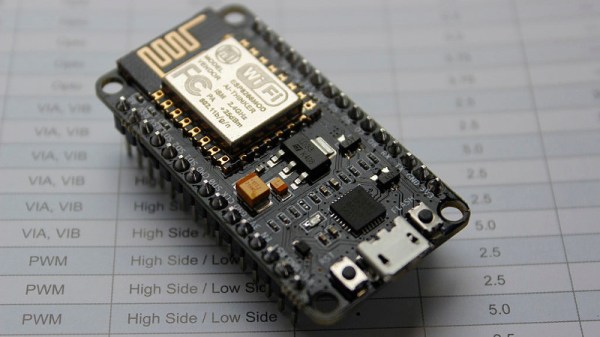
If your interest has been piqued by the inexpensive wireless-enabled goodness of the ESP8266 microcontroller, but you have been intimidated by the slightly Wild-West nature of the ecosystem that surrounds it, help is at hand. [Alexander] is creating a series of ESP8266 tutorials designed to demystify the component and lead even the most timid would-be developer to a successful first piece of code.

If you cast your mind back to 2014 when the ESP8266 first emerged, it caused great excitement but had almost no information surrounding it. You could buy it on a selection of modules, but there were no English instructions and no tools to speak of. A community of software and hardware hackers set to work, resulting in a variety of routes into development including the required add-ons to use the ever-popular Arduino framework. Four years later we have a mature and reliable platform, with a selection of higher-quality and well supported boards to choose from alongside that original selection.

The tutorials cover the Arduino and the ESP, as well as Lua and the official SDK. They are written for a complete newcomer, but the style is accessible enough that anyone requiring a quick intro to each platform should be able to gain something.

Our community never ceases to amaze us with the quality of the work that emerges from it. We’ve seen plenty of very high quality projects over the years, and it’s especially pleasing to see someone such as [Alexander] giving something back in this way. We look forward to future installments in this series, and you should keep an eye out for them.

Simple Ethereum Vending Machines With NodeMCU

Recently, we covered how to use the Etherscan API to query data (a wallet balance) from the Ethereum blockchain with NodeMCU. It’s a very useful method for retrieving information from a blockchain on embedded systems where storage and memory are an issue.

It has some limitations though. Most notably, it’s polling the API at some interval to retrieve information whether it has changed or not. I would like to be able to receive data more efficiently than this, and quickly enough to make simple vending machines possible. While we’ve seen videos of Bitcoin-based Red Bull vending machines before, they required an NFC card to use.

If we could receive information about Ethereum transactions quickly and reliably enough, we could build a similar vending machine without requiring an NFC card as an intermediary. Simply send to an address via some method, and receive goods!

It turns out we can do exactly that with NodeMCU using WebSocket. Like HTTP, WebSocket is a communications protocol that uses TCP connections (typically over port 80), but it allows full-duplex communication. In other words, you can establish a connection to a server, and send/receive messages without needing to poll the server.

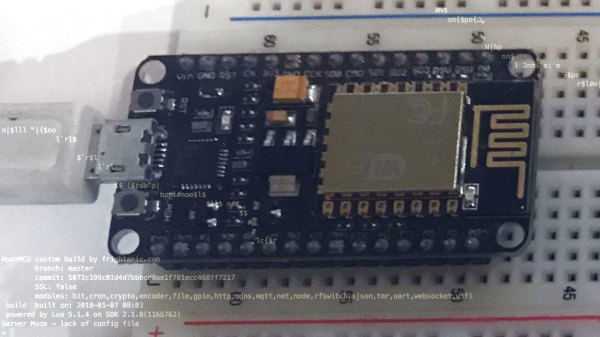
As in the previous example, we’ll use a NodeMCU running Lua. You may wish to refer to it for compile options and information about the screen, which will be the same in this case. Unlike the previous article, you will not need an API key from Etherscan to use this service (not yet, anyway). As usual, we’ll start off by connecting to WiFi:

wifi.setmode(wifi.STATION)
wifi.setphymode(wifi.PHYMODE_B)
station_cfg={}
station_cfg.ssid="Your SSID"
station_cfg.pwd="Your Password"
station_cfg.save=true
wifi.sta.config(station_cfg)

Connecting to a server with WebSockets is easy, but since we’re not using HTTP, we’ll have to remove the https:// and replace that with ws://. (Note: not wss:// because we’ve not enabled encryption yet.)

ws:connect(‘ws://socket.etherscan.io/wshandler’)

Next, we need to report back when the connection is established as the trigger to run additional code. It will return an error code if the connection fails to be established. Handling these error codes in a sensible way is an excellent feature, but we’ll handle that later:

ws:on("connection", function(ws)
    print('got ws connection')
    end)

Now, we need to extend the above to subscribe to an Eth address, and add some new code to do something when a transaction occurs. Note that the API requires that you subscribe to an address within 60 seconds of connecting. It also states that you have to send a ping event to the server every 20 seconds to keep the connection alive, so we’ll need to set a recurring timer for that.

If you’re using ESPlorer, you can send the ping request manually by entering =ws:send('{"event": "ping"}') and pressing Send. This is a useful way to test the connection status.

The address I used seems to have frequent transactions so is reasonable for testing. Be advised though that sitting and waiting for a transaction to happen to test the code creates a slow development cycle so some patience is necessary here.

ws = websocket.createClient()
ws:on("connection", function(ws)
    print('got ws connection')
    ws:send('{"event": "txlist", "address": "0x2a65aca4d5fc5b5c859090a6c34d164135398226"}')
    end)

ws:on("receive", function(_, msg, opcode)
    print('got message:', msg, opcode)
    end)

You should see something like what follows below. The first message is a simple confirmation of connection, the second confirms your subscription to an address, and the third is what you get sent when a transaction occurs. You can subscribe to up to 30 addresses with a single connected device! Note that the data is all in JSON format, which is something we’ll take advantage of later.

got message: {"event":"welcome"} 1
got message: {"event":"subscribe-txlist", "status":"1", "message":"OK, 0x2a65aca4d5fc5b5c859090a6c34d164135398226"} 1
got message: {"event":"txlist","address":"0x2a65aca4d5fc5b5c859090a6c34d164135398226","result":[{"blockNumber":"5532531","timeStamp":"1525098009","hash":"0xe5ec497cb5b38811e8bf5db67a056a2bdd4aa9b68df5c8e8225cb300cbcfa413","nonce":"3363391","blockHash":"0xf446f77d92ed29c221e8451b8048113969ed305a7dd49177e10b422e8e2c4bda","transactionIndex":"172","from":"0x2a65aca4d5fc5b5c859090a6c34d164135398226","to":"0xec5fdfba35c01c6ad7a00085e70e8f30cd121597","value":"24418350000000000","gas":"50000","gasPrice":"4000000000","input":"0x","contractAddress":"","cumulativeGasUsed":"7896403","gasUsed":"21000","confirmations":"1"}]} 1

That’s quite a mess of transaction data, and unfortunately the datum of interest is in the ‘result’ field – which is nested JSON. In the last article, we converted simple JSON to a Lua table using the excellent sjson module. We’ll do the same here after verifying the message type is a transaction (txlist).

ws:on("receive", function(_, msg, opcode)
    print('got message:', msg, opcode)
    ok, ethdata = pcall(sjson.decode, msg)
    if ok then
        msgtype = (ethdata["event"])
        if msgtype == "txlist" then
...

The NodeMCU documentation specifically notes that nested JSON can cause out-of-memory errors. For that reason we use pcall (protected call) to contain any such errors when decoding our JSON message. Next, we extract the contents of the ‘value’ field, nested within the ‘result’ field:

if msgtype == "txlist" then
    wei = ethdata.result[1].value
    print (wei)
    eth = wei/1000000000000000000
    print (eth)
    end

It took me a few hours to figure out how to deal with nested tables, but in the end it was actually quite clean and easy — I was just being dense. Now, we need to add a basic provision to handle errors when the websocket is closed:

ws:on("close", function(_, status)
    print('connection closed', status)
    print('Reconnecting...')
    ws = nil -- required to Lua gc the websocket client
    tmr.alarm(0,4000,tmr.ALARM_SINGLE,transact) -- This reconnects after 4 seconds
end)

To wrap it all up, we encase the code in a couple of functions — first, one to establish a connection, subscribe to the right address, and notify when there is a transaction. Next we need one to display the amount of Eth transferred. Finally, we need a ‘ping’ function to call every 20 seconds or less to keep the connection alive. Overall this turned out to be more robust than expected and has yet to encounter an error. Check out the full code listing here. Note that I’ve also added a little code above to interface with a 128×32 OLED screen, the same one we used previously.

Now that it works, let’s consider im/practical applications. It’s a neat way to display Ethereum transactions in real-time, say if you do livestreaming and accept Eth donations and want them to trigger something fancy. Or, you could make a somewhat insecure vending machine. Clearly, getting a secure WebSocket up and running is the next order of business.

You could also set a timer where the length depends on the amount of Eth received. This would allow for things like public advertisements that go away for a while if someone pays a fee. (Please don’t do this!) Maybe a conference room for rent with the power controlled this way? Hackerspace membership payment? An electric bicycle that charges you for power used?

In any case, it’s not legal to use cryptocurrency as a form of payment in my country so I can’t implement any of the above examples at this time. If you’ve got a better application, please share it in the comments!

An Introduction To Storm Detector Modules

Lightning storm detectors have been around for a surprisingly long time. The early designs consisted of a pair of metal bells and a pendulum. When there was a charge applied, for example by connecting one bell to the ground and the other to a lightning rod, the bells would ring when a lightning storm was close by. In the mid 18th century, these devices were only practical for demonstration and research purposes, but very likely represent the earliest devices that convert electrostatic charge to mechanical force. A bit over a hundred years later, the first lightning detector was considered by some as the first radio receiver as well.

As soon as I found out about storm detector chips, I knew I would have to get one working. For about $25, I ordered an AMS AS3935 module from China. This chip has been featured before in a number of excellent projects such as Twittering lightning detectors, and networks of Sub-Saharan weather stations. While there’s an Arduino library for interfacing with this IC, I’m going to be connecting it up to an ESP8266 running the NodeMCU firware, which means digging into the datasheet and writing some SPI code. If any of the above tickles your fancy, read on! Continue reading “An Introduction To Storm Detector Modules”

Capture The Flag Challenge Is The Perfect Gift

Nothing says friendship like a reverse engineering challenge on unknown terrain as a birthday present. When [Rikaard] turned 25 earlier this year, his friend [Veydh] put together a Capture the Flag challenge on an ESP8266 for him. As a software guy with no electronics background, [Rikaard] had no idea what he was presented with, but was eager to find out and to document his journey.

Left without guidance or instructions, [Rikaard] went on to learn more about the ESP8266, with the goal to dump its flash content, hoping to find some clues in it. Discovering the board is running NodeMCU and contains some compiled Lua files, he stepped foot in yet another unknown territory that led him down the Lua bytecode rabbit hole. After a detour describing his adjustments for the ESP’s eLua implementation to the decompiler he uses, his quest to capture the flag began for real.

While this wasn’t [Rikaard]’s first reverse engineering challenge, it was his first in an completely unknown environment outside his comfort zone — the endurance he demonstrated is admirable. There is of course still a long way down the road before one opens up chips or counts transistors in a slightly more complex system.

Repair Job Fixes Compressor, Gets It Online

We’ll never cease to be amazed at the things people try to put on the Internet of Things. Some are no-brainers, like thermostats, security cameras, and garage door openers. Others, like washing machines and refrigerators, are a little on the iffy side, but you can still make a case for them. But an IoT air compressor? What’s the justification for such a thing?

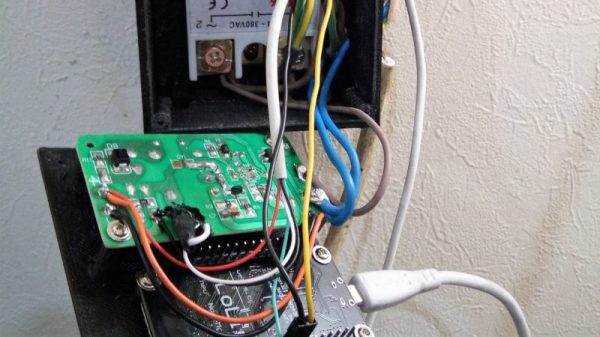
As it turns out, [Boris van Galvin] had a pretty decent reason for his compressor hacks, and it appears that the IoT aspect was one of those “why not?” things. Having suffered the second failure of his compressor’s mechanical pressure switch in a year, and unwilling to throw good money after the $120 that went into replacing the first contactor, [Boris] looked for a cheaper and more interesting way to control the compressor. An ESP8266 dev board made interfacing the analog pressure sensor a snap, and while he was at it, [Boris] added a web interface with a nice graphical air pressure gauge and some on-off controls. Now he can set the pressure using his phone and switch it off in the middle of the night without going outside. That’s an IoT win right there.

No air compressor? No worries — build your own from an old fridge. The non-IoT kind, preferably.

Simulate Your Robot Before You Build It

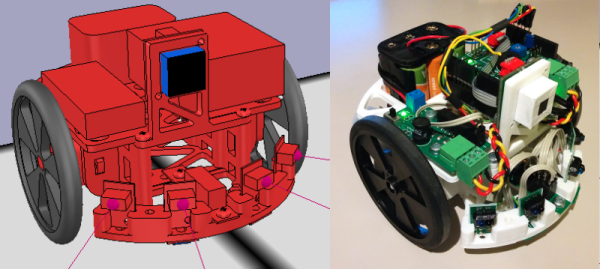
[Nurgak] shows how one can use some of the great robotic tools out there to simulate a robot before you even build it. To drive this point home he builds the tutorial off of the easily 3D printable and buildable Robopoly platform.

The robot runs on Robot Operating System at its core. ROS is interesting because of its decentralized and input/output agnostic messaging system. For example, if you leave everything alone but swap out the motor output from actual motors to a simulator, you can see how the robot would respond to any arbitrary input.

[Nurgak] uses another piece of software called V-REP to demonstrate this. V-REP is a simulation suite for robotics and has a few ROS nodes built in. So in order to make a simulated line-following robot, [Nurgak] tells V-REP to send a simulated camera image to the decision making node of the robot in ROS. It then sends the movement messages back to V-REP which drives the pretend robot around.

He runs through a few more examples, proving that it’s entirely possible to become if not a roboticist, at least a really good AI programmer without ever dropping the big money on parts to build a robot.

Broadcasting Bluetooth Beacons With Bubbles

Bluetooth beacons have only been around for a few years, but the draw is incredible. With Bluetooth beacons, your phone is location aware, even with location services are turned off. They’re seen in fast food joints, big box retailers, and anywhere else there’s a dollar to be made. [Nemik] has been working on a home automation project, and came up with a use for Bluetooth beacons that might actually be useful. It’s a WiFi-based Bluetooth beacon notifier that scans the area for beacons and forwards them to an MQTT server.

[Nemik]’s ‘Presence Detector’ for Bluetooth advertisements is actually a surprisingly simple build, leveraging the unbelievably cheap wireless modules available to us today. The WiFi side of the equation is a NodeMCU v2 ESP8266 dev board that provides all the smarts for the device via Lua scripting. The Bluetooth side of the board is a PTR5518 module that has a nRF51822 tucked inside. With the right configuration, this small board will listen for BLE advertisements and forward them to an MQTT server where they can be seen by anyone on the network.

[Nemik] is selling these beacon to WiFi bridges, but in the spirit of Open Hardware, he’s also giving away the designs and firmware so you can make your own. If you ever have an abundance of Bluetooth beacons sitting around and want to make a beacons of Things thing, this is the build for it.