Using An FPGA To Glitch The Olimex LPC-P1343

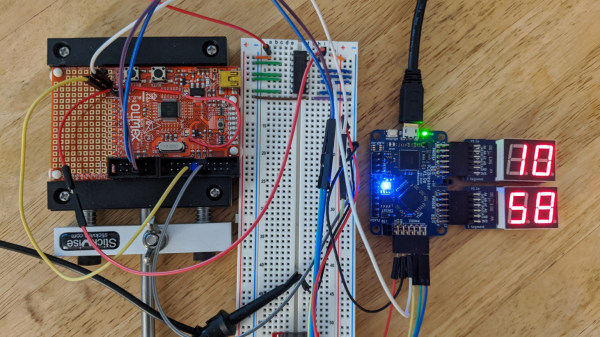
After trying out hardware hacking using an FPGA to interface with target hardware, [Grazfather] was inspired to try using the iCEBreaker (one of the many hobbyist FPGAs to have recently flooded the market) to build a UART-controllable glitcher for the Olimex LPC-P1343.
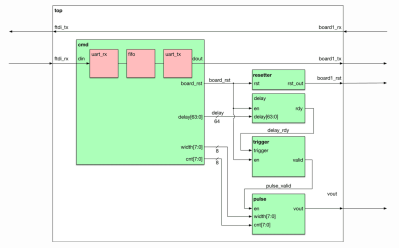
FPGA Modules (The cmd module intercepts what the host computer sends over UART, the resetter holds the reset line until the target is reset, the delay starts counting on reset and waits for a configured number of cycles before sending its signal, the trigger waits for the delay to finish before telling the pulse module to send a pulse, and the pulse works similar to the delay module and outputs to the power multiplexer.)

When the target board boots up, the bootROM reads the flash and determines whether the UART goes to a shell and if the shell can be used to read out the flash. This is meant for developing firmware and debugging it in the bootloader, only flashing a version when the firmware is production-ready. The vulnerability is that only a specific value read from address 0x2FC and the state of a few pins can lock the bootloader in the expected way, and any other value at the address causes the bootROM to consider the device unlocked. Essentially, the mechanism is the opposite of how a lock ought to work.

The goal is to get the CPU to misread the flash at the precise moment it is meant to be reading the specific value, then jumping to the bootloader in the unlocked state. The FPGA can be used as a tool between the host machine and target board, communicating via UART. The FGPA can support configuring the delay between resetting the target board and pulsing a ‘glitch voltage’, as well as resetting the target board and activating the glitch. The primary reasons for using the FPGA over a different microcontroller are that the FPGA allows for precise timing (83.3ns precision) and removes worries about jitters (a Raspberry Pi might have side effects from OS scheduling and other processes and microcontrollers might have interrupts messing up the timing).

The logic analyzer view

To simulate the various modules, [Grazfather] used Icarus Verilog as well as GTKWave to observe the waveforms generated. A separate logic analyzer observes the effects on real hardware.

With enough time, it is possible to brute force any combination of delay and width until you get a dump of the flash you’re not meant to read. You can check out how the width of the pulse gets wider until the max, when the delay is incremented and the width values are tried again.

Continue reading “Using An FPGA To Glitch The Olimex LPC-P1343”

Perfecting The Solar Powered Web Server

Running a server completely off solar power seems like it would be a relatively easy thing to do: throw up a couple of panels, tack on a charge controller and a beefy battery, and away you go. But the reality is somewhat different. Most of us hackers are operating on a relatively limited budget and probably don’t have access to the kind of property you need to put out big panels; both pretty crippling limitations. Doing solar on a small-scale is hard, and unless you really plan ahead your setup will probably be knocked out on its first cloudy day.

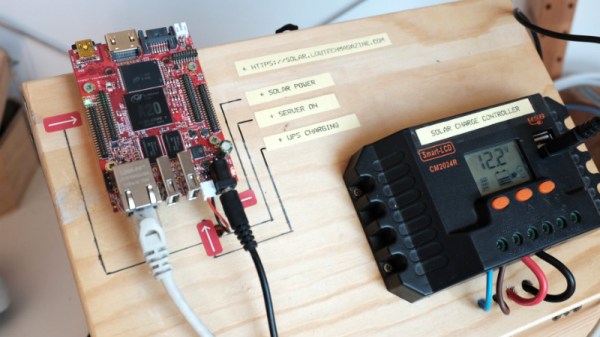
So when [Kris de Decker] wanted to create a solar-powered version of his site “Low-tech Magazine”, he went all in. Every element of the site and the hardware it runs on was investigated for potential power savings, and luckily for us, the entire process was written up in meticulous detail (non-solar version here). The server still does go down from time to time if the weather is particularly poor, but in general it maintains about 90% uptime in Barcelona, Spain.

The solar side of the equation is fairly simple. There’s a 50 watt photovoltaic panel charging a 12V 7Ah lead-acid battery though a 20A charge controller. With an average of 4 to 6 hours of sunlight a day, the panel generates 300 Wh of electricity in the best case scenario; which needs to be split between charging the battery and running the server itself.

As for the server, [Kris] chose the Olimex Olinuxino A20 Lime 2 in part because of it being open source hardware, but also because it’s very energy-efficient and includes a AXP209 power management chip. Depending on processor load, the Olimex board draws between 1 and 2.5 watts of power, which combined with charging losses and such means the system can run through two days of cloudy weather before giving up the ghost. A second battery might be added in the future to help improve the run time during low-light conditions, but for now its been working pretty well.

Perhaps the most interesting part of the whole project are the lengths to which the website itself was optimized to keep resource utilization as low as possible. Images are compressed using dithering to greatly reduce their file sizes, and the site eschews modern design in favor of a much less processor intensive static layout. There’s even a battery capacity display integrated into the page through some clever use of CSS. Even if you aren’t looking to set up your own sun worshiping website, there are tips here for building efficient web pages that could absolutely be put to use in other projects.

If you’re interested in solar projects, we’ve got you covered. From an open source charge controller to building DIY photovoltaic panels, there’s plenty of prior art you should find very…illuminating. Please clap.

DIY Laptop Aims For Complete Hardware Freedom

Open source software has unquestionably gone from fringe idealism to mainstream, even if the average person doesn’t really know it. From their web browser to their smartphone operating system, more people are running open source software today than at any other time in the history of computing, and the numbers are only getting bigger. While we can debate how well some companies are handling their responsibilities to the open source community, overall this is probably a lot closer to an open source utopia that many of us ever believed we’d get.

For argument’s sake, let’s say the software is settled. What’s next? Well, if we’ve got all the open source software we could ever ask for, naturally we now need to run it on open source hardware. Just like our software, we want to see how it works, we want to modify it, and to fix it ourselves if we want. These goals are precisely what [Lukas Hartmann] had in mind when he started work on Reform, the latest entry in the world of fully open source laptops.

A plate of fresh keycaps

Like the Novena that came before it, the Reform leverages the four-core ARM Cortex-A9 NXP i.MX6 SoC to deliver tablet-level performance, though [Lukas] mentions the design may migrated to the upgraded six-core version of the chip in the future which should give it a little more punch. The SoC is paired with the Vivante GC2000 GPU which can be used under Linux without any binary blobs. Most hardware is connected to the system via the USB 2.0 bus, though networking is provided by a ThinkPenguin mini PCI-e wireless adapter, and on-board SATA handles the 128 GB SSD.

While the internals are relatively run-of-the-mill these days, the work that [Lukas] has done on the case and input devices is definitely very impressive. He partnered with industrial designer [Ana Dantas] to get the look and feel of the system down, and built almost everything out of 3D printed parts. Even the keyboard caps and the trackball were manufactured in house on a Formlabs Form 2. Rather than using an off-the-shelf USB HID solution, [Lukas] is using Teensy LC boards to interface the custom input hardware with the OS.

[Lukas] is still working on how and when the Reform will be made available to the public. After some refinements, the team hopes to make both kits and individual parts available, and of course put all the files up so you can build your own if you’ve got the equipment. A mockup Amazon listing for the Reform has been posted to get the public’s feedback on the look and features of the machine, and [Lukas] asks that anyone with comments and suggestions send him an email.

Between the Reform, Novena, and the Olimex, competition in the realm of DIY laptops is frankly staggering. Now we just need more people working on open hardware smartphones.

Thanks to [Adrian] for the tip.

Olimex Announces Their Open Source Laptop

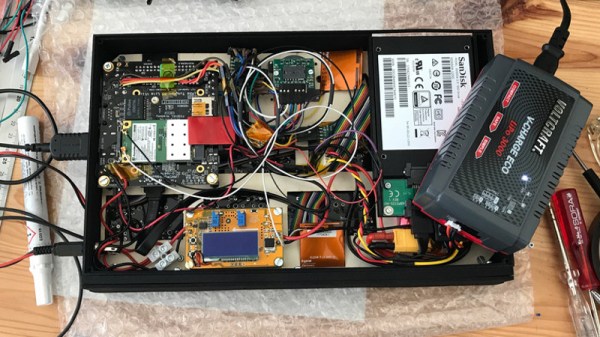
A few months ago at the Hackaday | Belgrade conference, [Tsvetan Usunov], the brains behind Olimex, gave a talk on a project he’s been working on. He’s creating an Open Source Hacker’s Laptop. The impetus for this project came to [Tsvetan] after looking at how many laptops he’s thrown away over the years. Battery capacity degrades, keyboards have a fight with coffee, and manufacturers seem to purposely make laptops hard to repair.

Now, this do it yourself, Open Source Hardware and hacker-friendly laptop is complete. The Olimex TERES I laptop has been built, plastic has been injected into molds, and all the mechanical and electronic CAD files are up on GitHub. This Open Source laptop is done, but you can’t buy it quite yet; for that, we’ll have to wait until Olimex comes back from FOSDEM.

The design of this laptop is completely Open Source. Usually when we hear this phrase, the Open Source part only means the electronics and firmware. Yes, there are exceptions, but the STL files for the PiTop, the ‘3D printable Raspberry Pi laptop’ are not available, rendering the ‘3D printable’ part of PiTop’s marketing splurge incongruent with reality. If you want to build a case for the Open Source laptop to date, [Bunnie]’s Novena, random GitHub repos are the best source. The Olimex TERES I is completely different; not only can you simply buy all the parts for the laptop, the hardware files are going up too. To be fair, this laptop is built with injection molded parts and will probably be extremely difficult to print on a standard desktop filament printer. The effort is there, though, and this laptop can truly be built from source.

As far as specs go, this should be a fairly capable laptop. The core PCB is built around an Allwinner ARM Cortex-A53, sporting 1GB of DDR3L RAM, 4GB of eMMC Flash, WiFi, Bluetooth, a camera, and an 11.6″ 1366×768 display. Compared to an off-the-shelf, bargain-basement consumer craptop, those aren’t great specs, but at least the price is consummate with performance: The TERES I will sell for only €225, or about $250 USD. That’s almost impulse buy territory, and we can’t wait to get our hands on one.

The Open Source Hacker’s Laptop

[Tsvetan Usunov] has been Mr. Olimex for about twenty five years now, and since then, he’s been through a lot of laptops. Remember when power connectors were soldered directly to the motherboard? [Tsvetan] does, and he’s fixed his share of laptops. Sometimes, fixing a laptop doesn’t make any sense; vendors usually make laptops that are hard to repair, and things just inexplicably break. Every year, a few of [Tsvetan]’s laptops die, and the batteries of the rest lose capacity among other wear and tear. Despite some amazing progress from the major manufacturers, laptops are still throwaway devices.

Since [Tsvetan] makes ARM boards, boards with the ~duino suffix, and other electronic paraphernalia, it’s only natural that he would think about building his own laptop. It’s something he’s been working on for a while, but [Tsvetan] shared his progress on an Open Source, hacker’s laptop at the Hackaday | Belgrade conference.

Continue reading “The Open Source Hacker’s Laptop”

25 Years Of Hardware Manufacturing In Plovdiv

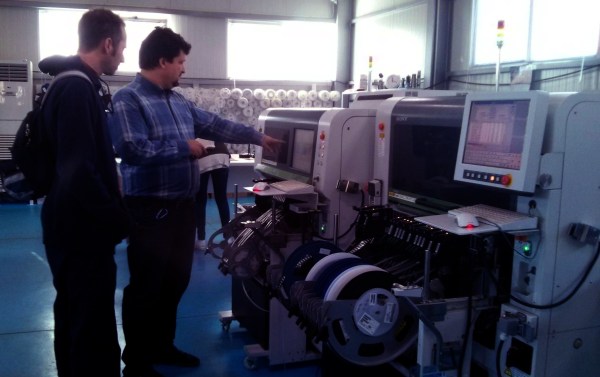
Plovdiv, Bulgaria has a long history of design and innovation going back at least 6000 years to cultures like the Thracians, Celts, and Romans. In the last decade it is also an important center for open hardware innovation — reviving the lost glory of the computer hardware industry from the former “Soviet bloc countries”. One of the companies in the region that has thrived is a 5000 square-meter microelectronics factory which you may have heard of before: Olimex.

Olimex has over 25 years of experience in designing, prototyping, and manufacturing printed circuit boards, components, and complete electronic products. Over the last decade it has evolved into a shining example of an open hardware company. We recently had the chance to visited Olimex and to meet its CEO, Tsvetan Usunov.

Continue reading “25 Years Of Hardware Manufacturing In Plovdiv”

Olimex Claims The World’s First $9 Computer Costs $39

The C.H.I.P. from Next Thing Co. bills itself as the world’s first nine dollar computer. That’s not a lie; their Kickstarter took in over two million dollars for a tiny single board computer with composite Video, WiFi, Bluetooth 512MB of RAM, 4GB of storage, and a 1GHz CPU. That’s a complete computer, sans keyboard, mouse, and monitor. You won’t get that with the $35 Raspberry Pi – you’ll need to add a WiFi adapter and an SD card for the same functionality – and you won’t get that with any other single board computer.

Understandably, the C.H.I.P. is already extremely successful. The company behind it has about 50,000 pre-orders, and people lined up to wait until well into next year for this computer. Exactly how Next Thing Co. managed to build a single board computer and send it out the door for nine dollars is a question that has yet to be answered, and is leaving more than a few people puzzled.

The Olimex blog has given their opinion of the C.H.I.P, and if that’s to be believed, the news isn’t good. The guys at Olimex know their stuff when it comes to making cheap single board computers; they have more than a few for sale, and they know what the Flash and DRAM market is like. To them, it’s impossible to sell a computer like the C.H.I.P. at $9. A quote from Allwinner for a similar module is $16 at the quantity Next Thing Co. would be looking at. That’s just the module with RAM and Flash – no Wifi, no board, no connectors. How could it be possible to sell this computer for only $9?

Continue reading “Olimex Claims The World’s First $9 Computer Costs $39”