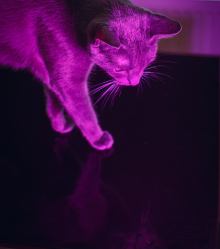
What happens when you mix over 23,000 coffee stirrers and a Raspberry Pi camera together? Probably nothing except for a mess, unless you very specifically pack the plastic straws and orient the camera just right. In that case, you get this very cool lenless digital straw camera that takes artfully ghostly images.

Actually, lensless is a bit of a reach for [Adrian Hanft]’s creation. While the camera he’s using to grab the image has a lens, the objective, for lack of a better term, is just a tightly packed bundle of straws. We’ve seen this approach to photography before, but there the camera used film placed at the back of the straw bundles to capture the pixelated image.
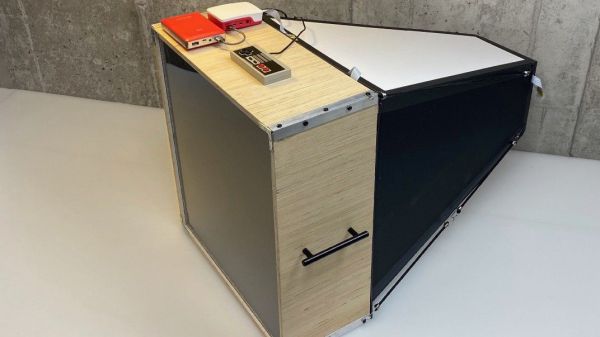
Here, a ground glass screen stands in for the film; a long lightproof box behind that provide a place to mount a camera to capture the images. Cleverly, [Adrian] built the camera mount from Lego, allowing cameras and lenses to be quickly swapped out. A Nintendo gamepad controller talks to custom software running on a Raspberry Pi and allows the photographer to control exposure and scroll through pictures using a smartphone as a display. There’s a short build video below, for those who can’t get enough of straw-packing techniques.
As with the film version of this camera, we just love the look of the photographs that come from this — the texture of the straw honeycomb and the defocused subject make for a striking effect.
Continue reading “Coffee Stirrers Act As Lens For This Digital Straw Camera”