When Deluxe Paint came out with the original Amiga in 1985, it was the killer app for the platform. [Christopher Drum] starts his recent article on just that note, remembering the day he and his mother walked into a computer store, and walked out with a brand new Amiga… thanks entirely to Deluxe Paint. Forty years on, how well can this killer app compete?
[Christopher] isn’t putting Deluxe Paint head-to-head with modern Photoshop; they’re hardly in the same class. Not Photoshop, no, but modern applications that do what Deluxe Paint did so well: pixel art. There was no need to call it pixel art back then, no, but with the resolutions on hand, all digital art was pixel art in 1985.
Or 1989, which is when Deluxe Paint III came out– that’s the last version written by Dan Silva and coincidentally the last version [Christopher] owned, and the one he focuses in on his tests. It has held up amazingly well.
Sure, you don’t get a full 24-bit colour palette, but most pixel artists stick to limited palettes still anyway. You don’t quite get a modern UI, but presence of useful keyboard shortcuts allows a Hands-On-Keybord-And-Mouse (We’ll call it HOKAM, in honour of HOTAS in aerospace) workflow that is incredibly efficient.
About the only things [Christopher] found Deluxe Paint III lacked compared to its successors were a proper layering system, and of course the infinite undo we’ve all gotten so used to. (DPIII has an undo button, but it could only store one operation.) He also complained about cursor latency for some brushes, but we wonder if that might have had something to do with Windows and the emulation layer adding a delay. One thing Amiga was always known for back in the day was the snappy cursor movement, even when the processor was loaded.
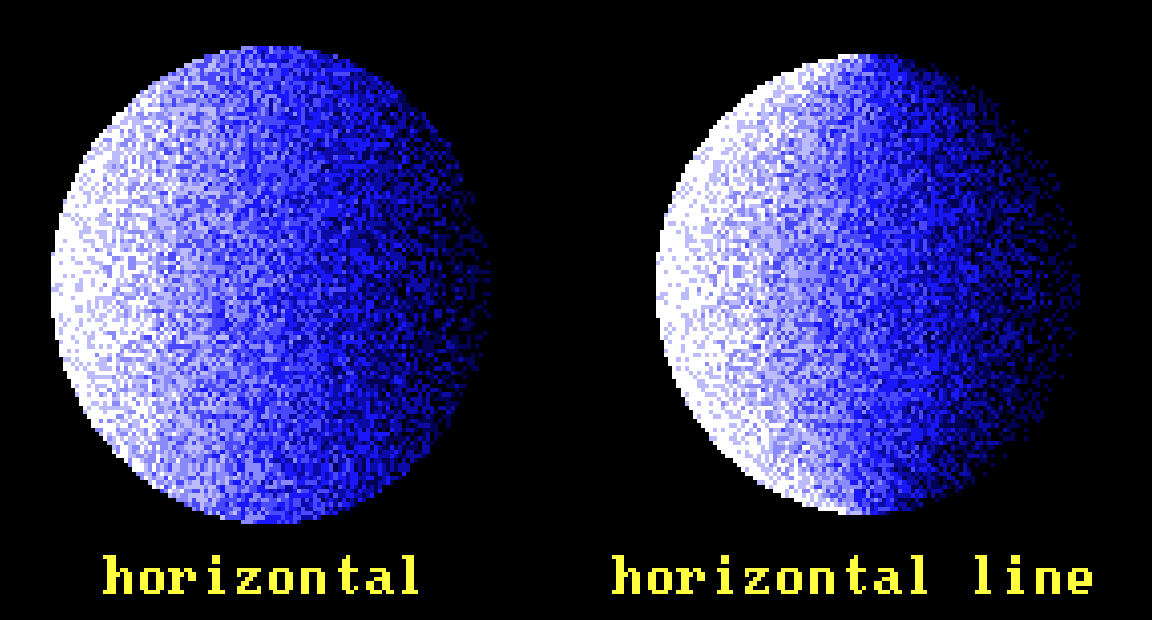
There were just as many features he found had been forgotten in the new generation — like palatte swapping animations, or flood-filling line gradients.
Anyone who owned an Amgia probably has fond memories of it, but alas, in spite of Commodore’s recent resurrection, we’re not likely to see a new one soon. On the other hand, at least when it comes to pixel art, there’s apparently no need to upgrade.
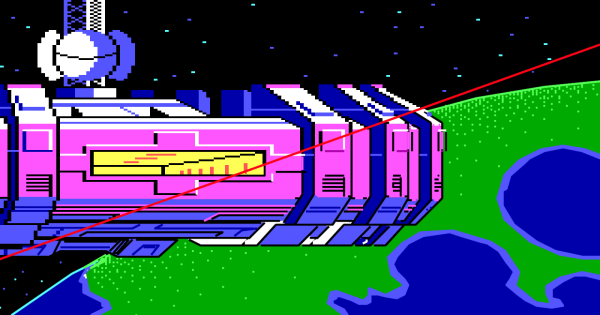
(Thumbnail and header image by Avril Harrison, distributed by Electronic Arts with Deluxe Paint.)