Hackaday Links Column Banner

Hackaday Links: December 15, 2019

When you’re right, you’re right. Back in January, we predicted that exoskeletons were about to break out as a mainstream product, and gave several examples of prototypes poised to become products. So it was with interest that we read about Sarcos Robotics and their new Guardian XO, a cyber suit aimed at those doing heavy lifting tasks. The wearable, full-body exoskeleton is supposed to amplify the wearer’s effort 20-fold, making a 200-pound load feel like lifting 10 pounds. It runs untethered for two hours on hot-swappable battery packs, and will be offered for lease to civilian heavy industries and the military for $100,000 a year. Honestly, it seems like you could hire a fair number of meat-robots for that sum, but still, it’s an interesting technology and a promising development.

Aficionados of 3D printing know all too well the limitations of the technology. While we’ve come a long way with things like a print in place, multiple materials, embedded electronics, and even direct 3D printing of complex mechanisms like electric motors, there’s been a long-standing obstacle to turning the 3D printer into the replicators of the Star Trek universe: batteries. But even that barrier is falling, and a new paper shows just how far we’ve come to printing batteries right into our designs. Using an off-the-shelf Prusa Mk 3 and specially formulated lithium iron phosphate/PLA and silicon dioxide/PLA filaments, the group was able to print working batteries in one shot. It’s exciting news because previous 3D-printed batteries required special printers or laborious post-processing steps. We’ll be watching for developments here.

Speaking of laboratory work, anyone who has been around labs is probably familiar with LabVIEW, the de facto standard for programming data capture and automation applications in the laboratory setting. The graphical programming language makes it easy to throw together a quick interface, and many lab-rats regret not having the expensive, proprietary environment available for their after-hours hacking. That might no longer be true, though, with special LabVIEW licensing for non-commercial users. It looks like there are two levels: LabVIEW Home Edition and a Community Edition of LabVIEW, which is currently in Beta. Either way, it’s good news for LabVIEW fans.

Friend of Hackaday Eric Strebel released a video the other day that we just had to comment on. It has nothing to do with electronics – unless you’re into circuit sculpture, that is. In the first of a two-part series, Eric covers the basics of modeling with brass and copper, using both wire and tubing. He has some great tips, like work-hardening and straightening copper wire by stretching it, and the miniature roll bender seen at 7:40 looks like something that could easily be 3D-printed. We recently did a Hack Chat on circuit sculpture with Mohit Bhoite, and saw his Supercon talk on the subject, so this video really got the creative juices flowing.

If you’re local to the Elkhorn, Wisconsin area, consider stopping by the Elkhorn Mini Maker Faire on February 15 and 16. Elkhorn looks like it has a nice central location between Milwaukee and Madison, and doesn’t appear too far from Chicago either, which is probably why they drew 1,200 people to the inaugural Faire last year. They’re looking to get that up to 2,000 people this year and over 150 booths, so if you’ve got something hackish to show off, check it out. The organizers have even set up a Hackaday.io event page to coordinate with the Hackaday community, so drop them a line and see what you can do to pitch in.

And finally, this one has us scratching our head. Activist group Extinction Rebellion (XR) has claimed they’ve “decommissioned” thousands of electric scooters in French cities. Why they’ve done this is the puzzler; they claim that the scooters-for-hire are an “ecological disaster” due to the resources needed to produce them compared to their short lifespan. We haven’t done the math. What is interesting, though, is the mode of decommissioning: XR operatives simply defaced the QR code on the scooters, rendering them un-rentable with the vendor’s smartphone app. Scooter companies might want to look into alternative rental methods if this keeps up.

From Fail To Wail: Guitar Picks Made From 3D Printed Waste

Between failed prints and iterative designs that need a few attempts before you nail them down, a certain amount of wasted material is essentially unavoidable when 3D printing. The good news is that PLA is a bioplastic and can be broken down via industrial composting, but even still, any method that allows you to reuse this material at home is worth taking a look at.

In a recent video, [Noah Zeck] details one potential use for your scrap plastic by turning his failed 3D prints into guitar picks. The idea here could really be applied to anything you can make out of thin plastic sheeting, but the fact that you can easily and cheaply produce picks with a commercially available punch makes this application particularly appealing.

The first step in this process is about as low-tech as it gets: wrap your scrap printed parts in rags, and beat them with a sledge hammer. This breaks them up into smaller and more manageable pieces, which is important for the next step. If the parts are small enough and you’ve got a decently powerful blender you don’t mind devoting to plastic recycling, we imagine that would make short work of this step as well.

Once suitably pulverized, [Noah] puts the plastic on a piece of glass and gets it warmed up with a heat gun. PLA has a fairly low glass transition temperature, so it shouldn’t take much time to soften. Then he puts a second piece of glass on top and squeezes them together to get a thin, flat sheet of plastic. Once cooled, he punches his guitar picks out of the sheet, with bonus points if the colors swirled around into interesting patterns. If you’re not musically inclined, we’ve seen a very similar method used to produce colorful floor tiles.

Continue reading “From Fail To Wail: Guitar Picks Made From 3D Printed Waste”

Fresh-Squeezed OJ Served In Orange Peel-Ay

Though it’s really more apple cider weather here at Hackaday HQ, freshly-squeezed OJ is a treat that knows no season. Sure generates a lot of peel, though. Not something you think about when you’re used to buying it in jugs at the grocery store. What a waste, huh?

Italian design firm [Carlo Rotti] teamed up with global energy company [Eni] to develop “Feel the Peel”, a 10-foot-tall real-time juice bar that celebrates the orange by using the entire thing. Fifteen hundred juicy orbs move single-file down the circular track toward their total destruction. One at a time, they are severed in half and wrung out by the machine, and their peels are dropped into a clear bin for all to see. Once the peels dry out, they are shredded, mixed with PLA, and fed into a delta printer that prints juice cups right there on site.

This live process of reuse is pretty interesting to watch — check it out after the break. [Eni] touts this as completely circular, but that really depends on what happens to the cups. If they collect the empties and compost them, great. Anyway, it seems way more sustainable than the Juicero.

Continue reading “Fresh-Squeezed OJ Served In Orange Peel-Ay”

Coffee Makes 3D Printing Better

While we know some 3D printer operators who need coffee, Washington State University is showing an improved PLA material that incorporates used coffee waste. Regular PLA is not known for being especially strong, though It isn’t uncommon for vendors to add things to their PLA to change its characteristics.

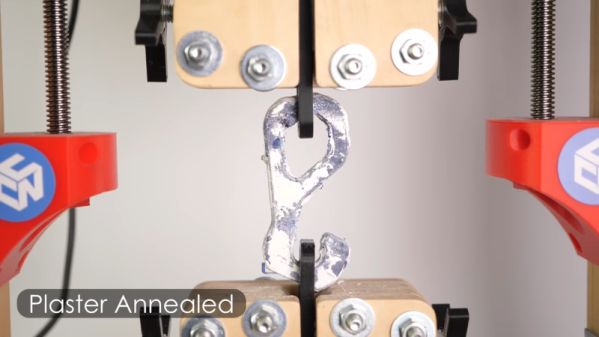
The new material containing about 20% coffee waste showed an over 400% increase in toughness (25.24 MJ/m3) versus standard PLA. Why coffee waste? We aren’t sure. They didn’t add grounds, but rather a dry and odorless material left over after coffee grounds are processed for biodiesel production.

Continue reading “Coffee Makes 3D Printing Better”

3D Printed Tools For Quick Press Brake Jobs

Press brakes are a workshop staple when working with sheet metal. They’re ideal for executing accurate and repeatable bends over and over again. Typically, they’re fitted with steel tooling that can hold up to thousands of press cycles. However, such tooling is expensive, and time consuming to produce. [Anthony] recently had a job come through the shop that required a unique internal radius. Rather than rush out and buy tooling, he decided to 3D print his own instead!

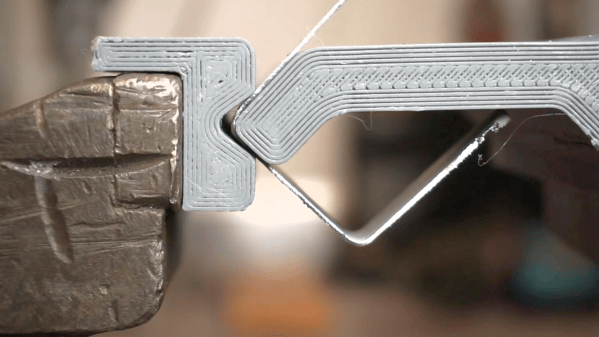
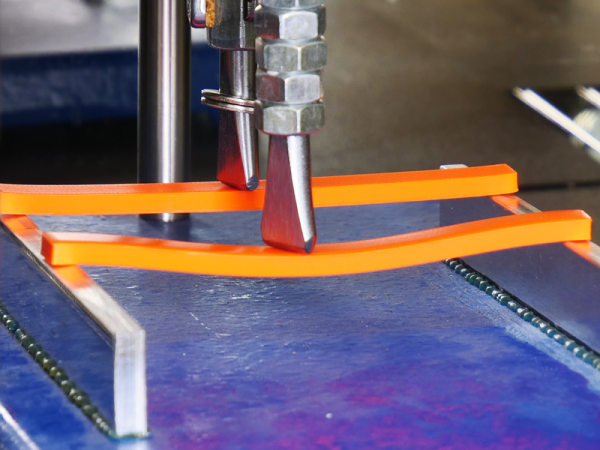
The press brake tools were printed on a standard Prusa i3, using regular PLA filament. There’s nothing particularly special in the process, with the prints using 12 perimeters and 20% infill. Despite being made of plastic, the tools held up surprisingly well. In testing, the parts were able to bend up to 3.4 mm steel, undergoing several cycles without major visible wear. [Anthony] also experimented with gooseneck parts, which, while less robust, make it easy to accommodate more complex sheet metal parts.

3D printing is a great way to produce custom press tooling, and can be done far more cheaply and quickly than producing traditional steel tooling. While it’s unlikely to be useful for long production runs, for short runs that need custom geometry, it’s a handy technique. We’ve even seen 3D printed punch-and-die sets, too. Video after the break.

Continue reading “3D Printed Tools For Quick Press Brake Jobs”

Hackaday Links Column Banner

Hackaday Links: July 21, 2019

Ordering a PCB used to be a [Henry Ford]-esque experience: pick any color you like, as long as it’s green. We’ve come a long way in the “express yourself” space with PCBs, with slightly less than all the colors of the rainbow available, and some pretty nice silkscreening options to boot. But wouldn’t it be nice to get full-color graphics on a PCB? Australian company Little Bird thinks so, and they came up with a method to print graphics on a board. The results from what looks like a modified inkjet printer are pretty stunning, if somewhat limited in application. But I bet you could really make a splash with these in our Beautiful Hardware contest.

The 50th anniversary of the Apollo 11 landing has come and gone with at least as much fanfare as it deserves. Part of that celebration was Project Egress, creation of a replica of the Columbia crew hatch from parts made by 44 hackers and makers. Those parts were assembled on Thursday by [Adam Savage] at the National Air and Space Museum in an event that was streamed live. A lot of friends of Hackaday were in on the build and were on hand, like [Fran Blanche], [John Saunders], [Sophy Wong], and [Estefannie]. The Smithsonian says they’ll have a recording of the stream available soon, so watch this space if you’re interested in a replay.

From the “Don’t try this at home” department, organic chemist [Derek Lowe] has compiled a “Things I won’t work with” list. It’s real horror show stuff that regales the uninitiated with all sorts of chemical nightmares. Read up on chlorine trifluoride, an oxidizer of such strength that it’s hypergolic with anything that even approaches being fuel. Wet sand? Yep, bursts into flames on contact. Good reading.

Continuing the safety theme, machinist [Joe Pieczynski] offers this lathe tip designed to keep you in possession of a full set of fingers. He points out that the common practice of using a strip of emery cloth to polish a piece of round stock on either a wood or metal lathe can lead to disaster if the ends of the strip are brought into close proximity, whereupon it can catch and act like a strap wrench. Your fingers don’t stand a chance against such forces, so watch out. [Joe] doesn’t share any gory pictures of what can happen, but they’re out there. Only the brave need to Google “degloving injury.” NSFL – you’ve been warned.

On a happier note, wouldn’t it be nice to be able to print water-clear parts on a standard 3D printer? Sure it would, but the “clear” filaments and resins all seem to result in parts that are, at best, clearish. Industrial designer [Eric Strebel] has developed a method of post-processing clear SLA prints. It’s a little wet sanding followed by a top coat of a super stinky two-part urethane clearcoat. Fussy work, but the results are impressive, and it’s a good technique to file away for someday.

Project Egress: Two Ways To Latch The Hatch

With July slipping away and the deadline approaching, the Project Egress builds are pouring in now. And we’re starting to see more diversity in the choice of materials and methods for the parts being made, like these two latches made with very different methods by two different makers.

For the uninitiated, Project Egress is a celebration of both the 50th anniversary of Apollo 11 and the rise of the maker movement. Spearheaded by [Adam Savage], the idea is to engage 44 prominent makers to build individual parts from the Unified Crew Hatch (UCH) from the Apollo Command Module. The parts will be used to create a replica of this incredibly complex artifact, which will be assembled by [Adam] before a live audience at the National Air and Space Museum next week.

Both [Joel] from the “3D Printing Nerd” channel and [Bill Doran] from “Punished Props Academy” got the nod for one of the 15 latches needed, and both played to their respective strengths. [Joel]’s latch was executed in PLA on a Prusa I3 printer. [Bill] went a different route for his latch. He used a Form 2 SLA printer to print the parts, but used them only to make silicone molds. He then cast the parts from urethane resin, which should prove much stronger than the original SLA prints. We suspect the ability to quickly cast more latches could prove handy if any of the other latch makers should fail to deliver.

The latches [Joel] and [Bill] made joins the other parts, like the wooden latch being made by [Fran Blanche] and the hatch handle [Paul] cast in aluminum. We’re looking forward to more part builds, as well as the final assembly.

Continue reading “Project Egress: Two Ways To Latch The Hatch”