Wood Enclosure Lends Warmth To This DIY Ribbon Microphone

We love it when someone takes an idea they’ve seen on Hackaday and runs with it, taking it in a new and different direction. That’s pretty much what we’re here for, after all, and it’s pretty gratifying to see projects like this wooden ribbon microphone come to life.

Now, we’re not completely sure that [Maya Román] was inspired by our coverage of [Frank Olson]’s homage to the RCA Model 44 studio mic rendered in walnut veneer, but we’re going to pat ourselves on the back here anyway. The interesting thing with [Maya]’s build is that she chose completely different materials and design styles for her project. Where [Frank] built as much of his mic from wood as possible, [Maya] was fine with a mixed media approach — CNC-milled plywood for the case and stand, laser-cut acrylic for the ribbon motor frame, and 3D-printed pieces here and there as needed. The woven brass cloth used as a windscreen is a nice detail; while the whole thing looks — and sounds — great, we think it would be even better with a coat of dark stain to contrast against the brass, as well as a nice glossy coat of polyurethane.

The video below shows the whole design and build process, which was a final project for [Maya]’s audio production class this semester at college. Here’s hoping that it got as good a grade as we would give it.

Continue reading “Wood Enclosure Lends Warmth To This DIY Ribbon Microphone”

Skee-Ball Scoring With Coin Slot Switches

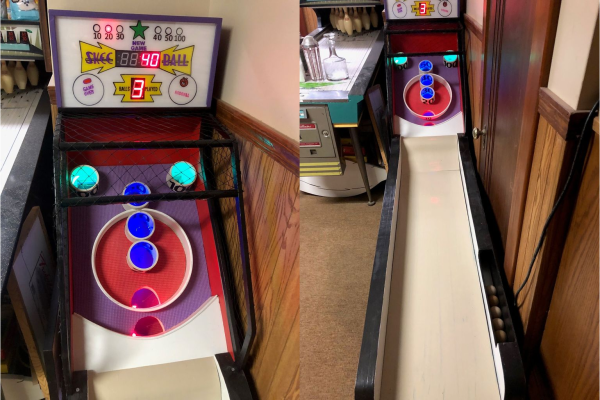
Bowling is great and all, but the unpredictability of that little ball jump in Skee-Ball is so much more exciting. You can play it straight, or spend a bunch of time perfecting the 100-point shot. And unlike bowling, there’s nothing to reset, because gravity gives you the balls back.

In one of [gcall1979]’s earlier Skee-Ball machines, gravity assisted the scoring mechanism, too: each ball rolls back to the player and lands in a lane labeled with the corresponding score, which is an interesting engineering challenge in its own right. He decided to build automatic scoring into his newest Skee-Ball machine.

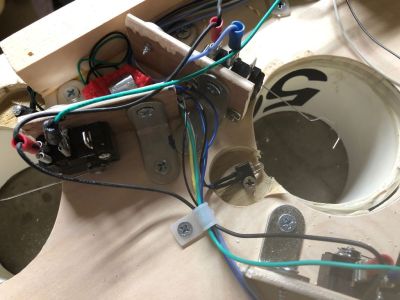
At the bottom of each cylinder is an arcade machine coin door switch with a long wire actuator. These had to be mounted so they’re close enough to the hole, but out of the way of the balls.

Each switch is wired up to an Arduino Mega along with four large 7-segments for the score, and a giant 7-segment to show the number of balls played. Whenever the game is reset, a servo drops a door to release the balls, just like a commercial machine.

The arcade switches work pretty well, especially once he bent the wire into hook shape to cover more area. But they do fail once in a while, maybe because the targets are full-size, but the balls are half regulation size. For the next one, [gcall1979] is planning to use IR break-beam targets which ought to work with any size ball. If you prefer bowling, you won’t strike out with break-beam targets there, either.

A Professional-Level Desk In A Dorm

Heading off to college comes with its own set of challenges. Harder course material, living away from home for the first time, and dealing with roommates are common hurdles to overcome, but an oft-overlooked issue is the poor quality dorm room desks. For a place that a student is expected to spend a majority of their study time, colleges and universities don’t often provide inspiring areas in the dorm rooms for this task. With a few tools and some time, though, anyone suffering in a dorm can have a much better place to work.

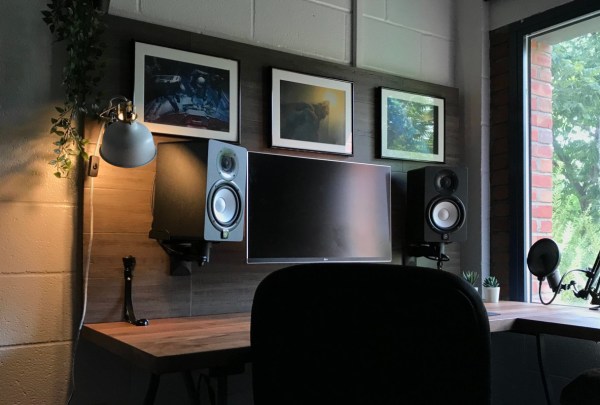
This desk build comes to us from reddit user [lucas_talbert] and is noteworthy for using simple tools and materials to transform the standard, boring desk in a way which won’t upset the facilities manager in charge of the dorm furniture. The backer is a piece of plywood which was covered in bamboo flooring. It was screwed into the back of the desk and secured with L-brackets. A piece of 1×4 was attached around the edges to help hide the LED lights and cables as well.

We like this build for its impressive transformation of an otherwise drab dorm room into a place that most of us wouldn’t mind having as our main workstation, even beyond college. It also uses common materials and is easily removable, both of which are perks when living as a student. The one thing it doesn’t have, though, is the ability to exercise when using it.

Quilting Desk Is An Absolute Unit

Most hobbies come with a lot of tools, and thread injecting is no different. Quilting itself may be Queen Hobby when it comes to the sheer volume of things you can buy: specialized templates, clips, thimbles, disappearing ink pens, and so on. And of course, you want it all within arm’s reach while sitting at the machine.

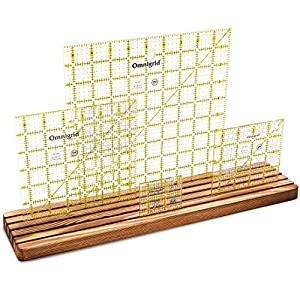
Ruler rack via Amazon.

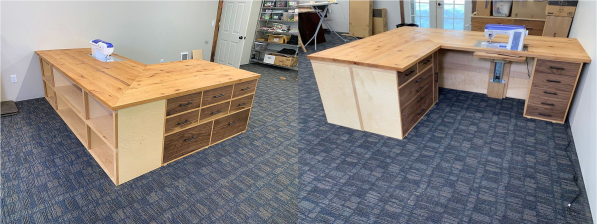
Years ago, [KevsWoodworks] built an impressive custom quilting desk for his wife. He’d added on to it over the years, but it was time for a bigger one. This beautiful beast has 21 drawers and 6 large cubbyholes for plastic bins. At the wife’s request, one of the drawers is vertical. [Kev] doesn’t say what she put in there, but if it were our desk, that’s where we’d stash all our large plastic rulers that need to be kept flat (or vertical). There’s also a lift, so any sewing machine can be brought up flush with the enormous top.

Fortunately for us, [Kev] likes to teach. He documented the build in a series of videos that go nicely with his CAD drawings, which are available for download. Thread your way past the break to see those videos.

Want to do some thread injecting, but don’t want to spend hundreds on a machine? We got lucky with our entry-level injector. If yours is a piece of scrap or has limited stitch options, replace the motor, or add an Arduino.

Continue reading “Quilting Desk Is An Absolute Unit”

3D Printer Meets CNC Router To Make Wood Prints

We’ve seen plenty of plywood 3D printers before; after all, many early hobbyist machines were made from laser-cut plywood. But this plywood 3D-printer isn’t made from plywood – it prints plywood. Well, sort of.

Yes, we know – that’s not plywood the printer is using, but rather particleboard, the same material that fills the flatpack warehouse of every IKEA store. And calling it a printer is a bit of a stretch, too. This creation, by [Shane Whigton] and his Formlabs Hackathon team, is more of a hybrid additive-subtractive CNC machine. A gantry-mounted router carves each layer of the print from a fresh square of material – which could just as easily be plywood as particleboard. Once a layer is cut, the gantry applies glue to it, puts a fresh sheet of material on top, and clamps it down tight. The router then carves the next layer, and so on up the stack. The layer height is limited to the thickness of the material – a nominal 3/4″ (19 mm) in this case – and there’s a remarkable amount of waste, but that’s not really the point. Check out the printer in action and the resulting giant Benchy in the video below.

Seeing all that particleboard dust and glue got us thinking: what about a 3D-printer that extrudes a paste of sawdust mixed with glue? We imagine that would be a bit like those giant printers that extrude concrete to build houses.
Continue reading “3D Printer Meets CNC Router To Make Wood Prints”

Hexagonal Lamp Is A Stylish Application Of Plywood

Lamps are useful things, and can be a great way to add style and lighting options to a room. Where overhead lights have to provide enough illumination for all manner of tasks, a subtle table lamp can add a nice moody glow to a room when it’s time to kick back and relax. Oftentimes, a stylish lamp can be let down by having a run of the mill plastic switch hanging off the power lead, but it doesn’t always have to be the case. [Emiel] designed this hexagonal lamp with a hidden switch, which works remarkably well.

[Emiel] starts by laying out hexagonal paper templates on plywood and perspex sheet. The plywood is cut on the bandsaw, while the interior cuts on the perspex are made on a scroll saw to avoid unsightly cut entry lines. The outer half of the lamp slides up and down on a pair of steel rods. Springs hold the outer half up, and it can be pressed down to activate a switch inside to turn the lamp on and off.

The build has a clean and attractive aesthetic, with the LEDs hidden inside, glowing through the perspex slices built into the body. It looks like something you’d find in the rooms at the Tranquility Base Hotel & Casino. If regular lamps aren’t enough for you, however, you could always consider building something interactive. Video after the break.

Continue reading “Hexagonal Lamp Is A Stylish Application Of Plywood”

Behold The WT-220: A ‘Clever’ VT-220 Terminal

[John Whittington] failed to win a bid for an old VT-220 serial terminal on eBay, so he decided to make his own version and improve it along the way. The result is the Whitterm-220 (or WT-220) which has at its core a Raspberry Pi and is therefore capable of more than just acting as a ‘dumb’ serial terminal.

Rear of the WT-220 with paint-filled laser engraving and all necessary connectors.

The enclosure is made from stacked panels of laser-cut plywood with an acrylic plate on the back for labels and connectors, where [John] worked paint into the label engravings before peeling off the acrylic’s protective film. By applying paint after laser-engraving but before peeling off the film, it acts as a fill and really makes the text pop.

Near the front, one layer of clear acrylic among the plywood layers acts as a light guide and serves as a power indicator, also doing double duty as TX/RX activity lights. When power is on, that layer glows, serving as an attractive indicator that doesn’t interfere with looking at the screen. When data is sent or received, a simple buffer circuit tied to the serial lines lights up LEDs to show TX or RX activity, with the ability to enable or disable this functionality by toggling a GPIO pin. A video overview is embedded below, where you can see the unit in action.

Continue reading “Behold The WT-220: A ‘Clever’ VT-220 Terminal”