How Low Can You Go? Tiny Current Generator

Current limited power supplies are a ubiquitous feature of the bench, and have no doubt helped prevent many calamities and much magic smoke being released from pieces of electronics. But for all their usefulness they are a crude tool that has a current resolution in the range of amps rather than single digit milliamps or microamps.

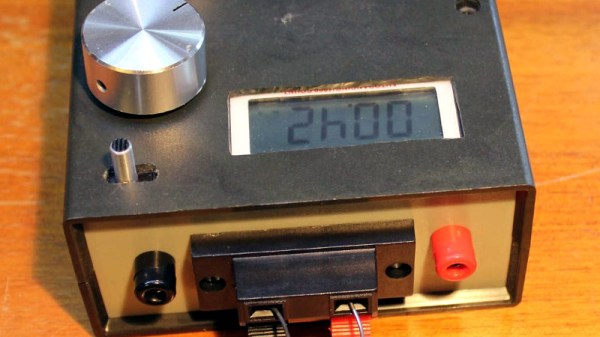
To address this issue, [Yann Guidon] has produced a precision current source, a device designed to reliably inject tiny currents. And in a refreshing twist, it has an extremely simple circuit in the form of a couple of PNP transistors. It has a range from 20 mA to 5 µA which is set and fine-tuned by a pair of pots, and it has a front-panel ammeter hacked from a surplus pocket multimeter, allowing the current to be monitored. Being powered by its own internal battery (and a separate battery for the ammeter) it is not tied to the same ground as the circuit into which its current is being fed.

[Yann] is a prolific builder whose work has featured here more than once. Take a look at his rubidium reference and his discrete component clocks, for example, and his portable LED flash.

Custom Parts Feeder Aims To Keep Pace With Pick And Place

When your widgets have proven so successful that building them gets to be a grind, it might be time to consider a little mechanical help in the form of a pick and place machine (PnP). If you’re going to roll your own though, there’s a lot to think about, not the least of which is how to feed your beast with parts.

Managing the appetite of a PnP is the idea behind this custom modular parts feeder, but the interesting part of [Hans Jørgen Grimstad]’s work-in-progress project has more to do with the design process. The feeders are to support a custom PnP being built in parallel, and so the needs of one dictate the specs of the other. Chief among the specs are the usual big three: cheap, fast, and reliable. But size is an issue too insofar that the PnP could be working with dozens of component reels at once. Flexibility was another design criteria, so that reels of varied width can be accommodated.

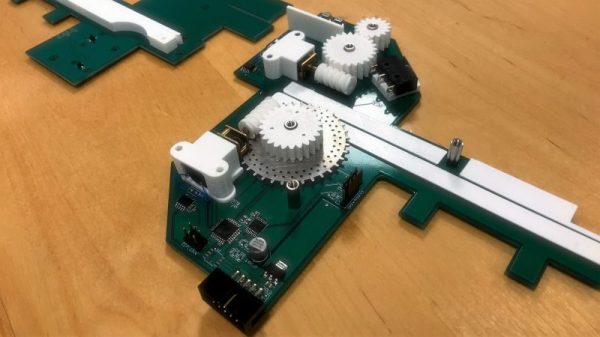
With all that in mind, [Hans] and company came up with a pretty slick design. The frame of the feeder is made out of the PCBs that house the motors for handling the tape, and the ATmega168 that controls everything. Tapes are driven by a laser-cut sprocket driven by 3D-printed worm gears. The boards have fingers that mate up to the aluminum extrusion that the PnP will be built from, and at only a few millimeters wider than the tape, lots of feeders can be nestled together. The video below shows the feeder undergoing some tests.

Alas, this build isn’t quite done, so you’ll have to check back for the final schematics and PCB files if you want to build one for yourself. While you’re waiting, you might want to build your own pick and place.

Continue reading “Custom Parts Feeder Aims To Keep Pace With Pick And Place”

Hackaday Prize Entry: IO, The Cardboard Computer

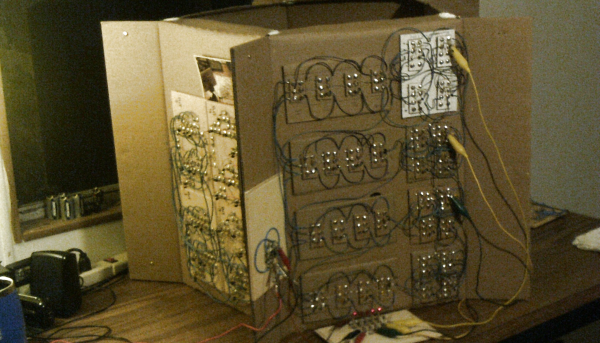
[Dr. Cockroach]’s goal was to build a four-bit computer out of recycled and repurposed junk. The resulting computer, called IO, consists of a single 555, around 230 PNP and NPN transistors, 230 diodes, and 460 resistors. It employs RISC architecture and operates at a speed of around 3 Hz.

He built IO out of cardboard for a good reason: he didn’t have a big budget for the project and he could get the material for free from his workplace. And because it was built so cheaply, he could also build it really big, allowing him to be able to really see each circuit close up and repair it if it wasn’t working right. You can really see the architecture very well when it’s this big—no tangle of wires for [Dr. Cockroach]. He uses over sixty blue LEDs to help monitor the system, and it doesn’t hurt that they look cool too. One of our favorite parts of the project is how he used copper fasteners to both manage the cardboard and serve as wiring points.

Continue reading “Hackaday Prize Entry: IO, The Cardboard Computer”

Tools Of The Trade – Component Placing

Recently we started a series on the components used to assemble a circuit board. The first issue was on dispensing solder paste. Moving down the assembly line, with the paste already on the board, the next step is getting the components onto the PCB. We’re just going to address SMT components in this issue, because the through hole assembly doesn’t take place until after the SMT components have gone through the process to affix them to the board.

Reels!
Reels!

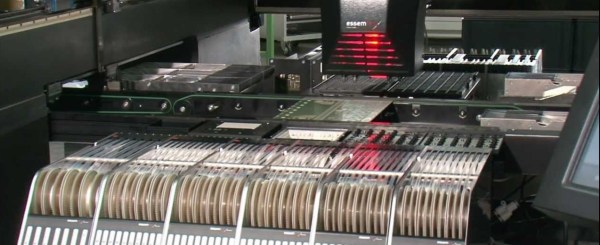
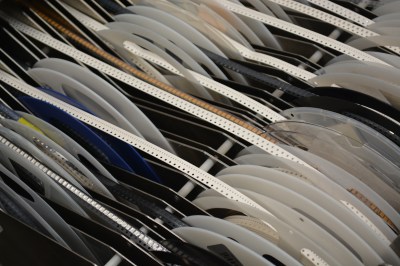
SMT components will come in reels. These reels are paper or plastic with a clear plastic strip on top, and a reel typically has a few thousand components on it. Economies of scale really kick in with reels, especially passives. If you order SMT resistors in quantities of 1-10, they’re usually $.10 each. If you order a reel of 5000, it’s usually about $5 for the reel. It is cheaper to purchase a reel of 10 kOhm 0603 resistors and never have to order them again in your life than it is to order a few at a time. Plus the reel can be used on many pick-and-place machines, but the cut tape is often too short to use in automated processes.

Continue reading “Tools Of The Trade – Component Placing”

Hackaday Prize Semifinalist: CNC Becomes Pick And Place

In the 80s and 90s, building a professional quality PCB was an expensive proposition. Even if you could afford a few panels of your latest board, putting components on it was another expensive process. Now, we have cheap PCBs, toaster-based solder ovens, and everything else to make cheap finished boards except for pick and place machines. ProtoVoltaics’ semifinalist entry for the Hackaday Prize is the answer to this problem. They’re taking a cheap, off-the-shelf CNC machine and turning it into a pick and place machine that would be a welcome addition to any hackerspace or well-equipped garage workshop.

Instead of building their own Cartesian robot, ProtoVoltaics is building their pick and place around an X-Carve, a CNC router that can be built for about $1000 USD. To this platform, ProtoVoltaics is adding all the mechanics and intelligence to turn a few webcams and a CNC machine into a proper pick and place machine.

Among the additions to the X-Carve is a new tool head that is able to suck parts out of a reel and spit them down on a blob of solder paste. The webcams are monitored by software which includes CUDA-accelerated computer vision.

Of course a pick and place machine isn’t that useful without feeders, and for that, ProtoVoltaics built their own open source feeders. Put all of these elements together, and you have a machine that’s capable of placing up to 1000 components per hour; more than enough for any small-scale production, and enough for some fairly large runs of real products.

You can check out some of the videos for the project below.

The 2015 Hackaday Prize is sponsored by:

Continue reading “Hackaday Prize Semifinalist: CNC Becomes Pick And Place”

Thumbnail that say The Hacklet

Hacklet #4 — PCB Tools And Wristwatches

4

The Hackaday Prize is heating up! When we set up the prize, we expected to see some incredible entries, and you guys haven’t let us down. Projects like SatNOGS, which aims to create a global network of satellite ground stations, or OpenMV, a low-cost Python powered vision module, are seriously blowing us away.

We’re starting to give away some prizes through community voting and there’s still plenty of time for you to enter. Check out The Hackaday Prize page for the full details.

Low Cost Printed Circuit Board Tools

Pick and Place

We’ve seen mills, lathes, CNC machines and 3D printers, but if there is any device that gets a hardware hacker’s attention, it’s a pick and place machine. In the PCB industry these machines pick up thousands of parts every hour, perfectly placing them on printed circuit boards. The downside is they’re incredibly expensive. The cheapest Chinese machines without vision start in the $4000 USD price range.

[Neil] aims to break down those price barriers with a $300 Pick and Place Machine that doubles as a 3D printer. He’s using delta 3D printer hardware to do it, and he’s throwing in everything! OpenCV based vision, multiple tool heads, reel and tray pick up, [Neil] has covered all the major points. He can’t do it alone though, so he’s looking for help. Check it out, and give him a hand (or a skull)!
pcbMill

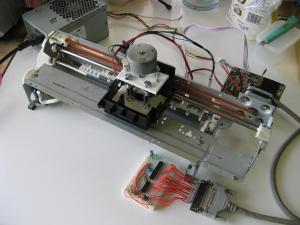
A low-cost pick and place machine will need printed circuit boards to work on. Not to worry, [shlonkin] has you covered with his PCB mill for under $10. Built from recycled printers, an Arduino, and host software written in processing, [shlonkin] has already posted impressive photos of boards his machine has milled. The main problem [shlonkin] has run into is longevity with plastic parts. In his most recent update, he’s looking for ideas. Can you help him?

Digital Watches

Anyone will tell you that digital watches are a pretty neat idea. With the era of smartwatches upon us, more than one hacker has delved into building their own timepiece. We’re happy to report that most of them even tell time.
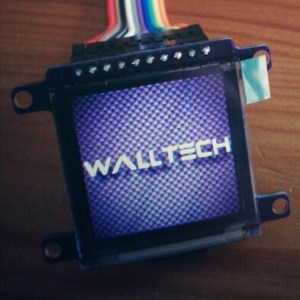
walltech[Walltech] has gone all out to create the ultimate watch. His OLED Smart Watch 6.0 is the culmination of years of work. The watch features a 1.5” OLED display, an SD card slot, and a vibrator motor. It has Bluetooth 4.0 to connect to the world, and an Atmel ATmega32u4 as its brain. A 500mAh battery will power the watch for 18-24 hours per charge.

[Walltech] plans to make it do everything from SMS and email notifications to music streaming. Don’t see a feature you want? Add it! Smart Watch 6.0 Is completely open source, so you can hop into the code and hack away!
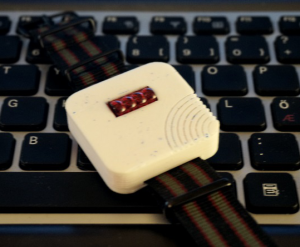
tilttouchtime2On the other side of the spectrum is [askoog89’s] Tilt Touch Time, which utilizes  those awesome bubble LED displays some of us remember from the 70’s. The retro look is only 3D printed skin deep though, as [askoog89] is using an ATtiny2313 processor. Atmel’s Qtouch is providing the capacitive touch sensing, while a tilt sensor helps Tilt Touch Time live up to its name. [Askoog89] has submitted his watch to The Hackaday Prize, so he’s trying to figure out a way to use the touch sensor to sync time with a PC. If that doesn’t work out, we bet those bubble LEDs would make great light sensors for some monitor-blink-sync action.

Fallout fans have seen plenty of PIP boys here on Hackaday, but have you seen [jara’s] PIP Watch? This Personal Information Panel is going big on size but low on power with a 3 inch e-ink display. [Jara] is using an STM32F101 ARM Cortex-M3 CPU, so he’s got plenty of processing power at his disposal. He’s connecting to the world through a Bluetooth serial link. All he needs is a Geiger counter, and he’s good to go!
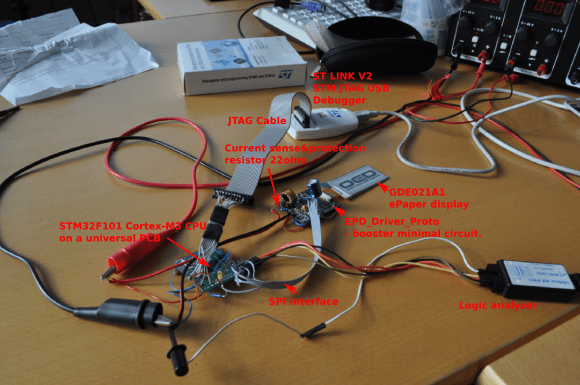
pipWatch

That’s it for this week’s Hacklet, stay tuned for next week when we bring you more of what’s happening at Hackaday.io!

Simple Transistor Tester Makes Sorting Easy

simple_transistor_sorter

Hacker [Dino Segovis] is back with yet another installment of his Hack a Week series, and it’s looking like he isn’t too worse for wear after hunkering down to face hurricane Irene.

This week, it seems that [Dino] is having some problems separating his PNP transistors from his NPNs. After Albert Einstein proves to be less than useful when it comes to sorting electronic components, [Dino] decided to build a simple transistor tester to help him tell his PNPs and NPNs apart without having to resort to looking up product data sheets.

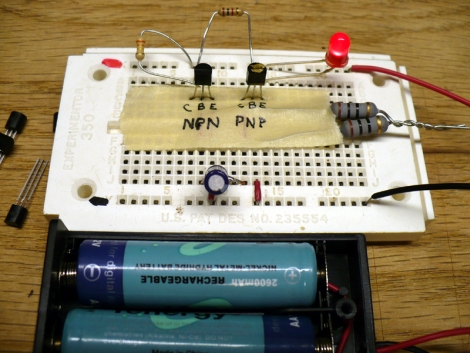
The tester itself is relatively simple to build. As you can see in the video below, it consists of a power supply, an LED, a few resistors, a pair of known transistors, and not much else. When everything is hooked together, the NPN/PNP pair causes the LED to light up, but the circuit is broken whenever one of the transistors is removed. Inserting a new transistor into the empty spot on the breadboard immediately lets you know which sort of transistor you have inserted.

Sure you can tell transistors apart with a multimeter, but if you have a whole drawer full of loose components, this is a far more efficient option.

Continue reading “Simple Transistor Tester Makes Sorting Easy”