Driving BB-8 - More than one way to move this bot

Driving BB-8: More Than One Way To Move This Bot

BB-8 is the much loved new droid introduced in the 2016 movie Star Wars: The Force Awakens, though in my case from the very first trailer released in 2014 I liked it for the interesting engineering problems it posed. How would you make a robot that’s a ball that rolls along, but with a head that stays on top while the ball rolls under it?

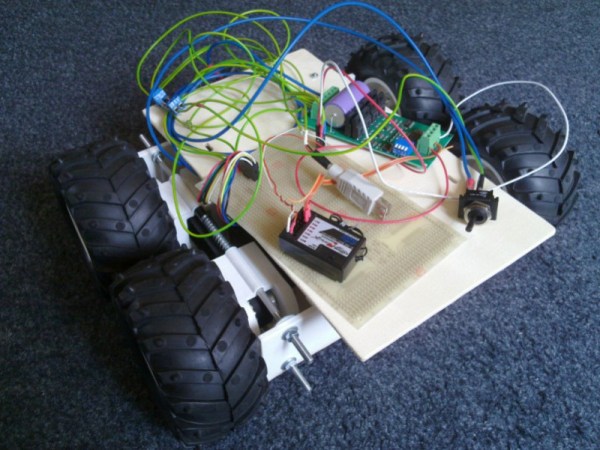
To make the ball roll, the answer most people found obvious at first was to use the analogy of a hamster wheel. The hamster running inside makes the wheel turn. In the BB-8 building world, which is quite large, the drive mechanism has come to be called a hamster drive, or just a hamster.

Magnets holding the head on

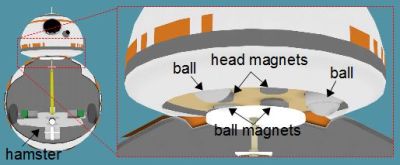
For the head, it seemed obvious that there would be magnets inside the ball, perhaps held in place near the top of the ball by a post extending up from the hamster. Corresponding magnets in attraction would then be attached to the underside of the head, and balls (also mounted under the head) would keep the head moving smoothly over the ball.

The magnet approach for the head has turned out to be the method used by all BB-8 builders that I’ve seen. However, the hamster has turned out to be only one of multiple solutions. Since the original debut many different methods have been used in builds and we’re going to have a lot of fun looking at each separate approach. It’s almost like revealing a magic trick; but really it’s all just clever engineering.

Note that for the actual movie, a combination of 7 or 8 props and CGI were used. The official working BB-8s that are shown at various promotional events were built after the movie was made and as of this writing, few details of their construction have been released. One notable detail, however, is that they aren’t using hamster drives.

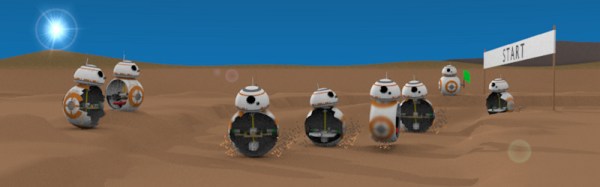
Below are details of all the different BB-8 drive systems I’ve seen so far that have been built along with how they work.

Continue reading “Driving BB-8: More Than One Way To Move This Bot”

Find A Drone

Flying a drone usually leads to–sooner or later–crashing a drone. If you are lucky, you’ll see where it crashes and it won’t be out of reach. If you aren’t lucky, you’ll know where it is, but it will be too high to easily reach. The worst case is when it just falls out of the sky and you aren’t entirely sure where. [Just4funmedia] faced this problem and decided to use some piezo buzzers and an Arduino to solve it.

Yeah, yeah, we know. You don’t really need an Arduino to do this, although it does make it easy to add some flexibility. You can pick two tones that are easy to hear and turn on the buzzers with a spare channel or sense a loss of signal or power.

Continue reading “Find A Drone”

Chomper Antweight Robot Kraves Combat

Antweight combat robots are really lightweight. [Carter Hurd] used leftover materials to create a dustpan robot with a chomper (comically made from a Krave cereal box) to hold captured competitors in place. The main body is made of foam board. The only metal is in the front wedge which is lifted by a servo to help trap the other robot.

[Carter] fully expects the foam to be eaten by competitors during the match. This led him to position his electronics at the center of the robot to keep it from being damaged. We’ll have to see how well that works. He’s hoping for an advantage over vertical flip weapons since they may simply cut through the foam without getting enough purchase for a flip.

The electronics is on a modular board so it can be easily moved from one robot to another. All that is on the board is the RC receiver and two FingerTech Tiny Electronic Speed Controllers. A battery is slung underneath.

Best of luck for Krave ‘bot eating up the opposition. We’ve seen some other light weight designs in the cardboard competitors from the Columbia Gadget Works makerspace.

Continue reading “Chomper Antweight Robot Kraves Combat”

The OpenR/C Project

The Open RC Truggy that started it all.

[Daniel Norée] started the OpenR/C project back in 2012 when he bought a Thing-O-Matic. In search of a project to test out his new printer, he set his sights on a remote controlled car, which as he put it,”… seemed like the perfect candidate, as it presents a lot of challenges with somewhat intricate moving parts along with the need for a certain level of precision and durability.

After releasing his second design, the OpenR/C Truggy, he realized a community was forming around this idea, and needed a place to communicate. So, he created a Google+ group. Today, the Truggy has been downloaded over 100,000 times and the Google group has over 5,000 members. It’s a very active community of RC and 3d printing enthusiasts who are testing the limits of what a 3d printer can do.

Continue reading “The OpenR/C Project”

Surviving The FAA Regulations: Modelers Move Indoors

New FAA rules are making radio-controlled aircraft a rough hobby to enjoy here in the USA. Not only are the new drone enthusiasts curtailed, but the classic radio-controlled modelers are being affected as well. Everyone has to register, and for those living within 30 miles of Washington DC, flying of any sort has been effectively shut down. All’s not lost though. There is plenty of flying which can be done outside of the watchful eye of the FAA. All it takes is looking indoors.

Continue reading “Surviving The FAA Regulations: Modelers Move Indoors”

RC Mini Flame Thrower Brings The Burn

It goes without saying that a radio controlled mini flame thrower can be nothing but a bad idea and you should never, ever build one. But once you watch the video below, you’ll be tempted to try. But don’t do it – you’ve been warned.

That said, the video below shows that [Make-log]’s remarkably compact build is chock full of safety interlocks and sports a thoughtful and informative user interface. It’s fueled by a small can of spray deodorant whose valve is actuated by a servo and ignited by a spark-gap igniter. Alas, this final critical component is no longer available from SparkFun, so if you choose to roll your own – which you shouldn’t – you’ll need to find a substitute.

We’ve featured an unreasonable number of flame thrower projects before, including a ton of wristmounted units. Of course if you’re a musically inclined pyromaniac, you’ll also want to check out this mini Doof Warrior setup too.

Continue reading “RC Mini Flame Thrower Brings The Burn”

Robot Control Ties RC Receiver To Motor Controller

[Andrey Nechypurenko] has posted the second part of his robotics ground vehicle design guide. In his first post [Andrey] detailed the mechanical design decisions he faced. [Andrey] now begins covering the electrical components, starting with manual control using a standard radio control system. To accomplish this an RC system was used with an MD22 h-bridge driver and a picoUPS.

The MD22 is a neat motor control board which can take the PWM signals from the radio controller and use this to drive the DC motors. Optionally it can also use an I2C interface, giving a nice migration path to integrate with a microcontroller. Until that happens this can’t really be called a robot — its more of an RC vehicle. But the iterative design and build process he’s using is a good one!

The picoUPS provides on-board battery charging. Due to its UPS heritage it also allows the vehicle to be powered from an external supply, which has proved useful during development. Finally, a 5v regulator was required to supply the on-board digital logic. [Andrey] wanted a quick drop in solution with a budget large enough to allow for future expansion and went with the Pololu D15V35F5S3 which can supply 3.5 amps in a small and easy to use module.

After breadboarding the system [Andrey] fabricated a PCB to integrate all the components. The next step is to add sensors and and embedded computer to the platform.

Continue reading “Robot Control Ties RC Receiver To Motor Controller”