B Battery Takes A 9V Cell

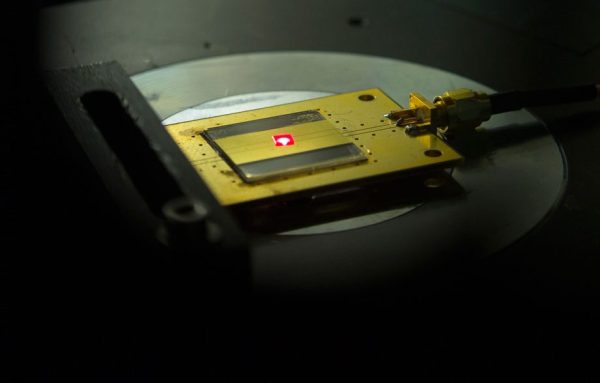
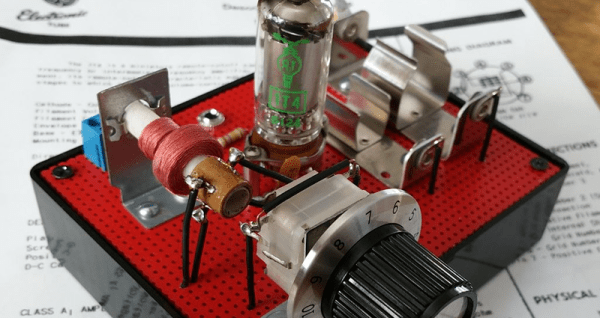
Old American radios (and we mean really old ones) took several kinds of batteries. The A battery powered the filaments (generally 1.5V at a high current draw). The B battery powered the plate (much lower current, but a higher voltage–typically 90V). In Britain these were the LT (low tension) and HT (high tension) batteries. If you want to rebuild and operate old radios, you have to come up with a way to generate that B voltage.

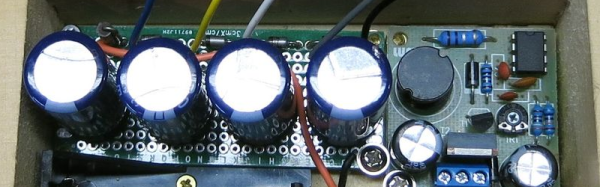
Most people opt to use an AC supply. You can daisy-chain a bunch of 9V batteries, but that really ruins the asthetics of the radio. [VA3NGC] had a better idea: he built a reproduction B battery from a wooden box, some brass hardware, a nixie tube power supply, and a 9V battery (which remains hidden). There’s also a handful of zener diodes, resistors, and capacitors to allow different taps depending on the voltage required.

b-battery-in-useThe project looks great. The wooden box apparently was a recycle item and the brass hardware makes it look like it belongs with the old radios it powers. This is a good example of how there’s more to vintage restoration than just the electronics. Sure, the function is important, but to really enjoy the old gear, the presentation is important, too.

Not all tube radios took 90V B+, but since this battery has taps, that isn’t a problem. The old Radio Shack P-Box kit took 22.5V. Of course, if you are going to build your own battery, maybe you ought to build your own triodes, too.

Hacked Diamond Makes Two-Atom Radio

It used to be pretty keen to stuff a radio receiver into an Altoid’s tin, or to whip up a tiny crystal receiver from a razor blade and a pencil stub. But Harvard researchers have far surpassed those achievements in miniaturization with a nano-scale FM receiver built from a hacked diamond.

As with all such research, the experiments in [Marko Lončar]’s lab are nowhere near as simple as the press release makes things sound. While it’s true that a two-atom cell is the minimal BOM for a detector, the device heard belting out a seasonal favorite from [Andy Williams] in the video below uses billions of nitrogen-vacancy (N-V) centers. N-V centers replace carbon atoms in the diamond crystal with nitrogen atoms; this causes a “vacancy” in the crystal lattice and lends photoluminescent properties to the diamond that are sensitive to microwaves. When pumped by a green laser, incident FM radio waves in the 2.8 GHz range are transduced into AM fluorescent signals that can be detected with a photodiode and amplifier.

The full paper has all the details, shows that the radio can survive extreme pressure and temperature regimes, and describes potential applications for the system. It’s far from a home-gamer’s hack at this point, but it’s a neat trick and one to watch for future exploitation. In the meantime, here’s an accidental FM radio with a pretty small footprint.

Continue reading “Hacked Diamond Makes Two-Atom Radio”

The Engines Of Ingenuity

Every once in a while, we stumble on an amazing resource that’s not exactly new, but it’s new to us. This is the case, in spades, with The Engines of Our Ingenuity, a radio show that’s been running since 1988!

Each episode covers an invention or engineering marvel, and tells the story of how it came to be, and puts each device into its historical and cultural context. Want to get the lowdown on how we safely bring fire into the kitchen? Or the largest land transport vehicle, NASA’s crawler? And what’s up with lobsters anyway?

Continue reading “The Engines Of Ingenuity”

RainCube Spreads Its Umbrella

There are times when a mechanism comes to your attention that you have to watch time and time again, to study its intricacies and marvel at the skill of its designer. Sometimes it can be a complex mechanism such as a musical automaton or a mechanical loom, but other times it can be a device whose apparent simplicity hides its underlying cleverness. Such a moment came for us today, and it’s one we have to share with you.

RainCube is a satellite, as its name suggests in the CubeSat form factor and carrying radar instruments to study Earthly precipitation. One of the demands of its radar system is a parabolic dish antenna, and even at its 37.5 GHz  that antenna needs to be significantly larger than its 6U CubeSat chassis.

The unfolding parabola in action.

It is the JPL engineers’ solution to this problem that is the beautiful mechanism we want to show you. The parabola is folded within itself and tightly furled round the feedhorn within the body of the satellite. As the feedhorn emerges, first the inner sections unfurl and then the outer edge of the parabola springs out to form the dish antenna shape. Simultaneously a mechanism of simplicity, cleverness, and beauty, one we’d be very proud of if it were our creation.

There is nothing new in collapsible parabolas used in spacecraft antennas, petal and umbrella-like designs have been a feature of some of the most famous craft. But the way that this one has been fitted into such a small space (and so elegantly) makes it special, we hope you’ll agree.

[via space.com]

An Amateur Radio Repeater Using An RTL-SDR And A Raspberry Pi

An amateur radio repeater used to be a complex assemblage of equipment that would easily fill a 19″ rack. There would be a receiver and a separate transmitter, usually repurposed from commercial units, a home-made logic unit with a microprocessor to keep an eye on everything, and a hefty set of filters to stop the transmitter output swamping the receiver. Then there would have been an array of power supply units to provide continued working during power outages, probably with an associated bank of lead-acid cells.

More recent repeaters have been commercial repeater units. The big radio manufacturers have spotted a market in amateur radio, and particularly as they have each pursued their own digital standards there has been something of an effort to provide repeater equipment to drive sales of digital transceivers.

But what if you fancy setting up a simple repeater and you have neither a shed full of old radios or a hotline to the sales department of a large Japanese manufacturer? If you are [Anton Janovsky, ZR6AIC], you make your own low-powered repeater using an RTL-SDR, a low-pass filter, and a Raspberry Pi.

[Anton]’s repeater is a clever assemblage through pipes of rtl_sdr doing the receiving, csdr demodulating, and [F5OEO]’s rpitx doing the transmitting. As far as we can see it doesn’t have a toneburst detector or CTCSS to control its transmission so it is on air full-time, however we suspect that may be a feature that will be implemented in due course.

With only a 10 mW output this repeater is more of a toy than a useful device, and we’d suggest any licensed amateur wanting to have a go should read the small print in their licence schedule before doing so. But it’s a neat usage of a Pi and an RTL stick, and with luck it’ll inspire others in the same vein.

We’ve touched on the Pi as a transmitter before, from a straightforward broadcast FM unit to crossing continents with WSPR, and even transmitting digital TV in another [F5OEO] hack.

An SDR For The Rest Of Them

If you are a radio enthusiast it is very likely that you will own at least one software defined radio. With the entry point into the world of SDRs starting with the ultra-cheap RTL2382 based USB receiver sticks originally designed for digital TV, it’s a technology that passed long ago into the impulse purchase bracket.

If you are not a radio enthusiast, or not even a Hackaday reader, you may not have heard of SDR technology. Even the humblest up-to-date radio or TV may well contain it somewhere within its silicon, but at the user interface it will still resemble the device you would have had in the 1950s: analogue tuning, or a channel-flipper.

It is interesting to see an attempt to market a consumer device that is unashamedly an SDR, indeed that is its unique selling point. The Titus II SDR bills itself as the “World’s First Consumer Ready SDR Package”, and is based around an Android tablet mated with a 100 kHz to 2 GHz SDR tuner and a pair of speakers in a portable radio styled case. It will support all modes including digital broadcasting through software plugins, and there will be an open plugin API for developers. They are taking pre-orders, and claim that the launch price will be under $100.

It sounds like an exciting product, after all who wouldn’t want a radio with those capabilities at that price! However it leaves us wondering whether the price point is just a little too ambitious for the hardware in question, and we’ll reluctantly say we’ll believe it when we see real devices on the market. A $100 consumer price doesn’t get you much in the tablet world, and that is from high-volume Chinese manufacturing without the extra cost of the SDR hardware and the overhead of smaller volume from a niche product. There are pictures online of real prototypes at trade shows, but we’d like to see a website with fewer renders and more hard plastic.

There is another angle to this device that might interest Hackaday readers though. It should remind anyone that building one yourself is hardly a difficult task. Take an RTL2382 stick with or without the HF modification, plug it into a tablet with an OTG cable, install an app like SDR Touch, and away you go. 3D print your own case and speaker surrounds as you see fit, and post the result on hackaday.io.

Via the SWLing Post.

Hollow State Receiver

[Netzener] received a Radio Shack P-Box one tube receiver as a gift. However, at the time, his construction skills were not up to the task and he never completed the project. Years later, he did complete a version of it with a few modern parts substitutions. The radio worked, but he was disappointed in its performance. Turns out, the original Radio Shack kit didn’t work so well, either. So [Netzener] did a redesign using some some old books from the 1920’s. The resulting radio — using parts you can easily buy today — works much better than the original design.

The most expensive part of the build was a 22.5 V battery, which cost about $25. However, you can get away with using three 9 V batteries in series if you want to save some money. The battery provides the plate voltage for the 1T4 vacuum tube. A more conventional AA battery drives the tube’s filament. The original Radio Shack design relied on a variable inductor for tuning. These are difficult to find now, so [Netzener] uses a more conventional adjustable coil and a common tuning capacitor.

As an extra touch, [Netzener] painted the perf board to look as much like the original Radio Shack kit as possible. You can see from the pictures, it came out looking very good. If this isn’t challenging enough for you, maybe you want to roll your own tube. Or maybe you should just settle for the socket.

Continue reading “Hollow State Receiver”