Hackaday Prize Entry: AutoFan Saves Tired Drivers With Face Recognition

Long distance driving can be tedious at times. The glare of the sun and the greenhouse effect of all your car’s windows make it hot and dry. You turn on the fan, or air conditioning if you have it, and that brings relief. Soon enough you’ve got another problem, the cold dry air is uncomfortable on your eyes. Eventually as you become more tired, you find yourself needing the air on your face more and more as you stay alert. You thus spend most of the journey fiddling with your vents or adjusting the climate controls. Wouldn’t it be great if the car could do all that for you?

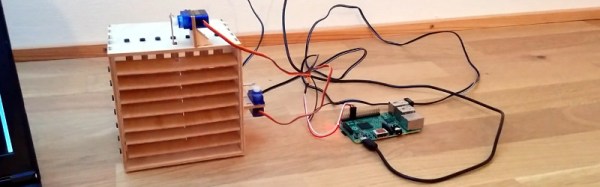
AutoFan is a project from [hanno] that aims to automate this process intelligently. It has a fan with steerable louvres, driven by a Raspberry Pi 2 with attached webcam. The Pi computes the position of the driver’s face, and ensures the air from the fan is directed to one side of it. If it sees the driver’s blink rate increasing it directs the air to their face, having detected that they are becoming tired.

The build logs go into detail on the mathematics of calculating servo angles and correcting for camera lens distortion in OpenCV. They also discuss the Python code used to take advantage of the multicore architecture, and to control the servos. The prototype fan housing can be seen in the video below the break, complete with an unimpressed-looking cat. For those of you interested in the code, he has made it available in a GitHub repository.

Continue reading “Hackaday Prize Entry: AutoFan Saves Tired Drivers With Face Recognition”

Abusing A Cellphone Screen With Solenoids Posts High Score

This Raspberry Pi 2 with computer vision and two solenoid “fingers” was getting absurdly high scores on a mobile game as of late 2015, but only recently has [Kristian] finished fleshing the project out with detailed documentation.

Developed for a course in image analysis and computer vision, this project wasn’t really about cheating at a mobile game. It wasn’t even about a robotic interface to a smartphone screen; it was a platform for developing and demonstrating the image analysis theory he was learning, and the computer vision portion is no hack job. OpenCV was used as a foundation for accessing the camera, but none of the built-in filters are used. All of the image analysis is implemented from scratch.

The game is a simple. Humans and zombies move downward in two columns. Zombies (green) should get a screen tap but not humans. The Raspberry Pi camera takes pictures of the smartphone’s screen, to which a HSV filter is applied to filter out everything except green objects (zombies). That alone would be enough to get you some basic results, but not nearly good enough to be truly reliable and repeatable. Therefore, after picking out the green objects comes a whole chain of additional filtering. The details of that are covered on [Kristian]’s blog post, but the final report for the project (PDF) is where the real detail is.

If you’re interested mainly in seeing a machine pound out flawless victories, the video below shows everything running smoothly. The pounding sounds make it seem like the screen is taking a lot of abuse, but [Kristian] mentions that’s actually noise from the solenoids and not a product of them battling the touchscreen. This setup can be easily adapted to test out apps on different models of phones — something that has historically cost quite a bit of dough.

If you’re interested in the nitty-gritty details of the reasons and methods used for the computer vision portions, be sure to go through [Kristian]’s github repository where everything about the project lives (including the aforementioned final report.)

Continue reading “Abusing A Cellphone Screen With Solenoids Posts High Score”

Don’t Take Photos Of Your Arduino 101 Either, It’s Light Sensitive

Wafer level chips are cheap and very tiny, but as [Kevin Darrah] shows, vulnerable to bright light without the protective plastic casings standard on other chip packages.

We covered a similar phenomenon when the Raspberry Pi 2 came out. A user was taking photos of his Pi to document a project. Whenever his camera flash went off, it would reset the board.

[Kevin] got a new Arduino 101 board into his lab. The board has a processor from Intel, an accelerometer, and Bluetooth Low Energy out of the box while staying within the same relative price bracket as the Atmel versions. He was admiring the board, when he noticed that one of the components glittered under the light. Curious, he pulled open the schematic for the board, and found that it was the chip that switched power between the barrel jack and the USB. Not only that, it was a wafer level package.

So, he got out his camera and a laser. Sure enough, both would cause the power to drop off for as long as the package was exposed to the strong light. The Raspberry Pi foundation later wrote about this phenomenon in more detail. They say it won’t affect normal use, but if you’re going to expose your device to high energy light, simply put it inside a case or cover the chip with tape, Sugru, or a non-conductive paint to shield it.

EDIT: [Kevin] also tested it under the sun and found conditions in which it would reset. Videos after the break.

Continue reading “Don’t Take Photos Of Your Arduino 101 Either, It’s Light Sensitive”

Modifying A Raspberry Pi 2 To Fit In Small Places

Still can’t get your hands on a Pi Zero? We know. Why not de-solder a few headers from a Raspberry Pi 2 to fit in your next project instead? Using a pair of 2.5″ HDD enclosures, [nodenet] made a mini linux laptop using the Raspberry Pi 2 — It even has a touch screen, and features a 1000mAh battery!

All in all it cost him about $120 for all the components, but before you JrECiM0rush out to make your own, you will need pretty good skills with a soldering iron to successfully downsize your Raspberry Pi 2. The modifications require removing both USB ports, the Ethernet plug, the GPIO pins, the HDMI port, the A/V jack and the camera connectors.

He used a combination of a mini hacksaw, and a soldering iron to remove all the components — what you’re left with his a business card sized computer — but the real fun part is re-attaching all the components with leads.

Continue reading “Modifying A Raspberry Pi 2 To Fit In Small Places”

Czech Out Raspberry Pi Riding The Rails

If you were wandering around Prague this Christmas season you may have spotted a Raspberry Pi 2 controlled Christmas tree. But you had to look quick because it was on the back of a special tram car that lubricates the rails around the city to reduce noise. The colors on the tree were determined by a web site that allowed visitors to change the colors. The same system, with a few adjustments, controlled a tree in the entrance hall of Czech Technical University in Prague at Karlovo.

dsc-5786

The adjustments weren’t trival. Power was a problem, for one. The electrical noise from the tram’s drive motors needed to be filtered by using a switching power supply. Cold temperatures might have created a frozen Pi so they added a heater. After all, everyone loves warm Pi. The LEDs on the tree were handled by a WS2811 addressable LED driver chip.

You can catch the tram any time on the web, but the tree will be gone once the Christmas season ends.

Continue reading “Czech Out Raspberry Pi Riding The Rails”

Firing Up A Raspberry Pi Zero

I ordered a Raspberry Pi Zero from Adafruit in their Startup Pack right after they were released. There are a few Greater Than Zero Pis (GTZPi) already on my workbench so my purchase was driven by curiosity, not necessity. With no rush on delivery it eventually got here, and I finally got around to looking at it. My experience with the Pi family began with the Pi B+ and, shortly after that, the Pi 2. The speed difference between them was noticeable so I decided to dive in and further test the performance of the Zero.

Continue reading “Firing Up A Raspberry Pi Zero”

Raspberry Pi Tablet Based On Sailfish OS

There are so many hacks in this project it’s hard to know where to start. So let’s start at the SailPi tablet which is a Raspberry Pi running the Sailfish OS on an LCD touch screen powered by a cell phone battery pack. The design looks more like a high-tech sandwich with the Pi in the middle than a tablet. Despite the appearance it works, at that’s what counts. COs98UBWsAAQNh5
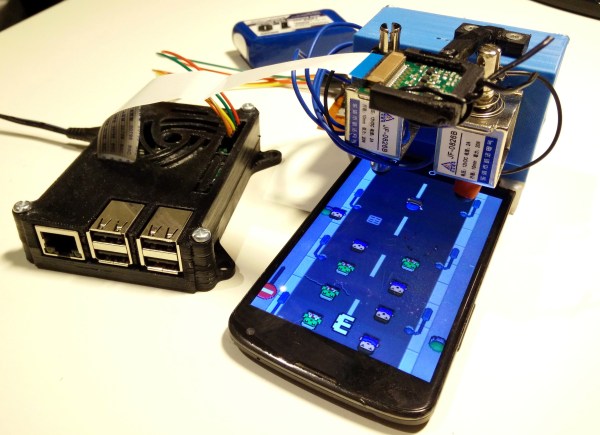
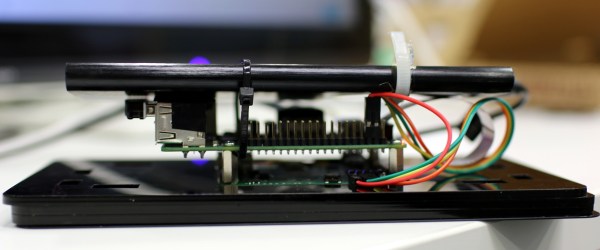
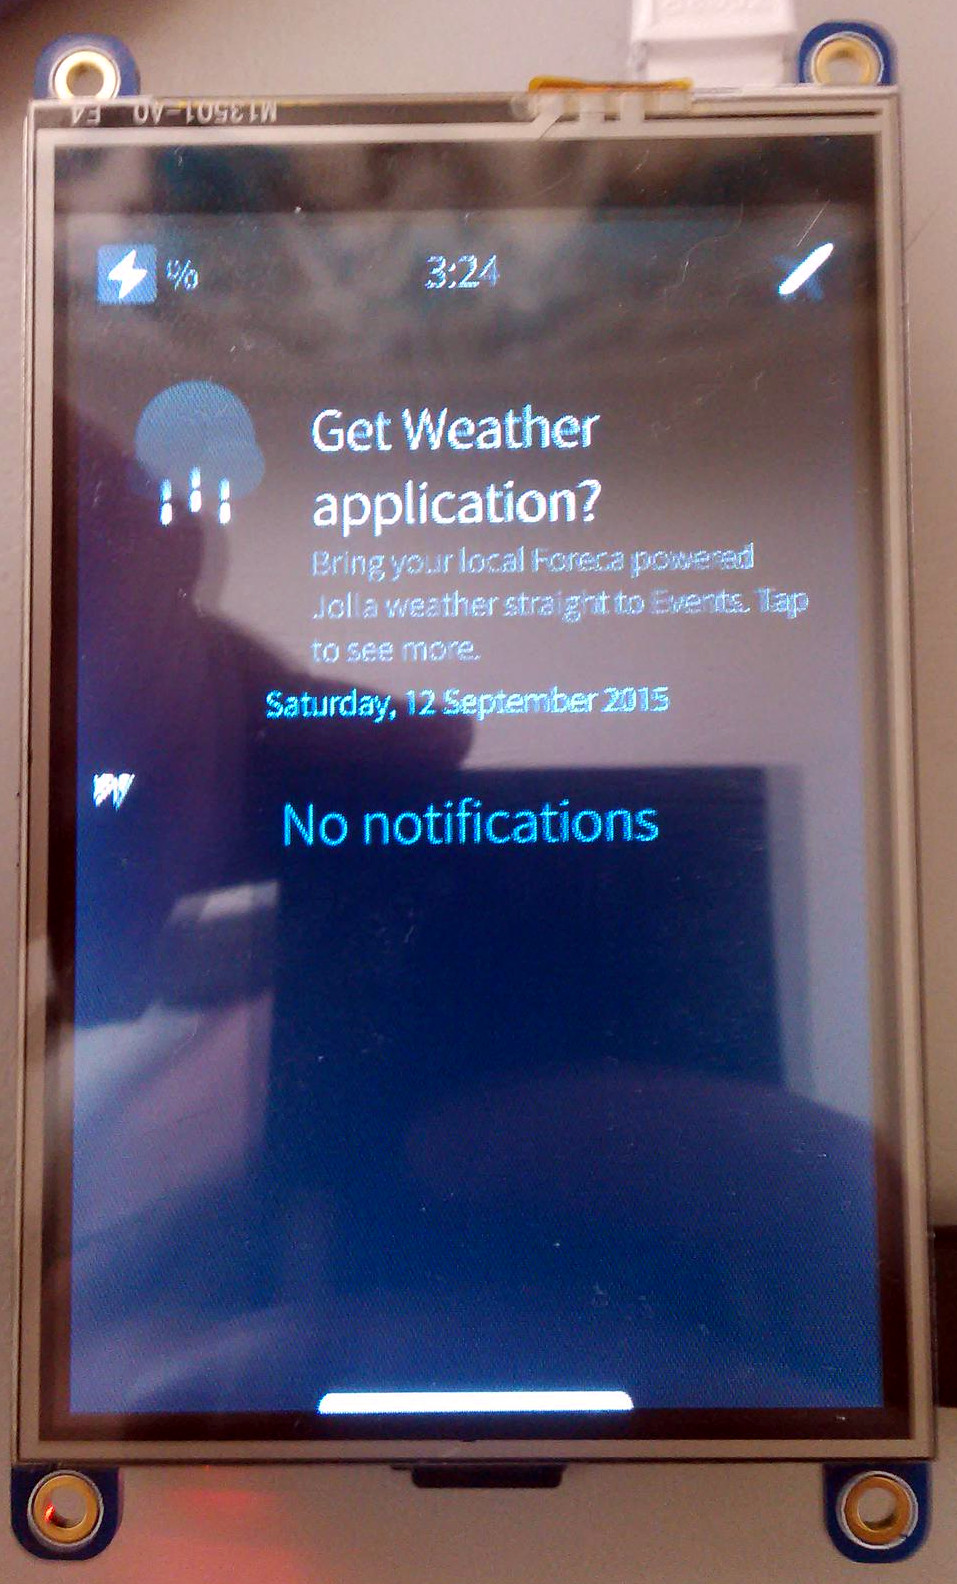
The creator, [Aleksi Suomalainen] expended a lot of effort pulling all the pieces together on this project.

The Sailfish OS project is targeted at creating a new OS for mobile devices, especially cell phones. It is open source which invites developers to contribute to the project. The touch screen user interface is designed for ease of use by gestures from one finger on the hand holding the phone.

[Aleksi] ported Sailfish to a Pi 2 during a hacking week. He’s shared the code for it on his blog. During the hack week he played with accessing the GPIO on the Pi to flash an LED. To get you up and running quickly he provided an image you can load onto an SD.

It appears the Pi is finding a niche for OS hackers in addition to the hardware hackers using the GPIO.

Don’t miss the demo after the break to see the OS running on the Pi. Continue reading “Raspberry Pi Tablet Based On Sailfish OS”