Sailing – specifically small boats in regattas – is a hobby that requires a lot of skill. Like any hobby, there are devices and electronics to make the hobby easier. For sailing, its tactical sailing compasses and GPS units. Remember, you probably don’t want to sail in a straight line, and that means offloading decades of experience to electronics. Instead of spending hundreds of dollars on a sailing computer, [Brook] thought it would be a better idea to build his own robot sailor from a Raspberry Pi and a Pebble smartwatch.
The sensors required for a sailing computer are par for the course – a Ublox GPS unit, a magnetometer, an acceleratometer, and a gyro. Being used on a sailboat also means there’s an anemometer thrown into the mix. These parts are stuffed into a waterproof polycarbonate field box with a USB power bank battery and a Bluetooth USB dongle.
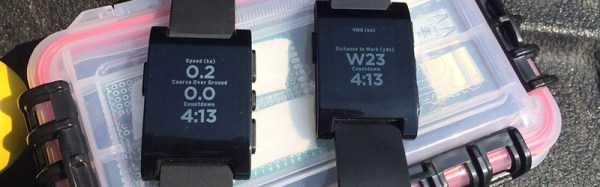
With the hardware in place, it was time to write the software. The UI for this device is a Pebble smartwatch, which means there was a lot of futzing around with C# and Mono. This device is also a sailing data recorder, meaning [Brook] can integrate this project with VisualSail, a desktop application he wrote a few years ago to create 3D replays of sailing races using GPS data.

The Raspberry Pi Zero contest is presented by Hackaday and Adafruit. Prizes include Raspberry Pi Zeros from Adafruit and gift cards to The Hackaday Store!
See All the Entries