Remote controlled Billy from the Saw movies

Pi-Controlled Billy From The Saw Horror Flicks

[David0429] has made a very scary Raspberry Pi controlled puppet. Scary that is if you’ve seen the Saw movies where a serial killer uses one like it, called Billy, to communicate with his victims. If you haven’t, then it’s a pretty neat remote-controlled puppet-on-a-tricycle hack.

A stepper motor hidden under the front fender moves the trike by rotating the front wheel. It does this using a small 3D printed wheel that’s attached to the motor’s shaft and that presses against the trike’s wheel. Steering is done using a 3D printed gear mounted above the fender and attached to the steering column. That gear is turned by a servo motor through another gear. And another servo motor in the puppet’s head moves its mouth up and down.

All these servos and motors are wired to an Adafruit stepper motor HAT stacked on a Raspberry Pi hidden under the seat. Remote control is done from a webpage in any browser. The Flask python web framework runs on the Pi to both serve up the webpage and communicate with it in order to receive commands.

[David0429] took great care to make the puppet and tricycle look like the one in the movie. Besides cutting away excess parts of the trike and painting it, he also ran all the wires inside the tubular frame, drilling and grinding out holes where needed.  The puppet’s skeleton is made of wood, zip ties and hinges but with the clothes on, it’s pretty convincing. Interestingly, the puppet in the first movie was constructed with less sophistication, having been made out of paper towel rolls and papier-mâché. The only things [david0429] would like to do for next time are to quieten the motors for maximum creepiness, and to make it drive faster. However, the need for a drive system that could be hidden under the fender resulted one that could only work going slowly. We’re thinking maybe driving it using the rear wheels may make it possible provide both speed and stealth. Ideas anyone?

In any case, as you can see in the video below, the result is suitably creepy.

Continue reading “Pi-Controlled Billy From The Saw Horror Flicks”

Hackaday Prize Entry: CNC Mill Lets Kids Engrave On The Fly

The manufacturing revolution has already begun, and there are 3D printers, CNC machines, and laser cutters popping up in garages and workspaces all around the world. The trouble with these machines is that they’re fiddly to use, and you don’t want a kid playing around with them.

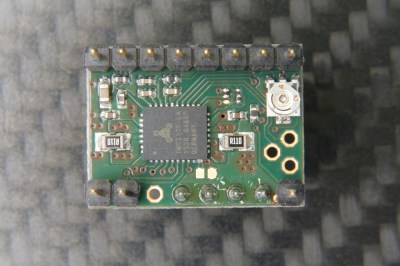
[moritz.messerschmidt]’s Hackaday Prize entry is a desktop Badgemaker that engraves acrylic name badges for kids. Under the hood, an Arduino with a custom-built shield with 3 SilentStepStick stepper drivers on it operates the three NEMA-11 motors. Meanwhile, the kids interact with a 7” touchscreen powered by a Raspberry Pi.

Once the kid selects what to engrave, motors move the piece of acrylic against a rotary tool’s milling bit, carving the acrylic as instructed. These cards are then equipped with watch batteries and LEDs to light up.

The touch screen is key. Bummed out by basic CNC machines that were difficult to use — like hobbyist 3D printers with a newbie-befuddling interface — [moritz.messerschmidt] went out of his way to make the interface kid-friendly, with just a simple set of choices necessary for creating one’s own name badge.

Is this a feature-packed CNC machine with all the bells and whistles? No, but that’s not the point. The purpose of the Badgemaker is to introduce a new generation to personal fabrication technology. It’s a toy, but that’s the point: a CNC machine that’s so easy to use, even a child can do it.

Alas, Poor Yorick! He Hath Not Amazon Prime

If you are looking around for a Halloween project, you might consider The Yorick Project from [ViennaMike]. As you can see in the video below, it marries a Raspberry Pi acting as an Amazon Alexa with an animatronic skull.

This isn’t the most technically demanding project, but it has a lot of potential for further hacking. The project includes a USB microphone, a servo controller, and an audio servo driver board. It looks like the audio servo board is controlling the jaw movement and based on the video, we wondered if you might do better running it completely in software.

Continue reading “Alas, Poor Yorick! He Hath Not Amazon Prime”

Portable Pi And Fresh Breath

There’s a long history of building things in Altoid tins, but the Pi-Tac 1.0 uses a Pi Zero W inside a Tic-Tac box. In addition to the processors, there is a tiny OLED display and a battery controller. According to a Reddit post, [Deathonater] plans to use it as a WiFi access point.

The display and the battery/power controller are from AdaFruit. You can find some sample code for the battery controller if you want to duplicate the design. You can also opt for an enhanced version that can report the battery state readily.

Continue reading “Portable Pi And Fresh Breath”

FruitNanny: The Raspberry Pi Baby Monitor For Geeks

Having a child is perhaps the greatest “hack” a human can perform. There’s no soldering iron, no Arduino (we hope), but in the end, you’ve managed to help create the most complex piece of machinery in the known galaxy. The joys of having a child are of course not lost on the geekier of our citizens, for they wonder the same things that all new parents do: how do we make sure the baby is comfortable, how many IR LEDs do we need to see her in the dark, and of course the age old question, should we do this with a web app or go native?

If you’re the kind of person who was frustrated to see that “What to Expect When You’re Expecting” didn’t even bother to mention streaming video codecs, then you’ll love FruitNanny, the wonderfully over-engineered baby monitor created by [Dmitry Ivanov]. The product of nearly two years of development, FruitNanny started as little more than a Raspberry Pi 1n a plastic lunch box. But as [Dmitry] details in his extensive write-up, the latest iteration could easily go head-to-head with products on the commercial market.

[Dmitry] gives a full bill of materials on his page, but all the usual suspects are here. A Raspberry Pi 3 paired with the official NoIR camera make up the heart of the system, and the extremely popular DHT22 handles the environmental monitoring. A very nice 3D printed case, a lens intended for the iPhone, and a dozen IR LEDs round out the build.

The software side is where the project really kicks into high gear. Reading through the setup instructions [Dmitry] has provided is basically a crash course in platform-agnostic video streaming. Even if a little bundle of joy isn’t on your development roadmap, there’s probably a tip or two you can pick up for your next project that requires remote monitoring.

It probably won’t surprise you that geeky parents have been coming up with ways to spy on their kids for some time now, and if you can believe it, some don’t even include a Raspberry Pi.

Pop Goes The Haunted Jack-in-the-Box

Is Halloween sneaking up on you, too?  It’s less than two weeks away, but there is still plenty of time to build something that will scare the pants off trick-or-treaters and party guests alike. This year, Hackaday regular [Sean Hodgins] hacked his favorite holiday by taking something that ships with a base level of scariness and making it autonomous. What could be more frightening than a haunted toy?

The (decades-old) jack-in-the-box mechanism is simple. Turning the crank operates a mechanical music box that plays the traditional “Pop Goes the Weasel”. When the music box hits the high note, a jutting piece of plastic on the barrel of music box disturbs the other end of the latch, which frees the scary clown inside. [Sean] used a 100:1 DC motor to turn the crank from the inside, and a Pi camera to detect victims in the vicinity. Once the camera locks on to a face, the box cranks itself and eventually ejects the jester. Since most of the space inside is already taken up by the spring, [Sean] housed the electronics in a custom 3D-printed base with a hole cut out for the camera’s eye.

Many modifications are possible with a project like this. [Sean] is now in complete control of the latch operation, so he could make the clown pop appear instantly, or randomly, or sometimes not at all. Check out [Sean]’s entertaining build video after the break.

Want to make your own fright machine from scratch? We’ve got all the inspiration you need, from tabletop to trash can-sized monsters. Continue reading “Pop Goes The Haunted Jack-in-the-Box”

DIY Nintendo Switch May Be Better Than Real Thing

Nintendo’s latest Zelda-playing device, the Switch, is having no problems essentially printing money for the Japanese gaming juggernaut. Its novel design that bridges the gap between portable and home console by essentially being both at the same time has clearly struck a chord with the modern gamer, and even 8 months after its release, stores are still reporting issues getting enough of the machines to meet demand.

But for our money, we’d rather have the Raspberry Pi powered version that [Tim Lindquist] slaved over for his summer project. Every part of the finished device (which he refers to as the “NinTIMdo RP”) looks professional, from the incredible job he did designing and printing the case down to the small details like the 5 LED display on the top edge that displays volume and battery level. For those of you wondering, his version even allows you to connect it to a TV; mimicking the handheld to console conversion of the real thing.

[Tim] has posted a fascinating time-lapse video of building the NinTIMdo RP on YouTube that covers every step of the process. It starts with a look at the 3D model he created in Autodesk Inventor, and then goes right into the post-printing prep work where he cleans up the printed holes with a Dremel and installs brass threaded inserts for strength. The bulk of the video shows the insane amount of hardware he managed to pack inside the case, a true testament to how much thought was put into the design.

For the software side, the Raspberry Pi is running the ever popular RetroPie along with the very slick EmulationStation front-end. There’s also a Teensy microcontroller on board that handles the low-level functions such as controlling volume, updating the LED display, and mapping the physical buttons to a USB HID device the Raspberry Pi can understand.

The Teensy source code as well as the 3D models of the case have been put up on GitHub, but for a project like this that’s just the tip of the iceberg. [Tim] does mention that he’s currently working on creating a full build tutorial though; so if Santa doesn’t leave a Switch under the tree for you this year, maybe he can at least give you a roll of filament and enough electronics to build your own.

While this isn’t the first time a Raspberry Pi has dressed up as a Nintendo console, it may represent the first time somebody has tried to replicate a current-generation gaming device with one.

Continue reading “DIY Nintendo Switch May Be Better Than Real Thing”