How many times are you out on vacation and neglect to take pictures to document it all for the folks back at home? Or maybe you forgot just exactly where that awesome waterfall was. [Mark Williams] has made a Raspberry Pi Zero enabled cap that can take photos and geotag them with the location as well as the attitude of the camera.
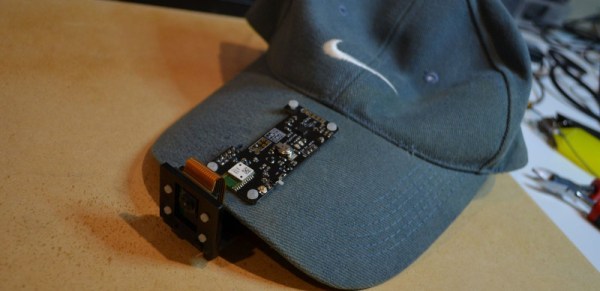
The idea is to enable the reconstruction of a trip photographically. The hardware consists of a Raspberry Pi Zero W coupled with a Raspberry Camera V2 and a BerryGPS-IMU. Once activated, the system starts taking photos every two minutes. Within each photograph, the location of the photographer is recorded like most GPS enabled camera.
An additional set of data including yaw, pitch, and roll along with direction is also captured to understand where the camera is pointing when the image was taken. Even if he’s tilting his head at the time the photo was taken, the metadata allows it to be straightened out in software later.
This information is decoded using GeoSetter which puts the images on a map along with the field of view. Take a peek at the video below for the result of a trip around Sydney Harbour and the system in action. The Raspberry Pi Zero and camera combo are useful for a lot of things including this soldering microscope. Hopefully, we will be seeing some DIY VR gear with stereo cameras in the near future. Continue reading “The Perfect Tourist Techno-Cap”