Mobile devices have become notorious for their unrepairability, with glued-together parts and impossible-to-reach connectors. So it’s refreshing to see something new in that field from the e-book reader brand Kobo in the form of a partnership with iFixit to ensure that their new reader line can be fixed.
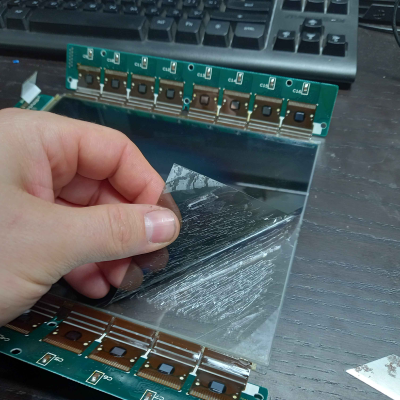
Naturally, we welcome any such move, not least because it disproves the notion that portable devices are impossible to make with repairability in mind. However, the linked article is especially interesting because it includes a picture of a reader, and its cover has been removed. We’re unsure whether or not this is one of the new ones, but it’s still worth looking at it with reparability eyes. Just what have they done to make it easier to repair?
Older consumer electronic devices follow a desirability curve in which after they fall from favour they can’t be given away. But as they become rarer, they reach a point at which everyone wants them. Then, they can’t be had for love nor money. CRT TVs are now in the first stage, they’re bulky and lower-definition than modern sets, and thus thrift stores and dumpsters still have them in reasonable numbers. To retrogamers and other enthusiasts, this can be a bonanza, and when he saw a high-end late-model JVC on the sidewalk [Chris Person] wasted no time in snapping it up. It worked, but there were a few picture issues, so he set about fixing it.
There is much to be found online about recovering data from corrupt SD cards, but [StezStix Mix] had an entirely different problem with his card. He’d filmed an important video to it, then dropped it and ran his office chair over it, snapping it almost in half. He’s put up a couple of videos showing how he recovered the data, and we’ve put them below the break.
A modern SD card is mostly just plastic, as in the decades since the format was created, the size of the circuitry on it has decreased dramatically. So his stroke of luck was that the card circuitry was a tiny PCB little bigger than the contact pad area on a full size SD card. There was a problem though, it wouldn’t be easy to fit in an SD card socket. So in the first video he goes through physically wiring it to a USB card reader, which results in reading the data after a false start in remembering that an SD card activates a switch.
This however is not the end of the story, because he had viewers asking why he didn’t simply attach an SD card shaped bit of cardboard. So the second video below goes through this, trying both card, and an SD to micro SD adapter. We find that making something to fit an SD socket is a lot less easy than it looks, but eventually he manages it.
Sometimes, you have a piece of hardware that just up and stops working on you. In today’s fast-paced world, it’s easy to toss something broken and move on. [BuyItFixIt], as you imagine, makes it their purpose to, well, fix things instead. Their latest efforts involved resurrecting a dead AVerMedia Live Gamer 2 Plus capture device sourced off eBay.
The device was advertised as being dead, with no power. Probing around the board when powered up showed that there was some basic activity going on with one of the flash chips, but the device simply wouldn’t spring to life. This suggested that perhaps the flash had become corrupted, which was confirmed when reading the chip mostly returned 0xFF. Sadly, the device was so badly bricked that the usual update methods via SD card simply wouldn’t work.
Eventually, hunting down a debug header provided a way in. [BuyItFixIt] was able to find a way to flash firmware over this connection instead, but there was a problem. The firmware they had was formatted for loading via SD card, and wouldn’t work for the debug mode entry route. Instead, getting the device going would require recovering firmware from a similar working device, and then using that as a guide to assemble a proper workable firmware update to get the device back to an operational state.
It’s a great tale of perseverance and triumph, particularly given many would give up after the first update attempt failed. We’ve seen [BuyItFixIt] pull off some heroic repairs before, too. Video after the break.
If you have ever wondered what goes into repairing and refurbishing an X-ray Computed Tomography (CT) scanner, then don’t miss [Ahron Wayne]’s comprehensive project page on doing exactly that. He has two small GE Explore Locus SP machines, and it’s a fantastic look into just what goes into these machines.
These devices use a combination of X-rays and computer software to reconstruct an internal view of an object. To bring these machines back into service means not only getting the hardware to work correctly, but the software end (including calibration and error correcting) is just as important.
That means a lot of research, testing, and making do. For example, instead of an expensive calibration grid made from an array of tiny tungsten carbide beads, [Ahron] made do with a PCB laden with a grid of copper pads. The fab house might have scratched their heads a little on that one, but it worked just fine for his purposes and price was certainly right.
What else? Shown here is an old foil Pokémon card from an unopened package! (Update: the scan is not from a card in a sealed package, it is just a scanned foil card. Thanks to Ahron for clarifying.) [Ahron] coyly denies having a pet project of building a large enough dataset to try to identify cards without opening the packs. (Incidentally, if you just happen to have experience with supervised convolutional neural networks for pix2pix, he asks that you please reach out to him.)
The real power of CT scanning becomes more apparent if you take a look at the videos embedded below the page break. One is a scan of an acorn, [Ahron]’s first successful scan. Another is an interesting scan of a papyrus roll in a bamboo sheath. Both of the videos are embedded below.
Oh, perfect — now our cars can BSOD. At least that’s how it looks from a forum post showing a Blue Screen of Death on a Ford Mustang Mach E, warning that an over-the-air software update failed, and now the car can’t be driven. The BSOD includes a phone number to reach Ford’s Customer Relationship Center and even presents a wall of text with specific instructions to the wrecker driver for loading the bricked vehicle onto a flatbed. Forum users questioned the photo’s veracity, but there are reports of other drivers getting bricked the same way. And we’ve got to point out that even though this specific bricking happened to an EV, it could just have easily happened to an ICE vehicle too; forum members were particularly prickly about that point. It would be nice if OTA software updates on vehicles could always roll back to the previous driveable state. Still, we suppose that’s not always possible, especially if memory gets corrupted during the update. Maybe the best defense against a bricked vehicle would be to keep a beater around that doesn’t need updates to keep running.
Some equipment comes with a backstory so impressive, you can’t help but treat it with reverence. For instance, this Hantek scope’s front panel and knobs have melted when a battery pack went up in flames right next to it. Then, it got donated to the CADR hackerspace, who have in turn given us a scope front panel refurbishing master class (translated, original), demonstrating just how well a typical hackerspace is prepared for performing plastic surgery like this.
All of the tools they used are commonplace hackerspace stuff, and if you ever wanted to learn about a workflow for repairs like these, their wiki post is a model example, described from start to end. They show how they could use a lasercutter to iterate through figuring out mechanical dimensions of the labels, cutting the silhouette out of cardboard as they tweaked the offsets. Then, they designed and printed out the new front panel stickers, putting them through a generic laminator to make them last. An FDM printer helped with encoder and button knob test fits, with the final version knobs made using a resin printer.
Everything is open-source – FreeCAD knob designs, SVG stickers, and their CorelDraw sources are linked in the post. With the open-source nature, there’s plenty of room to improvement – for instance, you can easily put these SVGs through KiCad and then adorn your scope with panels made out of PCBs! With this visual overhaul, the Hantek DSO5102P in question has gained a whole lot more character. It’s a comprehensive build, and it’s just one of the many ways you can compensate for a damaged or missing shell – check out our comprehensive DIY shell guide to learn more, and when you get to designing the front panel, we’ve highlighted a fewlessons on that too.