Come On Baby Light My Fire Button

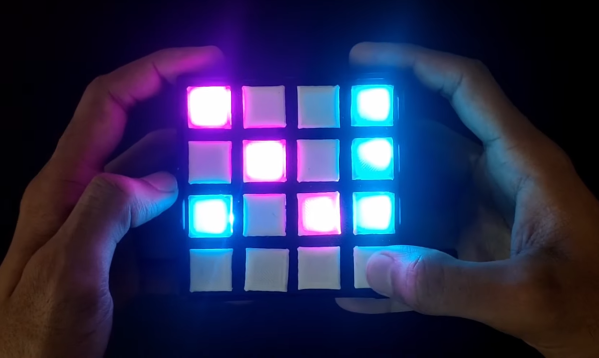
While the Nintendo GameCube stood deep in the shadows of the PS2 in its day, its controller remains a popular target for all sorts of modifications today — many of them involving LEDs, thanks to a translucent bottom and button option. As an avid player of the Super Smash Bros. series, [goomysmash] is of course an owner of the very same controller, which motivated him to write GoomWave, a “versatile and hackable LED library”. In an impressively detailed Instructable, he shows how to modify your own controller in two different ways to make use of the library for yourself.

Initially inspired by the Shinewave mod that lights up RGB LEDs in colors associated to pre-defined moves in Smash Bros, [goomysmash] aimed to improve on it and add more versatility from the very beginning. Its latest iteration comes in a simplified ABXY-buttons-only variety using an ATtiny85, and a full-blown all-button variety using an Arduino Nano. Both of them are powered straight from the controller board, and have different modes where they either react to controller interactions, or are just custom lights. A brief showcasing of all the different modes can be seen in the video after the break, and there a few more details also in an older version’s video, also embedded below.

Mesmerizing LED-blinking aside, we just have to admire the diligence and cleanliness [goomysmash] put into the wiring and fitting everything inside the controller. But in case light mods aren’t your thing or you’re looking for other GameCube controller modifications, how about adding Bluetooth?

Continue reading “Come On Baby Light My Fire Button”

A Sweet Little Insulin Reminder Light

So much of what we do relies on a certain societal structure that has been absent for a few months now. When the days run together, it’s hard to remember to do the things that must happen daily. You think you did something, and maybe you’re right, but it’s quite possible you’re thinking of yesterday.

[Flameeyes] has diabetes and must use an insulin pen every morning without fail, no matter what’s happening outside his door. This was pretty much a non-issue in the before-time, but quickly became a serious problem as the routine-free weeks wore on. With no room for false positives, he needed a solution that doesn’t trigger until the deed is done.

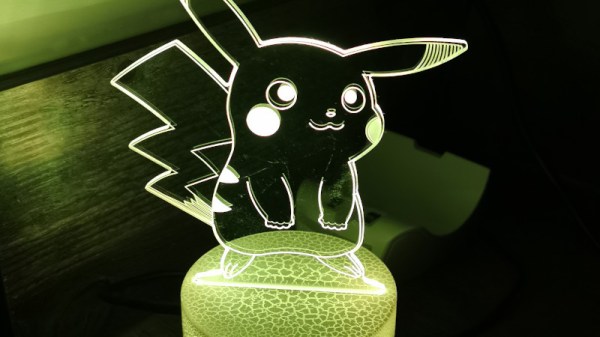
Now when [Flameeyes] puts the pen away, he also triggers a Flic smart button mounted nearby. The Flic shares its status with a Feather M4 Express through a web app, and the Feather in turn changes the RGB LED inside of Pikachu’s base from red to yellow for the day. Pikachu sits in plain sight by the kettle, so there’s no guessing whether [Flameeyes] took his insulin.

Insulin is a critical commodity with a lot of DIY interest, which is probably starting to spike about now. Our own [Dan Maloney] wrote a great piece on the subject that brings up an insulin hack from around 80 years ago.

Weather Display Is Cloudy With A Chance Of ESP8266

[Mukesh Sankhla] writes in to share this unique weather display that looks to be equal parts art and science. Rather than show the current conditions with something as pedestrian as numbers, this device communicates various weather conditions to the user with 25 WS2812B LEDs embedded into the 3D printed structure. It also doubles as a functional planter for your desk.

So how does this potted plant tell you if it’s time to get your umbrella? Using a NodeMCU ESP8266 development board, it connects to openweathermap.org and gets the current conditions for your location. Relative temperature is conveyed by changing the color of the pot itself; going from blue to red as things heat up. If there’s rain, the cloud over the plant will change color and flash to indicate thunder.

[Mukesh] has made all of the STL files for the printed components available, as well as the source code for the ESP8266. You’ll need to provide your own soil and plant though, there’s only so much you can send over the Internet. Incidentally, if the clever way he soldered these WS2812B modules together in the video catches your eye, you’ll really love his “RGB Goggles” project that we covered earlier.

Continue reading “Weather Display Is Cloudy With A Chance Of ESP8266”

These LED Shades Will Blind You With Science

Unless you’re particularly fond of looking at the back of 88 individual WS2812B LEDs, these “RGB Goggles” from [Mukesh Sankhla] won’t offer you much of a view. But from an outsider’s perspective, the smartphone-controlled glasses certainly make a statement. Just don’t try to operate any heavy machinery while wearing them.

The build starts off with a pair of shades dark enough that the lights won’t be obvious until they’re powered up. [Mukesh] then carefully aligned the LEDs into a grid pattern on a piece of clear tape so they could be soldered together with the fewest number of jumper wires possible. Even if you’re not in the market for some technicolor eyewear, this clever arrangement of WS2812B modules could come in handy if you’re looking to make impromptu LED panels.

To control the LEDs, [Mukesh] is using an Arduino Nano and an HC-06 Bluetooth module that’s linked to an application running on an Android smartphone. The software, developed with the MIT App Inventor, allows the user to easily switch between various patterns and animations on the fly. With such an easy-to-use interface, the RGB Goggles don’t look far off from a commercial product; other than the whole not being able to actually see through the thing.

We’ve actually seen a number of custom glasses projects over the years, as it seems that a cheap pair of shades make an ideal platform for head-mounted hacks. We’ve even found what may be the ideal power source for them.

Continue reading “These LED Shades Will Blind You With Science”

Break Time Is Calling On The Rainbow Connection

Like some of us, [Mister M] is prone to staying glued to his seat too long in this new era of working from home. And you know what they say about a body at desk — it tends to stay at desk until it absolutely must rise up to find food or use the restroom.

Thanks to this nifty new break time reminder, [Mister M] has a third call to answer that demands he get up. Every hour, the NeoPixel ring in this old dial-deficient phone fills up completely and switches over to an attention-getting rainbow animation. If [Mister M] stays seated, playtime is over. All the lights start flashing red, and the phone starts beeping incessantly until he walks across the room and either pushes the momentary button or lifts the handset to reset the timer.

We love that [Mister M] incorporated all of the phone’s original inputs and outputs into this project, because it’s such a cool old dog and bone. No need to drop a dime, just whistle at the break button to check out the build video.

This grille-faced phone was probably part of an intercom system. Incidentally, you can make an intercom system with two standard-style phones of this vintage.

Continue reading “Break Time Is Calling On The Rainbow Connection”

Millennium Falcon Docking Bay Doubles As Table

A glass table makes a perfect display case for showing off whatever’s important to you, but if you want keep the dust off of your treasures, closing up the sides is probably a wise move. It might not be a bad idea to put some lighting in there to make sure everything is easy to see. You might as well make the lights RGB and remote controlled, so you can fiddle with the look from across the room. Of course, you could go all in and just make the thing a diorama…

It’s not hard to imagine the line of thinking that convinced [Erv Plecter] he should turn a simple glass table into a docking bay for a model of the Millennium Falcon, and looking at the final results, we think it was the right move. With an incredible attention to detail, what started out a generic looking table and rather modest toy, have been combined into an interactive display that could woo even the staunchest of Trekkies.

If you’ve ever considered lighting a model, this project is an excellent example to follow. The Hasbro toy that [Erv] started with certainly wasn’t what you’d call studio quality; the little lighting it featured wasn’t even accurate to how the ship appears in the films. But with some reference material, fiber optic cables, and enough Arduinos to drive it all, the final lighting is truly a marvel. We’d say the engine is our favorite part, but those tiny lit panels in the cockpit are hard to beat.

While the Falcon is clearly the star of the show, the docking bay itself is certainly no afterthought. The back-lit panels, with their inscrutable Imperial design aesthetic, look fantastic. The addition of small details like crates and barrels, plus the glossy black PVC sheet used for the floor, really brings the whole scene to life. It’s almost a shame that the ship itself is so big, as a smaller model would have left more room to toss in a few Stormtroopers and droids out on patrol.

This isn’t the first time we’ve seen somebody augment a “toy” grade model with additional lighting effects. While the scale miniature aficionados in the audience might turn their nose up at some of the artistic liberties taken on these low fidelity models, we think any normal person would be blown away if they saw them in person.

Continue reading Millennium Falcon Docking Bay Doubles As Table”

RGB Kitchen Uses Pots To Stir Up Color

Anyone who has done anything with RGB LEDs knows that their ability to display pretty much any color is somehow both the best and worst thing about them. How do you get it right? How do you make your results repeatable? [Thomas] has the answer. He dug around in the ol’ parts cupboard, found a few pots, and got to work making this stay-home stew of a project — an on-demand RGB LED color mixer.

Three cleverly color-coded potentiometers and an Arduino let [Thomas] step through 0-255 to mix various values of red, blue, and green. The shade that gets made is displayed live on a set of 10 individual NeoPixels that are laid out under a frosty diffusing panel. Each of the RGB values are also shown on an 16×2 LCD.

This is one of those projects that hits a sweet spot of being simple, useful, and fun. It’s even nice-looking and compact. What more could you want from a project cobbled together from ingredients on hand? [Thomas] is even giving away the code recipe.

Once you dial in your ideal colors, why not make a gesture-controlled lamp?