3D printers were never meant to be used for production. They’re not manufacturing machines, they’re prototyping machines. That doesn’t mean 3D printers can’t be used in a manufacturing context, it’s just very hard – you’d need someone manning a fleet of machines, or some sort of ‘automated build platform’ that won’t be invented for exactly fourteen years.
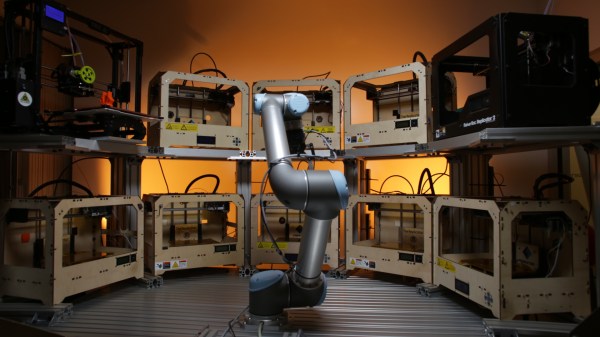
In the absence of someone paid to watch printers print, [Mark], [Robert], and [James] at tend.ai have created a way to manage a fleet of printers with a robot arm. It’s a robotic arm that automatically monitors the LCD on a rack full of 3D printers, plucks the finished prints off the bed, drops the parts in a box, and starts another print.
Tend.ai is in the business of cloud robotics, and have designed a system that takes any robotic arm, any webcam, and provides the backend for this robotic arm to – wait for it – tend to other machines. As a demo, it works well. Parts are picked up off of the machines, dropped into boxes, and another print run started.
As a tech demo for a cloud robotics platform, you can’t do much better than this. As a way to automate a fleet of 3D printers, I can only wonder how this robot arm system would work with large, flat printed parts. A robotic gripper could always be replaced with a spatula, I guess.
You can check out the demo and the ‘how they did it’ video below.
Continue reading “Automating 3D Printers With Robots” →