Hackaday Links: Sunday, July 28th, 2013

hackaday-links-chain

[Chris Gammell] tipped us off that he’s building an online training program for learning electronics. The ten session course will cost money to take but you can get the goods for free if you’re one of the beta testers. We love to listen to The Amp Hour podcast which is just one of [Chris’] many endeavors.

Did you buy a Chromecast this week? We did, but we don’t have it in hand yet (ordered through Amazon). You can still get a look inside from the iFixit teardown.

Practice your Processing skills by using it to code a game of Pong.

A bit of lighter fluid and a hacked insert will get you a flaming wallet. We guess this is a different type of an anti-pickpocket device. [Thanks Stephen]

[Brain] used a $1.50 magnifying lens to help his Raspberry Pi camera module read QR codes better.

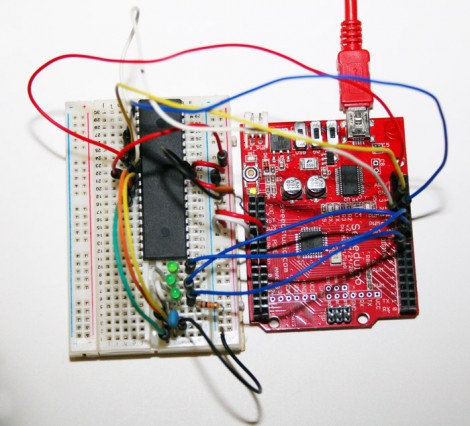
We really like [Aaron Christophel’s] LED matrix clock (translated). He started from a marquee that must be at least a decade old. He stripped it down and figured out how to drive it using a Sanguino as a controller.

More Pins And More Power With A DIY Sanguino

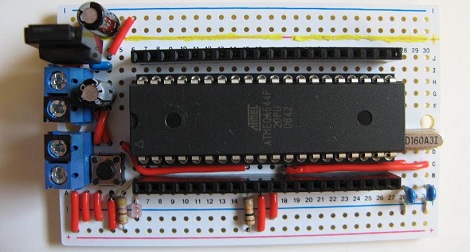
Not long after [CulinarilySpeaking] got into the Arduino game, he began to want more IO pins and a larger program space for more ambitious projects. This, of course, led him down the path towards the Sanguino, the ATMega644-based dev board with many more IO pins than Arduino boards based on the ATMega328. Instead of buying new, [CulinarilySpeaking] decided to make his own Sanguino, and the results look fantastic.

After coming across an ATMega644 while browsing for parts on line, [CulinarilySpeaking] found the micro that had enough power and pins to do some fairly complex stuff. A bunch of other people though about using this chip in the Arduino environment before, so all [CulinarilySpeaking] had to do was copy the circuit with the parts he had on hand.

After soldering all the components to the neat breadboard-style PCB, [CulinarilySpeaking] fired up the Arduino IDE and put the Blink example on the 644. Everything worked, so now there’s a board with much more power than a standard Arduino built with only $8 USD in parts.

via reddit

Bootloader Burning Basics

[Charles Gantt] and a few others were having trouble burning the Sanguino bootloader to an ATmega644 chip. With some help from the [Nils Vogil] via the RepRap IRC [Charles] got it worked out and wrote a guide for burning the bootloader using an Arduino as an ISP programmer.

We’re not familiar with the specifics of the Sanguino bootloader, but [Charles] mentioned that he was unable to flash it onto the AVR chip without a resonator. The resonator serves as an external clock source for the chip. We’d bet the programming process changes the fuse settings on the chip to use an external source. Without that source, you won’t be able to communicate with the chip afterwards.

The solution just adds the resonator to the programming circuit. This should be useful when burning any bootloader using an Arduino. But it does make us wonder if there isn’t an alternative method that would let you draw the clock signal from the Arduino itself?

BrewTroller Brewing Control System

BrewTroller_2.4__4a70af85574f3

BrewTroller is an open source brewing control system based on the Sanguino. Targeting home beer brewers, this project gathers some of the best features from other DIY brewing controllers and packages them into a hardware and software setup so it’s accessible to those without the skills to design their own. It can interface with 4 heat controllers, 32 pumps/valves, 6 temperature sensors, 3 volume sensors, and 1 steam pressure sensor. The system displays information through a 4 line LCD. It can be used to monitor and maintain temperature during mashing, boiling, and chilling. If you have a more advanced setup that involves automatic valves, it can control those for you with almost limitless reconfigurability through every step of the brewing process.

We thought it was pretty hard core that at least some of the kits shipped with hand made PCBs. At the very least, it shows that it is possible to make this board yourself with the provided PCB layout.

[Thanks Julius]

Arduino Buyers Guide And The Seeeduino

seeeduino

Make has assembled a buyers guide for the many different types of Arduino devices. The Arduino is an open hardware platform designed to make prototyping easily accessible. The design allows for other people to modify, expand, and improve on the base, and many people have started producing their own versions. The guide features a lot of the hardware we’ve covered in the past like the LilyPad, Arduino Pro, Sanguino, Duemilanove, Ethernet Shield, and Freeduino.

Out of the pack, the Seeeduino (pictured above) definitely caught our eye. It’s a low profile SMD design much like the Arduino Pro. They’ve taken advantage of the space saved by the SMD ATmega168 by adding more useful headers. In addition to the ICSP, you get the pins in UART order and an I2C header. Vcc is switch selectable for 3.3 or 5volts. The reset switch has been moved to the edge plus two additional ADC pins. Our favorite feature is the new spacing on the digital pins. Arduino digital pin headers have an inexplicable 160mil gap between the banks. The Seeeduino has the standard row for shield compatibility, but has an additional row spaced at standard 100mil spacing for use with protoboard. At $23.99, it’s competitively priced too.

Sanguino ATmega644P Board

The RepRap project, which is a printer that can make components using rapid prototyping technology, and it is designed so that it can eventually self replicate. Has released a new breakout board for the Sanguino that provides access to all the pins as screw terminals. The Sanguino is an Arduino compatible board based on the ATmega644P chip. You can populate the full board with all the components and have a fully functional single board. You could populate only the screw terminals and plug your Sanguino, and use it as a breakout board as well. The board design is released on Google Code.